Archive for March, 2011

S’more Patio Furniture Options

11 Comments

Posted by Rebecca, March 23rd, 2011

Mike and I are currently in the midst of a slew of unfinished projects.

1. I have to order fabric for the office, but I’m waiting for the price to go down since I swear I once saw it for half the price!

2. We have to finish our chair rail/fake wainscoting project we started this weekend. I LOVE this project. I loved using the saw. I can’t wait to see the finished product. I can go on and on and on. I am just counting down the minutes until Saturday morning when we can chair rail the downstairs!

3. Patio, patio, patio. Contract is on it’s way 🙂 Though we’re not doing the actual work on this…

These are all being sandwiched in between my graduate course load, full time jobs and a bunch of parties and other plans that the spring always seems to bring. Slow and steady wins the race though, right?

Today I received an email from West Elm about their new outdoor collections, so my focus was thrown back towards the patio for the day. After our friend Jon commented about how awesome the Crate & Barrel outdoor furniture is, I had to look around a little more. There has to be some sort of solution out there and thank you to all of you who have sent recommendations my way 🙂

So, the results of my (minimal) research today.

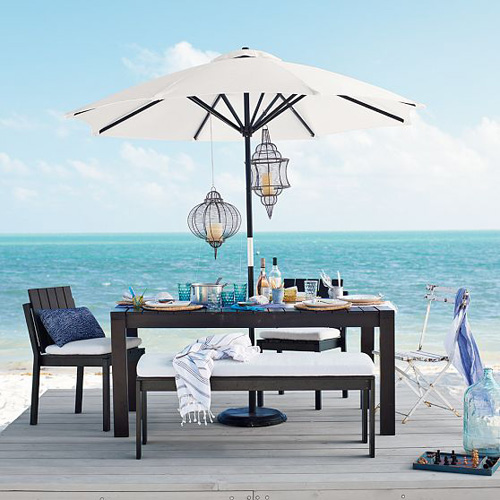
West Elm Wood Slat collection:

Considering the price of the Crate & Barrel Ventura collection, I was expecting this set to be astronomical in price, but it is strangely reasonable. Not as cheap as Target, but the table is $399 which is half of the price of the Crate & Barrel one. Each chair is $149 compared to Crate & Barrel’s $300, plus the chairs are stackable for storage! So really, who on earth is Crate & Barrel trying to sell their stuff to? Though their set is still my favorite, I’ve given up hope 🙁

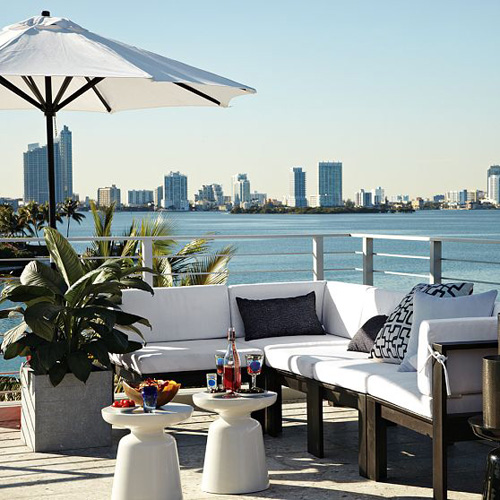
I like the West Elm set, but the couch isn’t very cushy and inviting looking. One thing I love that I hadn’t thought of? White cushions. The white cushions with the dark frame look so nice. I love the idea of white and navy pillows, so very Grecian paradise!

(via)

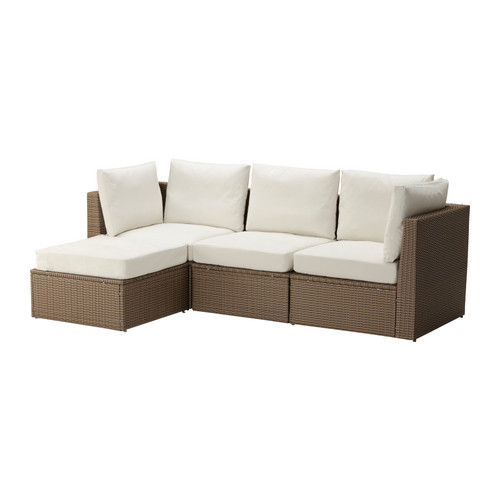
I also remembered that Ikea had a Crate & Barrel knockoff last year, so I figured I’d check their website to see if it was listed yet. Sure enough, I found the Arholma collection

This little sectional is just $650, now that’s a better price! I have heard that the cushions look cheap, so I googled for some better images. I found this one from a previous Ikea catalog…

(via)

The good? The cushions appear to be white to go with my new inspiration, it’s affordable and I like the color of the rattan. The bad? The cushions maaay be cheap and the table that goes with the set is missing an umbrella hole! Being the pale person that I am, this is a deal breaker.

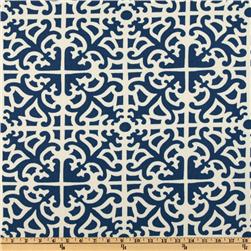
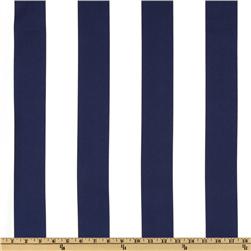
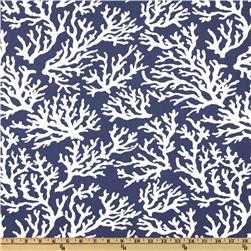
But! I am not giving up hope on the lounge furniture. The pieces are all sold as separates, unlike the Target furniture, so I would be able to pick and choose the pieces and sizes I want. Plus I am thinking that if the white cushions look cheap, I can fancy them up with some white and navy outdoor pillows along the back of the seat. I even found some options that I like from fabric.com

Waverly Sun N Shade Parterre Indigo

Swavelle/Mill Creek Finnegan Indigo

Swavelle/Mill Creek Faylinn Atlantic

One of the 5 Ikeas in our area has the Arholma collection on display so we’re going to go check it out in person. If we like it? Maybe we’ll go with the West Elm table or something similar. I think that a wood table and chairs would add more interest to the rattan furniture vs. trying to match it. As of today, I like this mismatched, white and navy lil Grecian paradise plan. It feels nice to have a plan, since just a few weeks ago I couldn’t pin down a plan for any sort of outdoor space. Thankfully it came to me, literally, in the form of a West Elm email today.

Patio Progress

15 Comments

Posted by Rebecca, March 22nd, 2011

I took a little blog break at the end of last week because it was absolutely GORGEOUS out. This was what my car said when I left work on Friday…

Thursday was equally as beautiful, so it felt like some sort of crime to spend my evening hours indoors on my computer. Sometimes life interrupts blogging in wonderful ways 🙂

Anyway, the nice weather gave us an opportunity to finally get out to the backyard to figure out what to do with our patio. We saw a patio display earlier in the week at Lowe’s and the gazebo was 10′ x 10′. Since that size seemed reasonable for a sitting area (and we were clueless about size) we thought 2 of those areas would suit our needs. So we guesstimated we’d want a 10′ x 20′. Sounded huge! I looked at Mike in Lowe’s and figured we were screwed for our estimate on Saturday. So when we ventured outside with a measuring tape on Thursday, I nearly died when the area we planned to cover measured 16′ x 32′. Hello budget buster. A 16′ x 32′ patio sounded not so reasonable, though we were relieved to see that it didn’t eat up a large portion of our yard.
Concrete guy came on Saturday morning. We told him from the outset that we wanted some sort of creative design that we could not come up with. He seemed enthusiastic and up for our challenge, which was definitely a plus for us! I like working with people who can bounce ideas back and forth and in the end can out think me. As much as I have ideas of my own and know what I want, I always look forward to suggestions and things I haven’t thought of.

We broke out a can of spray paint and started playing with shapes. We also asked him to price out a walkway from our driveway to the patio. Mike and I briefly talked about this, but it didn’t exactly process in my head. I was happy that he brought it up, but terrified of the price. Concrete guy measured, then gave us a book of patterns and colors to chose from while he wrote up an estimate. We knew exactly what pattern we wanted, so that part was extremely easy. He came back with this little doodle and description…

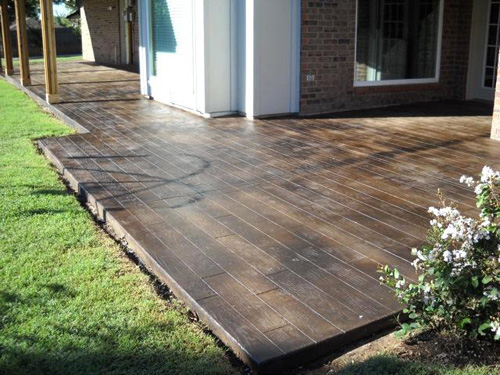
That says 34′ x 18’… this thing keeps growing! We showed him this actual picture of the pattern/color we wanted…

He had something similar in his portfolio, though it was a little lighter. He warned us that something too too dark would burn the heck out of bare feet in the summer. That was definitely something I hadn’t thought of, even though I am rarely without shoes…even indoors.

In the end, we were pleasantly surprised with the price given all of the extra square footage we added with the walkway. We liked the guy a lot too, so I think we’re going to go with it. He said he wouldn’t start jobs until the first week in April so hopefully we will have a patio soon!

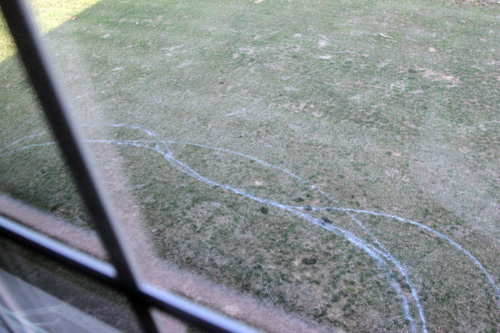
I ventured outside to take some pictures of the spray paint action.

That’s one side. I quickly realized I couldn’t fit the whole patio into one shot without going upstairs, so I tried going into a spare bedroom to get an aerial shot 🙂

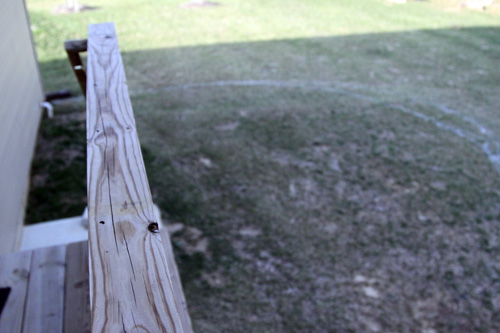
Ignore that semi-circle line. The curved area on the right of this picture sold me. I’m not sure why, since it’s not necessarily something we hadn’t thought of, but seeing it was an ah-ha! moment for me.

Just once it was more rounded (the outer line) it felt so cozy. I immediately pictured a grill angled in the center of this curve.

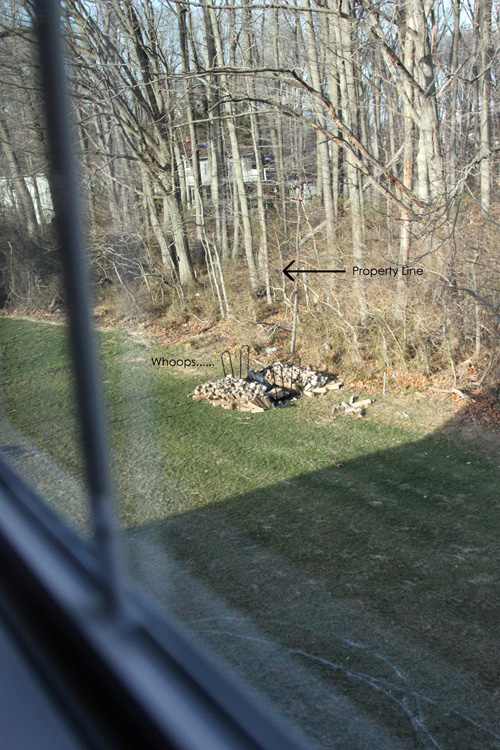
We were also very relieved that we still had a lot of yard beyond the patio. Sometimes we forget that our property extends into the tree line and that we’ll still have plenty of land for the future.

The arrow points to the property stake, which is visible when the picture is enlarged. I once climbed back there to get an idea of how much land was there and it was not a fun trip. Plus I looked like the crazy neighbor…again. Oh and did I ever tell you that we originally chose the lot to the left of this picture? Thank goodness we didn’t, holy house in their backyard when the trees are nakey.

Wait, you’re wondering why I’m ignoring the fact that our nicely stacked wood piles were demolished during a windy snowstorm? Because we’ve been ignoring them in real life for weeks….

Some Molding Love

6 Comments

Posted by Michael, March 21st, 2011

Rebecca and I have always loved molding in a home. Whether it was crown molding, large baseboard molding or bead-board wainscoting, we were in love with it. For me, there was something about the clean lines it presented and the overall framing of the room. It is a great finishing touch that can ultimately transform a room.

We always talked about doing our own molding, but it was something we were scared to do ourselves. How do we do the corners, how do we make the cuts, will I cut my hand off using the power saw — all scary questions that ran through my head. We previously had a friend of the family install some molding in our formal living room.  Our plan was to eventually bring the molding into our foyer area, up the stairs, and the upstairs hallway.

So when I told Rebecca earlier in the week that I had an itch to do a chair rail, she kind of shrugged me off thinking it was just another molding conversation that would soon pass.

But when we woke up Saturday morning, we began passing along ideas to accomplish during the day since we both felt somewhat motivated.  Rebecca mentioned hanging some curtains and I mentioned the chair rail.  We decided to start with the upstairs hallway since it would be the easiest in terms of straight cuts and easy angles.  We made some measurements and a couple minutes later, we were on our way to Lowe’s to pick up some molding.

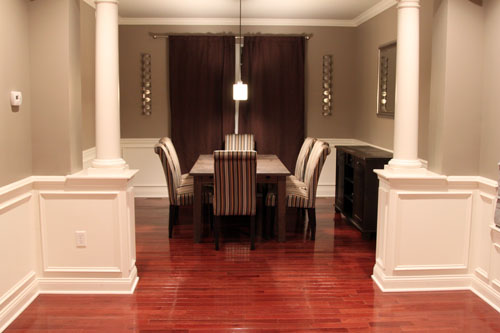
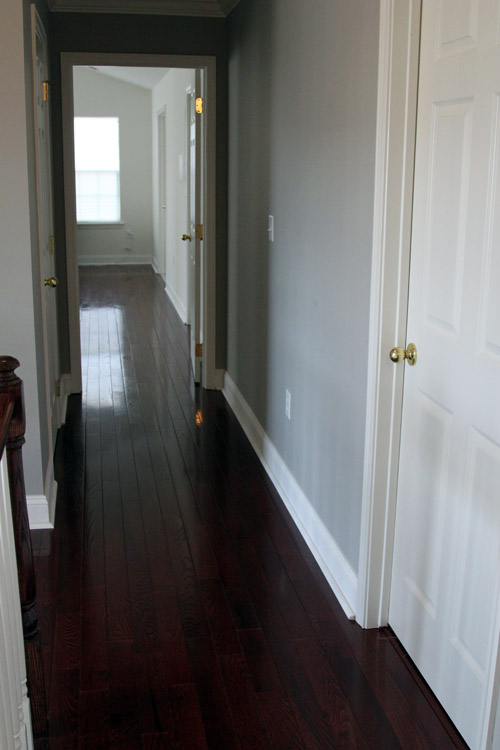
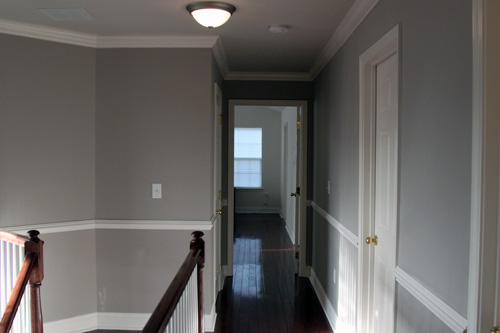
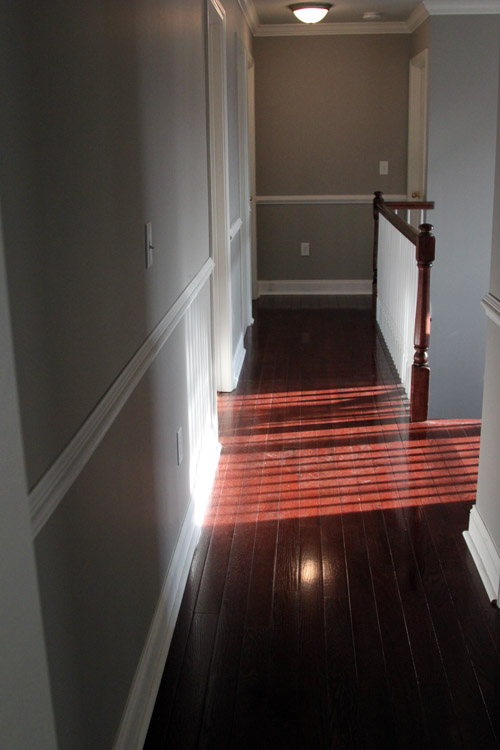
Here is the view looking down the hallway and into our master bedroom.  The plan here is to put up a chair rail and then eventually do boxes; similar to our living room in the picture above.

Everything is pretty straight so cutting+nailing would be pretty straight forward.  This was so until we got to an angle at the top of our stairs.

We struggled with this for maybe a half hour or so.  We could not figure out how to make this cut.  We tried several different cuts, holding them up and trying to determine how to do this.  We went back and forth a bit before I went downstairs to draw the angle on paper and try to calculate some numbers.  And just when I was about to lose my patience, Rebecca figured it out.  We made two cuts with some scrap, one angle at 20 degrees and the other at 25 degrees.  We held the pieces together and sure enough, we were golden.

A few more finishing cuts later, and we were finished.

So what did I learn with this experience?

  • We waited just about a year to do this project because we were scared.  We were scared for absolutely no reason.
  • Invest in a nail gun with a compressor.  We used an electric nail gun and half our nails barely went completely in.  We had to hammer a lot of them flat with the surface.
  • Take your time.  Measure twice, cut once.  Or if you have scrap pieces, make some cuts as an example and work from there.
  • The molding area at Lowe’s isn’t scary nor overwhelming.

I categorized this post as inexpensive design because this was an incredibly cheap project to accomplish — especially compared to what we would have paid a contractor.   All said and done, 40 linear feet of molding and some tubes of caulk ran us just under $100.  An absolute steal.

It’s a Throwdown!

12 Comments

Posted by Michael, March 16th, 2011

No, not really, but one can wish, right?

However, we did get some great inspiration from Bobby Flay’s Vegetable Lasagna Throwdown episode for our own lasagna.  Watching the episode made the both of us drool (even if it was midnight) and we both instantly agreed to make lasagna the following day.

In the Lasagna Throwdown, Bobby at first insisted on making his lasagna with mushrooms only (ding!) — eventually he was talked into adding creamed cauliflower.  The challenger fried up some zucchini for her dish (ding!).

Those dings! are what we took from the episode and added to our lasagna: mushrooms and fried zucchini.

I first made a traditional tomato sauce which I inherited from my mother; which she inherited from her mother.  Nothing fancy, but definitely a comfort food for me.  Any tomato sauce will do in lasagna — some like jar sauce, some like a bolognese sauce.  Me?  I stick to my mom’s sauce.

To do the fried zucchini, I sliced it thin (maybe a quarter of an inch thick) longways and left the skin on,  I dipped each slice in an egg bath and then dipped it in a combination of flour+salt+pepper+garlic-powder.  I probably did 2 cups flour, 1 teaspoon salt, 1 teaspoon pepper, 1/2 teaspoon garlic powder.  But honestly, any combination will work.  After all, you are frying these bad boys.

I fried each side of the zucchini until they were golden brown; roughly 4-5 minutes on each side.  I then placed the zucchini on a cooling rack allowing the excess oil to drop down onto the paper towels.

These things came out crispy and incredibly good.  In fact, they were so good that we ended up making some fried zucchini sticks to hold us over.  So good!

The mushrooms were a combination of shiitake, portobello and cremini.  I diced them up and sauteed them with a little bit of oil, butter and garlic.  I also roasted some carrots in hopes of adding a bit of sweetness to the lasagna.

I totally forgot to take pictures of the mushrooms and carrots — sorry about that.

After the mushrooms, I prepared the ricotta mix which consisted of a large container ricotta, two eggs and some grated parmesan and romano cheese. From here, it was time to start doing the layers of the lasagna.  And please forgive me, but while I was busy eating the zucchini sticks, I totally forgot to snap pictures of the complete process.

I started with a thin layer of the tomato sauce followed by a layer of the lasagna pasta.  I placed the zucchini down next followed by the ricotta and then a layer of shredded mozzarella cheese.  On top of the mozzarella, I added some tomato sauce.

And then it was time to start my next layer by applying a layer of lasagna pasta.  This was followed by the mushrooms as well as the carrots.  The ricotta mix, mozzarella and a spread of sauce finished this layer.  I finished the lasagna with a layer of the ricotta, lasagna pasta, mozzarella and tomato sauce — in that order.

The lasagna was then baked for about an hour; just enough for the top layer to be slightly bubbly and crispy/brown in some areas.

By the way, we still have a half tray of lasagna sitting in our fridge if anyone wants to hit us up for some leftovers.

Oh and mom, I have your lasagna tray.  I stole borrowed it while you were away.  It has a great home now.

We are once again linking this up to Jenn’s What I Ate Wednesday party at Peas and Crayons. It’s her birthday, so pay her a visit 🙂

A Place to Rest My…

16 Comments

Posted by Rebecca, March 15th, 2011

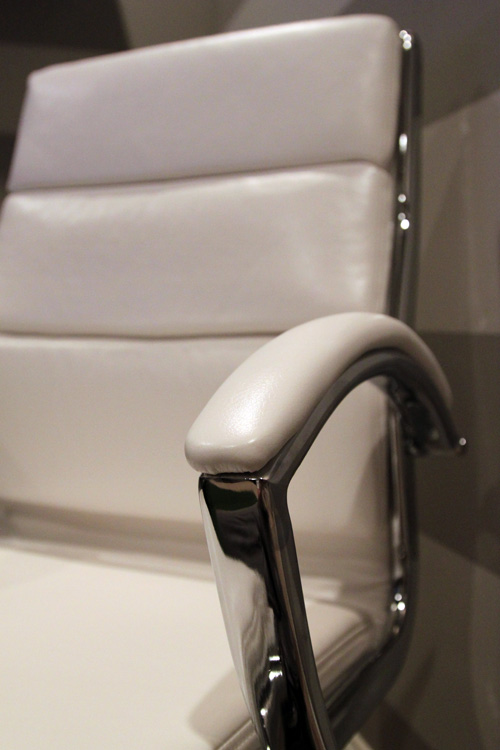
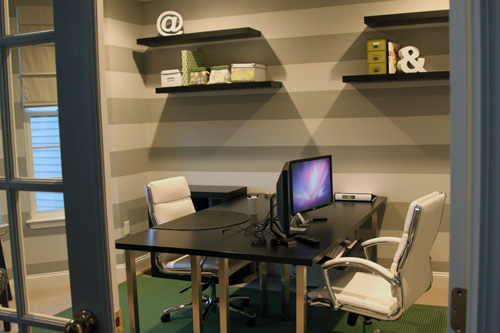
I”ll just cut to the chase here, WE FINALLY HAVE OFFICE CHAIRS! Wooo!

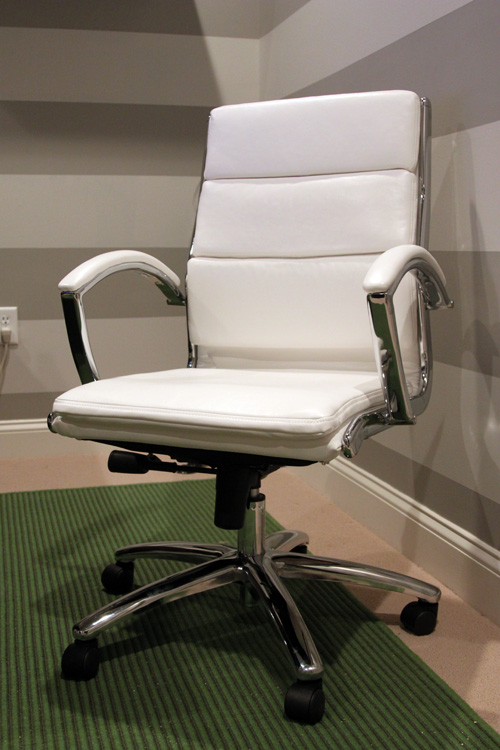
Incase you’re new around here, we spotted these white Belisse chairs at Staples back in November (they’re not available online). We fell in love with the idea of white chairs after spotting some at Crate and Barrel. However, they were $999. No, Macky didn’t step on the ‘9’ key there…

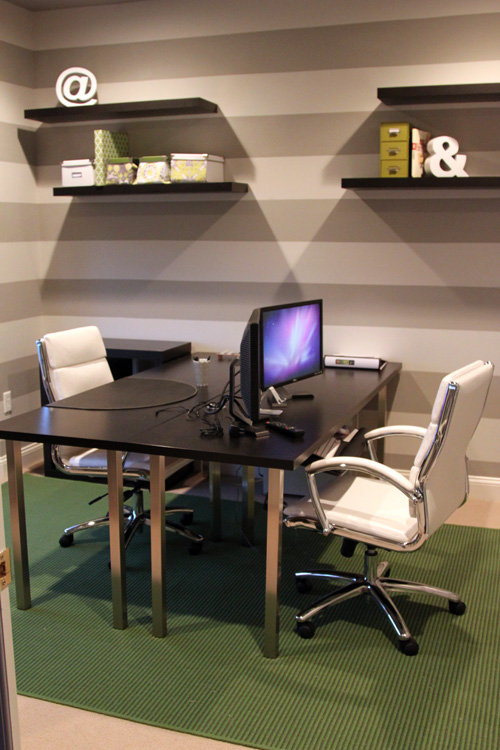
We’ve had parson style chairs that were rejects from our dining room in the office up until this point. I thought maybe I’d reupholster them, until we got backaches and had no where to rest our arms. We realized that we needed chairs meant for an office, as badly as I wanted some chic stylish ones. After a little searching for affordable white chairs, we ended up paying just $99 each for these beauties!

I love them. I love that they are a nice bright white, I love that all of the “hard” parts are a nice shiny chrome, I love the modern lines, I love the comfort. And mostly, I love that when you peek into the office from our french doors, you see something less expected. They’re still traditional enough in that they are office chairs, but they add that ounce of modern that makes it look like 20 somethings work in here. They have wheels and armrests, but they’re not the standard CEO-style chair.

I’m a little concerned about them getting dirty, but we’re usually in socks and pajama pants within 5 minutes of getting home, so I imagine some leather wipes will keep them tidy. Though they’re not real leather, so no cows were injured in the designing of this office 🙂

My second fabric sample should be arriving tomorrow. Once that decision is made, I can order fabric for curtains to bring some more white into the room. But for now, our white bookends have some crisp friends to keep them company.

Copyright 2010 - 2011. The Lil House That Could. All rights reserved.