How to Install Crown Molding

18 Comments

Posted by Rebecca, February 21st, 2012

Mike gave you an idea of our adventures in learning how to install crown molding yesterday, but I’m going to share the deets on what you SHOULD do. AKA, what we didn’t do first time around and how we learned along the way…

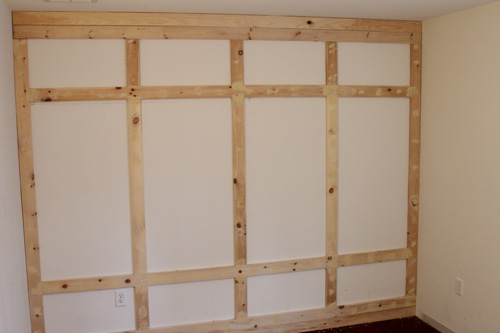
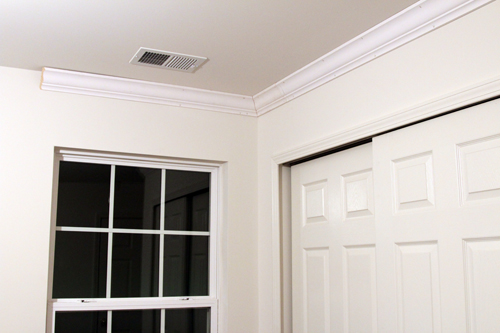
We left you with our paneled wall looking like this…

The plan was to add 4+ inch crown molding to the top that would extend all the way around the room, hence the additional 4 inch board up there. We actually struggled at first to find crown that was larger than 3 5/8″. We knew it existed because… we have it all over our house! We just wanted to match the crown we currently have and finally found it at Home Depot, in primed pine. I was okay with using MDF for the moldings because a) I wanted them to match the other moldings in the house, not because they touch or anything but because I liked them and wanted some consistency and b) there is so little molding in the room and the baby won’t be sleeping directly near it (like a crib or the paneling behind it). But, the 4 5/8″ inch crown was only available in pine at the time (we later found it in MDF), so it was a good excuse to use the solid wood stuff šŸ™‚ But we did cheap out with some MDF baseboards.

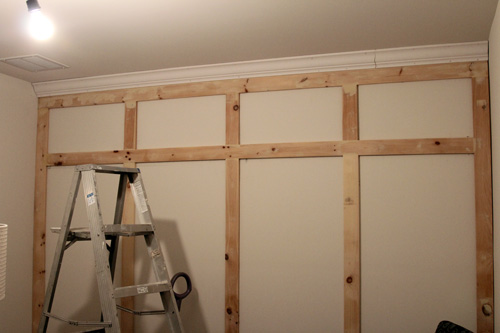
We started off simple…. we added a straight cut of crown to the top of the paneled wall…

We did the seam the same way we did our chair rail pieces– just a 45 degree cut at each end. Worked like a charm

To get the corners, we referred to this video from This Old House. In the video, they use straight cuts like ours above then an angled cut, which they cope, on just one side. To make their cuts, they angle the molding on the saw as if it was sitting against the wall and ceiling and make a 45 degree cut, like this….

(via This Old House)

Seems simple right? Well, we ran into a problem off the bat.

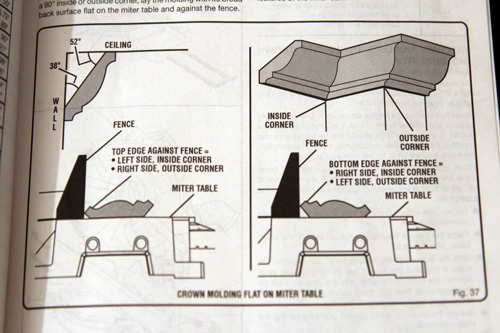
Our 4 5/8″ crown was too tall to fit under the blade of our Ryobi 10″ compound miter saw. We cursed this saw for a good hour as we took a lunch break. During our break, we figured our next plan of attack was to a) see if there was a way to make these cuts using the saw we have and b) if not, buy a $12 miter box and do it by hand. I asked Mike if we had the instruction manual to our saw and sure enough, there was a section on how to cut crown molding. Whew!

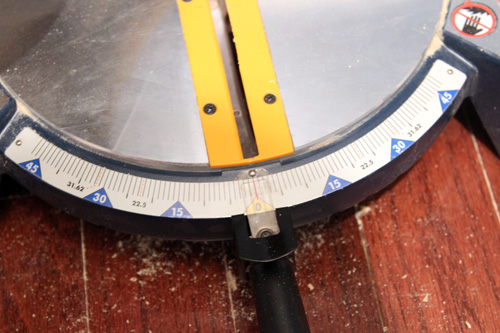
The funny thing is (there will be a lot of funny things in this story), for months Mike has been telling me that the bottom of our saw is not adjustable, despite these numbers marked on it…

The conversation went something like this:

Me- “If it doesn’t move then why are there angles marked on it?”

Mike- “I don’t know but it doesn’t move”

The instruction manual settled the score and the answer was… it moved! And that’s how you cut crown using this saw, with the molding laying flat. Mike “read” the manual and said we had to move the bottom measurement to 31.62 degrees, which is clearly marked on the saw…

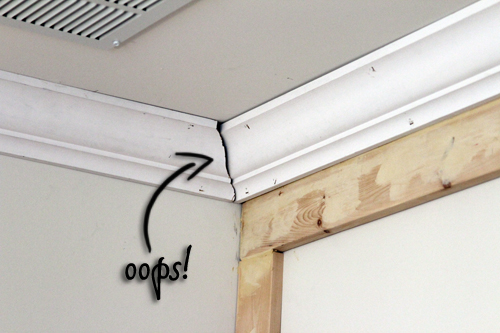
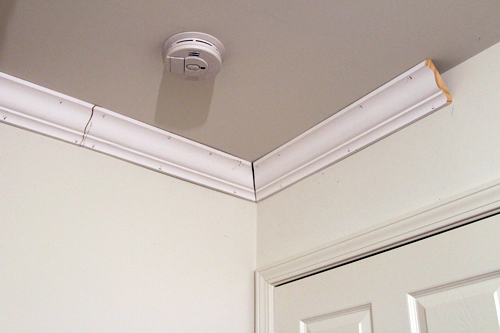
So off we went, making cuts with that one simple adjustment. Which left us with this picture Mike showed you yesterday…

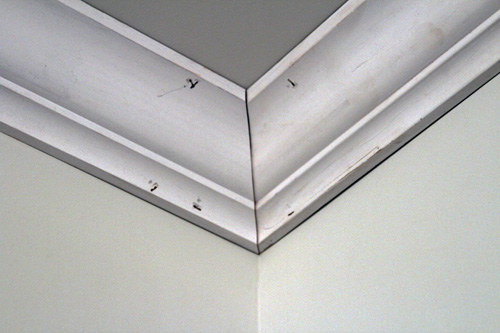
We thought this messed up corner was the result of our awful coping skills, but we realized that the molding touches at the bottom, but not the top. We decided to try a new method and can the coping, so for the next corner, we cut both sides at a 45 degree angle, rather than using one straight cut with one coped 45. We got this…

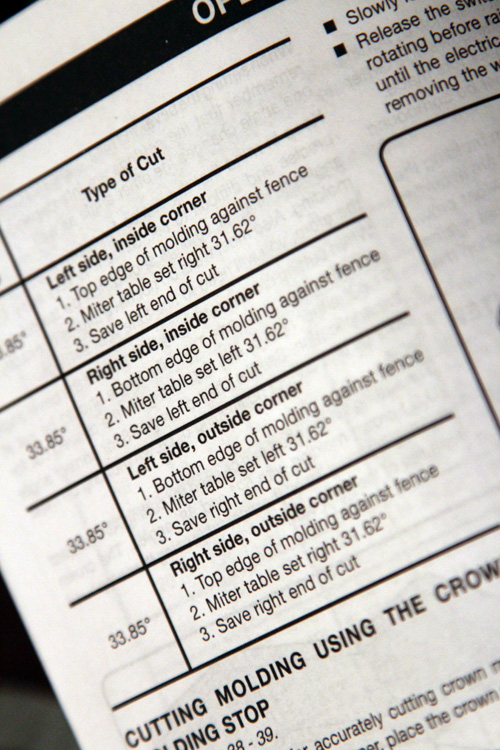
Definitely not right. Our pieces were meeting at the bottom, but not the top. We knew this had to be something with how the angle of our saw was set, but we didn’t know which angle was making it not meet… the miter (bottom of saw) or the bevel (angle of the blade)? So I decided to pick up the manual for the first time and I realized that Mike missed a very important part… Okay maybe he missed the entire crown molding section and just scanned for the 31.62 measurement because I found this…

Complete with detailed instructions that explained that while the miter was set to 31.62, the bevel should be set to 33.85 and NOT 45. That was our exact problem.

We had to move our blade from the 45 that it’s set on in the picture above, to the 33.9 measurement (and just a smidge less to make it 33.85).

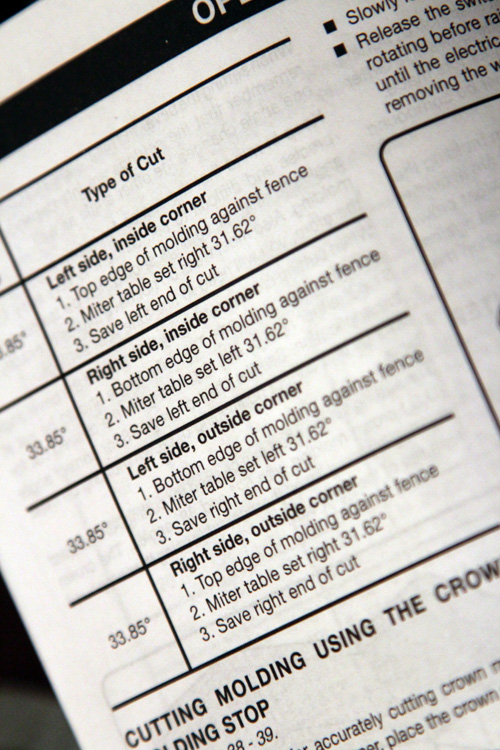
In this handy dandy instruction manual, I also found this little table which I lovingly called the bible. It saved our lives.

Yes, it tells us exactly how to get every single cut we need, which we had to think through before hand. We always play the “save the left or right?”, Ā “molding upside down or right side up?” game when making cuts. This little table took out any guesswork and thought. We officially declared this saw that we were cursing hours before as the best saw in the whole world.

We left our other cuts, as Mike told you, assuming we would just caulk the heck out of them. We cut another corner and guess what? No match. The angles were much tighter, but still weren’t meeting as they should. Just by looking at them, we could tell that the angle was too obtuse and decided we needed to make an adjustment in the miter (bottom) measurement. Mike played with some scrap pieces, adjusting them to make them slightly smaller, but they still weren’t meeting. He asked me to go look at the saw and figure out what angle we should use (I was trying to stay out of the room with the obnoxiously loud saw to protect my poor baby’s undeveloped ears). One look at the saw and I immediately noticed something….

See where that 31.62 is? I knew it was where the red dotted line was, but I could almost guarantee that Mike was using the bolder line just above the 31.62 (which is 35). I was right. Granted, it is confusing and they should have put the 31.62 in red so that you would know that it corresponds to the red line.

That tiny little adjustment gave us this absolutely perfect corner…

We still hit some bumps with the next 3 or so corners since our ceiling isn’t completely even, but all of the gaps are very much caulkable and nothing like what we had before!

So let’s recap for anyone who has a similar saw that doesn’t allow you to stand up your molding to make cuts…

1. Set your bevel (saw blade) to 33.85

2. Set your miter table to 31.62 (either to the right or left, depending on your cut)

3. Lay molding flat (either upside down or right side up, once again depending on your cut)

4. Follow this chart for specifics!!

With these directions, we only had to rotate the miter (bottom) angle to the left or right and kept the blade set at the same 33.85 the entire time. I should also mention that the left and right in the chart above are the angles when you are looking at the corner.

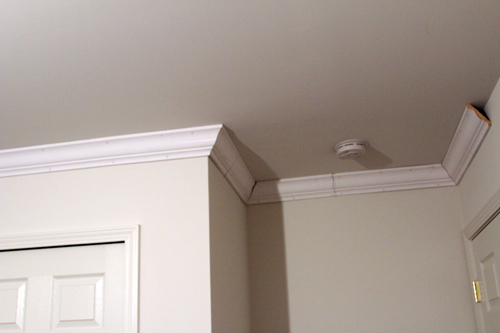
We also decided to make small cuts for the corners and cut both sides of a corner at the same time. That way, we could wiggle both pieces simultaneously to get the best fit and not have to worry about whether the other end of a piece matches its corner. That is why this wall looks so choppy…

All we have left are the two long runs (about 8 feet each) that meet up with the paneled wall, which should take us no time. We planned to finsh them up tonight, but unfortunately Macky had his first seizure since starting his meds around 3pm today. He’s been a little clingy and jumpy, so we didn’t want to break out the compresser, nail gun and saw tonight. The vet told us not to worry and to just keep an eye on him for a change in behavior, so we wanted to be able to judge that as best we could by keeping his environment normal.

With the last two pieces come our second attempt at coping… yikes…Had we known at the beginning that we could angle that initial piece on the paneled wall we would have. We’ll add it to the list of lessons learned, but at least we broke the crown molding ice around here.

  • StumbleUpon
  • del.icio.us
  • Twitter
  • Facebook
  • Google Bookmarks

A Crown Update

5 Comments

Posted by Michael, February 20th, 2012

After we finished the framing of the built-in cabinets in the new office, Rebecca and I realized we better get moving on the baby’s room which included doing a paneled accent wall as well as crown molding.Ā  This weekend was all about the crown molding and we wasted no time diving in the project.Ā  After getting a few corners and long strips of molding in place, Rebecca and I realized we were in over our heads.

There were gaps everywhere and it felt like we were resorting to the “yeah, we can caulk that, right?” line over and over again.Ā  Heck, I joked with my brother today there there would actually be more caulk on the walls than actual molding.

It was that bad.

You see, I was never one to really read manuals or the fine print.Ā  So when I was reading the manual on how to cut certain angles, I overlooked the section on HOW TO PROPERLY CUT CROWN MOLDING CORNERS.Ā  Good thing Rebecca is the brains around here, but bad for me since I’m essentially becoming my mother more and more these days.

After doing a celebration dance, Rebecca made ANOTHER discovery of my stupidity.Ā  Not only does the manual tell you how to make the cuts, but the necessary angles needed are marked on the miter saw.Ā  I knew this, but I didn’t realize that where the numbers are wasn’t exactly where the saw needed to be — instead the saw needed to be on the tick-mark that represents the numbers.Ā  Numbers were off to the side of the tick-marks; an additional 3% of space.Ā  Silly me.Ā  At one point Rebecca asked me how I graduated high school.Ā  Then she realized I copied off of her my senior year of math class.

SO ANYWAYS.Ā  We ripped down the round 1 of moldingĀ  (including that horrible example of a corner above) and decided to start over with our new found knowledge (thanks to Rebecca).Ā  We decided to start on the opposite side of the room and sure enough, our first corner with the proper cuts was absolutely perfect.

We worked around the room and finished about half of it.Ā  There are some spots where caulk is needed, but these areas are the result of the ceilings not being totally straight.Ā  I can say that confidently now.

I’m off to buy some more molding tomorrow to finish the room (yeah, we wasted way too much crown with attempt #1).Ā  Then we’ll do some caulking and give you another update.

  • StumbleUpon
  • del.icio.us
  • Twitter
  • Facebook
  • Google Bookmarks

Chevron in the Nursery

6 Comments

Posted by Rebecca, February 16th, 2012

Confession: I love chevron. Many people think is a trend or played out, but I have yet to put it anywhere in our house and I’ve been itching to. What better choice than the nursery?

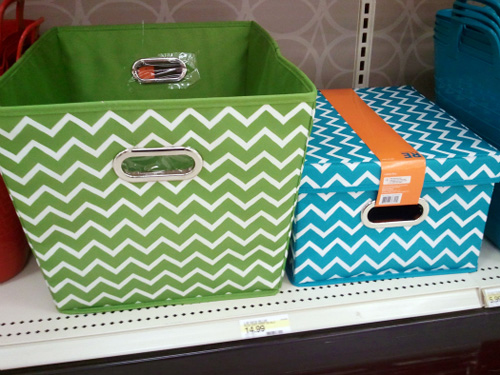
I started this weekend, with one of these green and white chevron storage bins from Target…

(via I Heart Organizing, because it’s not available on the Target website and it’s dark out and we have no light in the baby’s room :))

We have some small stuff we’ve received for the baby and I wanted a place to keep it all. I picked up one of the green bins pictured above for now, plus 2 blue ones for our laundry room (which I have yet to load with stuff). I also have 2 of the clear plastic containers from this line holding some non-maternity tank tops and what not I’ve grown out of in our closet. I like the clear ones in the closet because I will eventually need them again and I can easily see what each one is holding. Anyway, back to the chevron talk!

I’m not sure if the green bin will go with what we’ll end up doing in the nursery, but I figure it’s versatile enough to throw in the playroom or another room if it doesn’t work out. For now, it’s perfect to help me feel organized, but I do know I plan on using some sort of chevron in the room… most likely in the form of curtains.

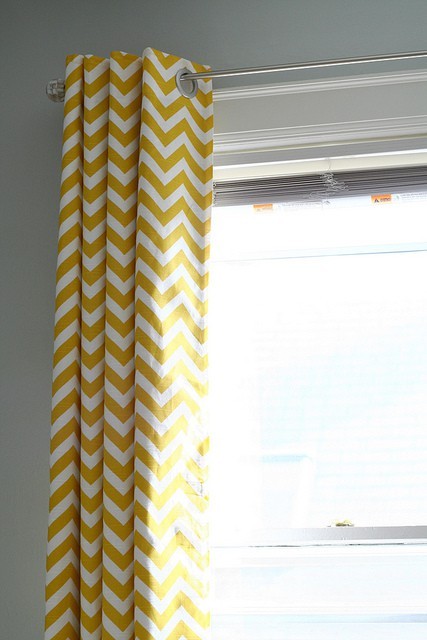
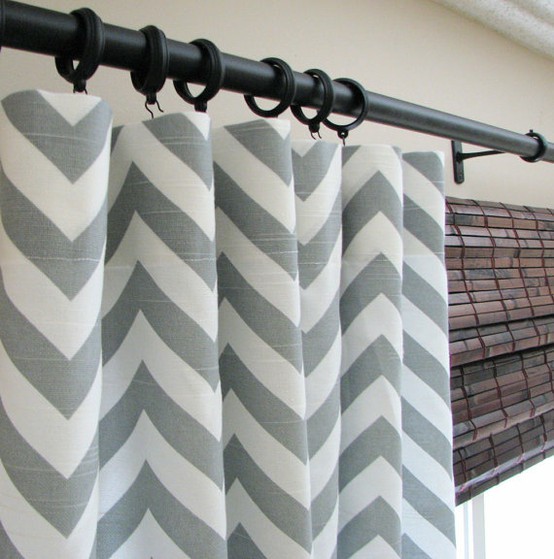
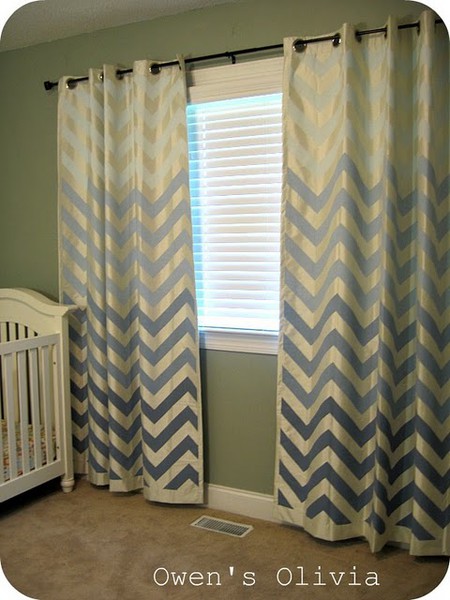
I have long had a love of chevron curtains. I feel like they’re perfect for a baby’s room, as they’re classy and stylish with a hint of fun.

(from Flickr via Pinterest)

(from Castle Creek Designs on Etsy via Pinterest)

(from Remodelholic via Pinterest)

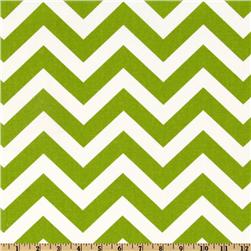
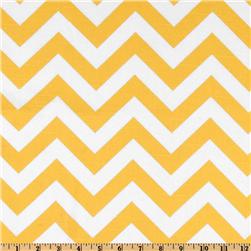
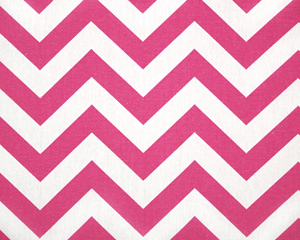
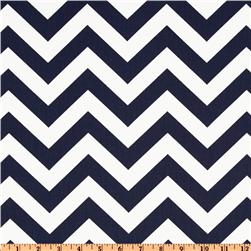
I’m planning on buying some fabric and making my own, either by breaking out the sewing machine or using no sew tape and curtain rings. I want a smaller scale chevron, so painting would be tedious. Plus there are so many great chevron fabrics out there that I can’t really go wrong! Premier prints are some of my favorite patterns…

(via Fabric.com)

(via Fabric.com)

(via Fashion Fabrics Club)

(via Fabric.com)

We decided to forgo making our own cribskirt and instead went with a bedding set, so I feel like I need to add in a good mix of other fabrics to make the room look less matchy matchy. Plus the baby isn’t going to be using the bumper or the comforter, so in reality, if the cribskirt isn’t working for us, it will be easy enough to change out. Therefore, I don’t want to marry the rest of the room to the bedding, since it will be grown out of so quickly and can be so easily changed. As Mike told me, we shouldn’t make the room too “baby” since we want a room the baby will grow into… and they’re only babies for so long ::sniffle::. I figure some bold, yet simple chevron is a good way to make the room last longer!

ps- Mike spent last weekend and half of this week in San Francisco, so we didn’t have any nursery progress to share this week šŸ™ But we’re anxious to get back to work this weekend! Aaand I may have already ordered some fabric samples…

  • StumbleUpon
  • del.icio.us
  • Twitter
  • Facebook
  • Google Bookmarks

I Call This My Gray Period

4 Comments

Posted by Rebecca, February 13th, 2012

I haven’t slept well the past several days. Darwin had a urinary tract infection, on top of kidney failure, which led to many unpleasant accidents that may have occurred on my lap…while I was sleeping. I’ve been peed and puked on way too many times before this baby has arrived. I know, TMI, but I’m just being honest here šŸ™‚ Throw in a super active baby lately and when I finally have the opportunity to sleep, someone is waking me up from the inside. Needless to say, I’m a zombie and I spent the weekend cleaning and organizing some baby stuff that we’re borrowing from my brother and sister-in-law. I felt very accomplished and feel much better about life (and Darwin started some antibiotics and has been accident free, whew!) But, it leaves you with a post full of randomness. Because that’s what’s going on in my head today!

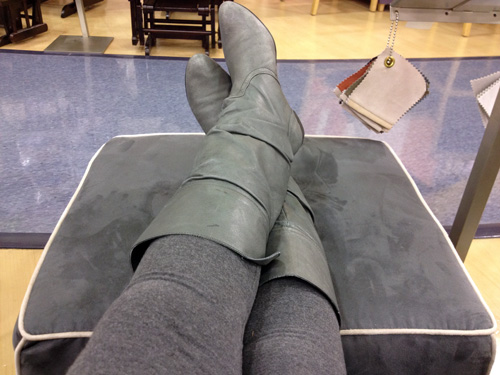
On Friday, Mike and I returned to Babies R Us to test out the glider I wrote about last week. When I kicked my feet up onto the ottoman, I noticed something…

Yes I was wearing gray leggings and gray boots while sitting on a gray chair. At least now I have a good idea of the color and I might be carrying around my leggings as a swatch. Speaking of swatches, in the background are all of the other colors the chair comes in. I think we’re going to go for it, I’m just scoping out coupons and hoping for a Presidents’ Day sale.

Next to the picture of my gray boots on gray pants on gray chair on my phone is a picture of my gray cat…

Isn’t she pretty? She’s not often seen around here, as she normally resorts to a mean face when the camera comes out. Plus she’s often in the shadow of her two special needs brothers, though she gets plenty of loving. She’s my constant sidekick (sitting with me at the moment). I wonder if she knows how chic her gray coat is these days?

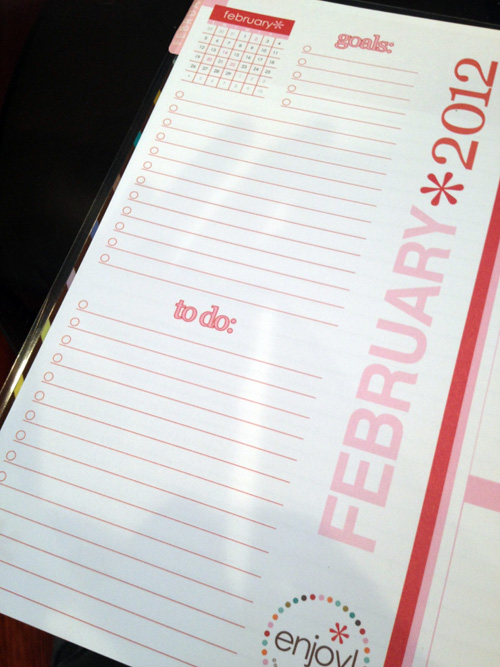
Something the complete opposite of gray (okay it’s rainbow), is my Valentine’s Day gift from Mike. I’m trying to organize my life (hence the mass decluttering I did this weekend), so Mike bought me this Erin Condren planner in the multi-colored chevron pattern…

(via Erin Condren)

Yes I know it’s early, but the box it came in was so obvious that I knew what it was when it arrived today. I wanted one last year, but this adorable video won me over.

YouTube Preview Image

(via Erin Condren)

I am already in love with it and it’s only been a couple of hours. I normally carry a small planner, a notebook for blog ideas and I end up sticking post-its all over my notebook/planner/wallet (yes I have a habit of sticking to-do lists to my wallet!) I figured this is only going to get worse as I juggle baby, work, blog and life, so it was time to upgrade my shabby little Target monthly planner I’ve been using for years. It comes with folders for stray papers and blank pages with each month, but possibly my favorite part of my new planner? The monthly and weekly goals and to-do lists…

The only way I managed to keep my head on straight through school, doctor’s appointments, work and blog posts in the fall was constant planning. I pretty much plan out my weekdays from 7am until 10pm in order to get everything done. I try to save Friday night for down time (but it usually turns into running errands) and weekends for doing projects. This planner has days broken into morning, day and night so I no longer have to cram things into one little box that I normally wrote on the top and bottom of. Michelle from Ten June also has one and she gave a nice little rundown of the features here.

Already filled in for this week’s goal? Install crown molding and baseboards in the baby’s room. Thanks to a 3 day weekend coming up, I’m feeling optimistic. Or maybe it’s the stickers with my name on them that came with my planner that made me feel a little brighter? šŸ™‚

  • StumbleUpon
  • del.icio.us
  • Twitter
  • Facebook
  • Google Bookmarks

Stationary Chair vs. Glider

18 Comments

Posted by Rebecca, February 9th, 2012

I hope you guys aren’t going to get sick of nursery posts anytime soon because with a little more than 12 weeks to go, we’re about to kick it into high gear!

From very early on in my pregnancy, I was pretty certain we weren’t going to buy a glider. I had never seen one that worked for me aesthetically and I get motion sickness in even hammocks. Combined with the hefty price tag, I didn’t think it was worth buying something we wouldn’t enjoy.

One day a few months ago, we walked into Ikea and spotted the Ekenas chair.

(via Ikea)

We were both drawn to it and were all like “oooh pretty”! where can we put it! We immediately thought that with it’s gray/brown color, it would be perfect for the nursery (we’re planning on mixing some grays and browns, but that’s for another post). At $299 it is cheaper than most gliders, so we made a mental note and moved along.

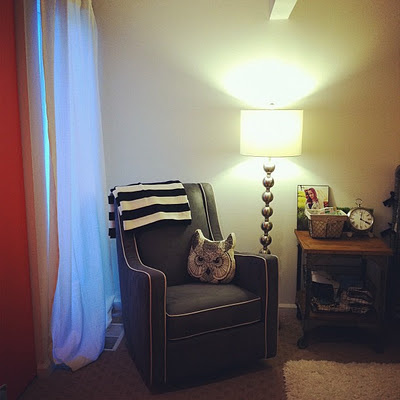
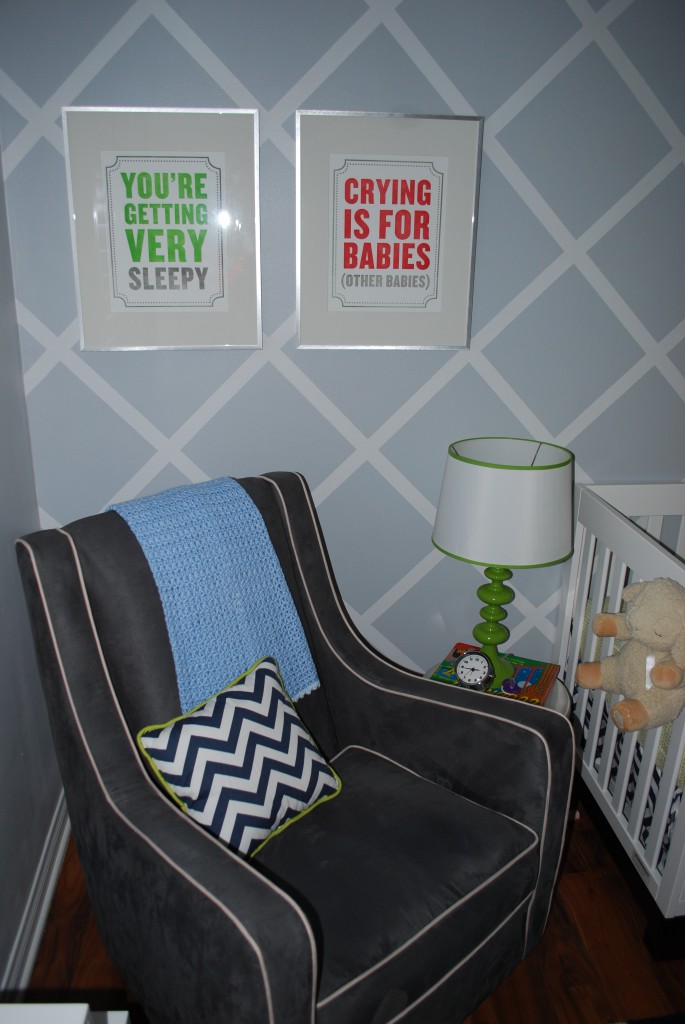
Fast forward 5ish monthsĀ and we’re in Babies R Us. From across the room, I spot a chair that catches my eye. It’s not anything like the other rockers/gliders around it and I bee line to it. Mike agrees that it was a sexy looking chair. Yes, I just used sexy in a post about nursery furniture. Okay and Mike didn’t say it was sexy, those are my words. She was the Lacey Glider by Klaussner Furniture in a dark gray color.
Ā (via Babies R Us)

I liked the color, but I was uncertain about it in our room. I’m still uncertain about it in our room, but it goes back to the mixing browns and grays post I’ve been meaning to write for a year. It’s a very dark gray (some may call it charcoal, slate, whatever) and does come in 7 other colors, which were no where near as fresh and modern looking as this one. I also wasn’t really sold on the contrast piping that was a little off white. I think if it were a lighter gray and without the piping, I would have been sold from the beginning.

What did sell me was the gliding. This chair is slimmer than the Ikea one so it would take up less space. Plus the ottoman moves with the chair (as it does with most gliders) and this was super appealing to me. In a perfectly designed room, I would just get the chair and pair it with a round, patterned ottoman to offset the square, matchy-matchy ottoman that comes with the set. But most of the appeal of this chair was that MY BODY AND FEET MOVED AT THE SAME TIME!Ā  I tried to think of what would be best for the baby andĀ what we would get most use out of so we can use it for future babies. Oh and the price tag was huge as expected, $399 for the glider and $199 for the ottoman. Once again, the ottoman was a selling point so cutting out that cost wouldn’t really be worth it for me. I left the BRU scratching my head (I learned in a graduate school class that mommies refer to Babies R Us as BRU…and I learned this while I was pregnant and had no clue…I’ll promise I’ll never call it that again…)

Of course when I got home, I did a little googling. Little did I know, that glider has been used in nurseries I have seen and liked… it just never stood out to me like it did in the store.

First, I realized that it was the glider pictured in this photo on Little Baby Garvin, a blog I found from Pinterest because I like to compare my giant belly size to other people…

(via Little Baby Garvin)

She hasn’t yet revealed the full room, but I like the chair paired with pink. No, that’s not hinting anything about the baby’s gender, I said earlier that I want a chair that can be used for all of our babies and is neutral šŸ™‚

Google also led me to this picture from Turning the Tables….

(via Turning the Tables)

How fabulous (and very nicely gender neutral) is this bedding she chose?

(viaĀ Turning the Tables)

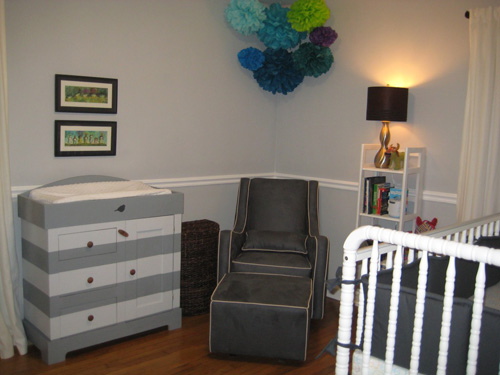
And then there are aĀ couple ofĀ nurseries featured on Project Nursery that have the Lacey glider and prove that it goes well in boys’ rooms as well…

(via Project Nursery)

(via Project Nursery)

I’m still thinking about it, but I think we’re leaning towards getting it. I would cover the lumbar pillow (and possibly the ottoman) with some fabric to make it less of a matchy set. I’m thinking of putting it in one of the corners against our new paneled wall, which will be painted white, so the darkness of the chair won’t be so bad. We’ve been saving ourĀ pennies and we’veĀ been fortunate enough that most of our big nursery expenses have been generously paid for by family members, so splurging on this one big purchase wouldn’t be too bad. And I just read on one of the other blogs that the chair does go on sale and someone got it for $279… not bad at all.

I’ve found so many amazing blogs through designing this nursery and I could seriously get lost in Google for hours. When I’m unsure of something, I Google it and almost always find a small blog with amazing style. This is why I love blogs (and Google for sending me to them)! I am also very thankful to have my own little space here to share my random ramblings and ideas… and for all of you for listening šŸ™‚

  • StumbleUpon
  • del.icio.us
  • Twitter
  • Facebook
  • Google Bookmarks
Copyright 2010 - 2011. The Lil House That Could. All rights reserved.