Archive for May, 2012

Forty

13 Comments

Posted by Rebecca, May 14th, 2012

Tomorrow is my due date.

Crazy.

I honestly had no desire to take a 40 week picture . I haven’t worn jeans in 2 weeks and I’m trying to grow out my hair, so it’s in an awkward flipping stage. Therefore looking decent these days = extremely time consuming. I took this picture right after a nap and said eff it, I’m not straightening that weird flip in my hair that just never goes away.

Another funny story, we usually a take a bunch of these pictures but this time, we only took like 5. That’s why my arms are in a different position because I completely forgot how I normally pose. The important part is that my head is included in the picture, right?

Consider this series complete!

In my last picture post I said that I couldn’t imagine what a 40 week picture would look like. Holy protruding belly! Mike and I were laughing that I thought I was huge at 25 weeks, clearly I didn’t know what huge was.

We’re so close to being done with the nursery and I have so much I haven’t yet blogged about. I think I just need another day to organize then I can sit down and write some posts about everything we’ve done in the past week or so!

I think it’s safe to say, we’re feeling pretty ready at this point. Thank you for not coming early baby, these past 2 weeks have been so very necessary for my sanity. But come soon, okay?

Giraffe Sconces

10 Comments

Posted by Rebecca, May 10th, 2012

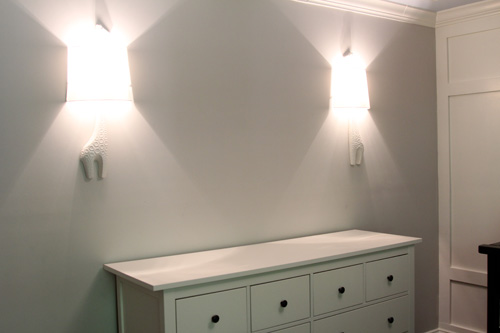
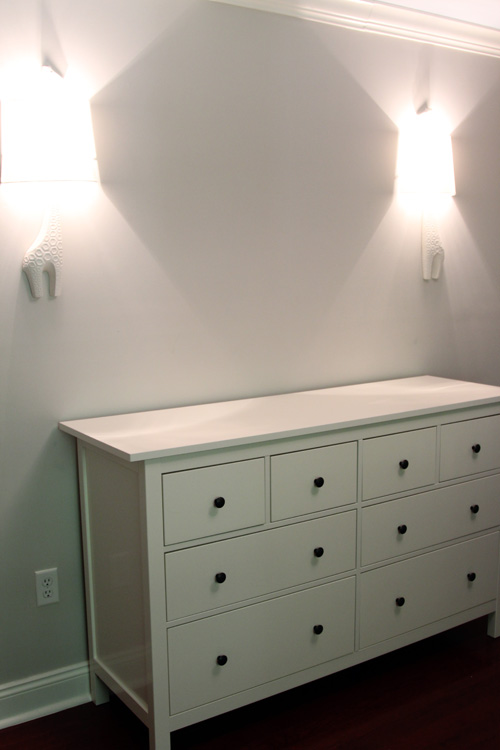
Remember way back when we started planning this nursery, when my very first nursery purchase was a pair of Jonathan Adler giraffe sconces? Well, yesterday they finally went on the wall!

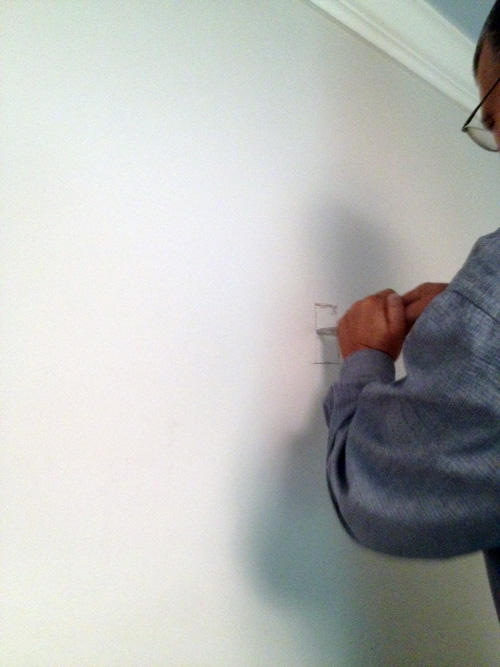
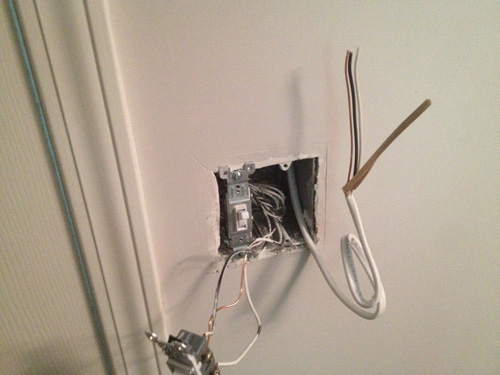
I can tell you nothing about the install process– Mike and his dad did everything, but Mike did snap some in-progress photos for you with his iPhone. I will try my best to narrate.

Step 1: Holes went in wall.

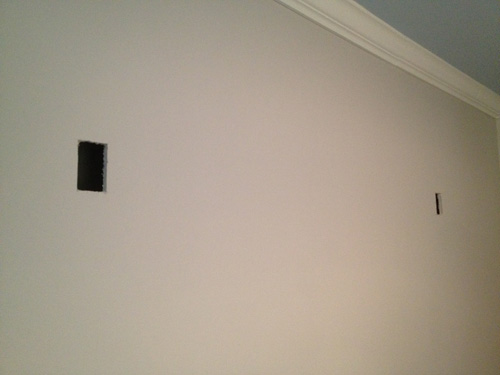
Step 2: Wires somehow came out of wall (I know it involved crawling around the attic)

Step 3: New light switch went in, with more wires.

Step 4: I took a nap (not documented through photos)

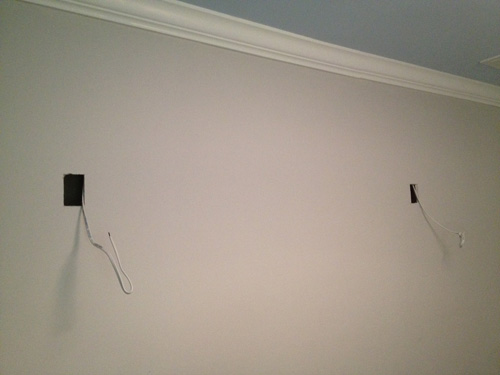
Step 5: More wires and blue boxes. Please note that the electricity is off in this picture, safety first kids!

Then Mike did the usual taping and capping of wires while I neglected to take pictures of the fixtures actually going up. The sconces came in 4 pieces: the actual light fixture (which was just a round circle sconce with a light bulb pointing upwards), a shade, a giraffe head and a giraffe body (which were just mounted to the wall without any electrical business). You can see here how the actual giraffe is separate from the light…

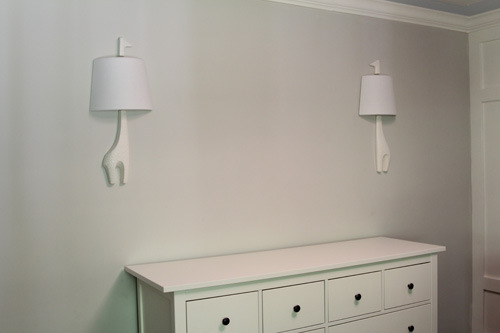
Then, we had sconces!!!

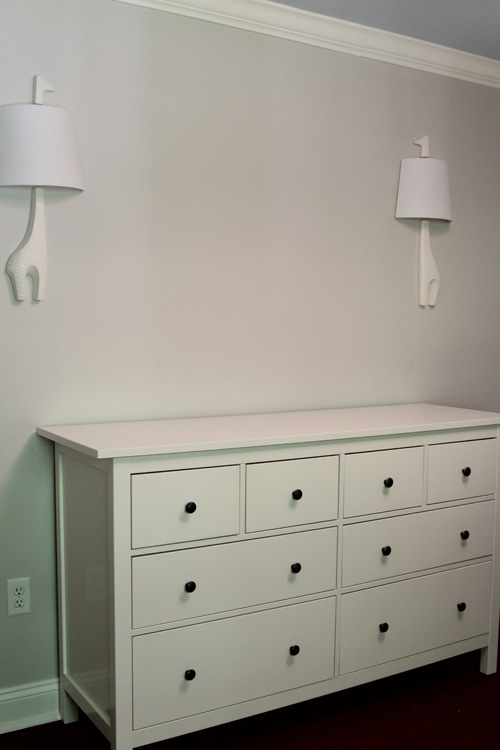
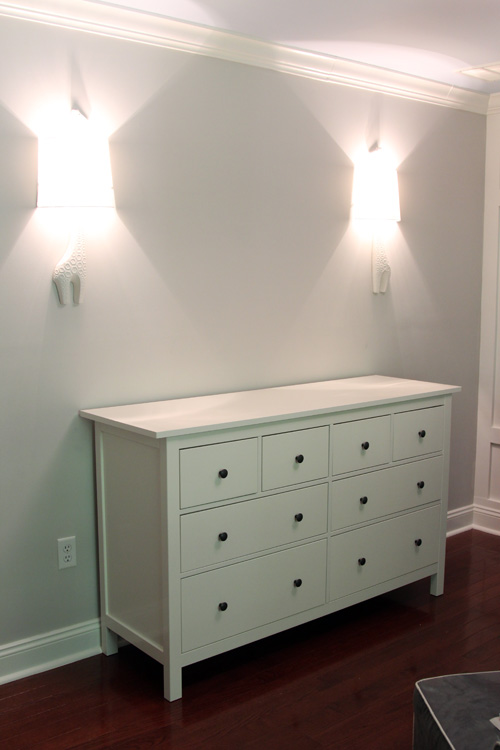
We based the height and width of the sconces off of the giant frame we bought to put in between them. The frame will come slightly above and slightly below the length of the giraffes. Each giraffe extends slightly beyond the width of the dresser.

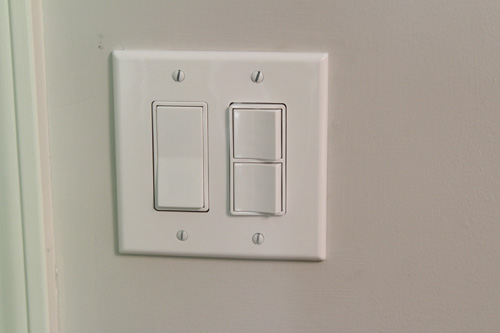
We also have a new fancy light switch in the room.

The big switch is for the ceiling fixture, then one little switch is for the sconces and one is for an outlet in the room.

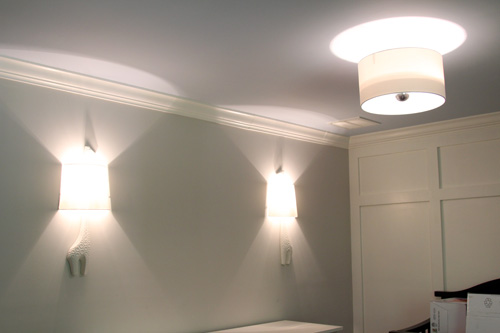
Sconces on!

Trying to get a head on shot in this room is nearly impossible, especially with all of the closet pieces still hanging around. Hopefully they will be gone tomorrow since we finally got our replacement piece!

Thankfully, the sconce shades match almost perfectly with the ceiling fixture. The whole vibe in the room is totally different now.

We love them.

We’re finally wrapping things up in the nursery, which is good considering I’m due on Tuesday. The bookcase we ordered arrived and has been assembled. We have a shade on the window that is just waiting for some chevron curtains. The final closet piece arrived and will hopefully be assembled tomorrow. We have a frame for our ABC art print that we just need to design. The only thing I’m unsure of at this point is if I want to hang anything over the crib. After I decide that, this room will be  d-o-n-e 🙂

ps- the winner of the Cutting Edge Stencil giveaway has been announced! Check the post to see if it was you!

Enter to Win: A Cutting Edge Stencil

16 Comments

Posted by Rebecca, May 8th, 2012

**THIS GIVEAWAY IS NOW CLOSED. CONGRATULATIONS TO OUR WINNER, SARAH G.!**

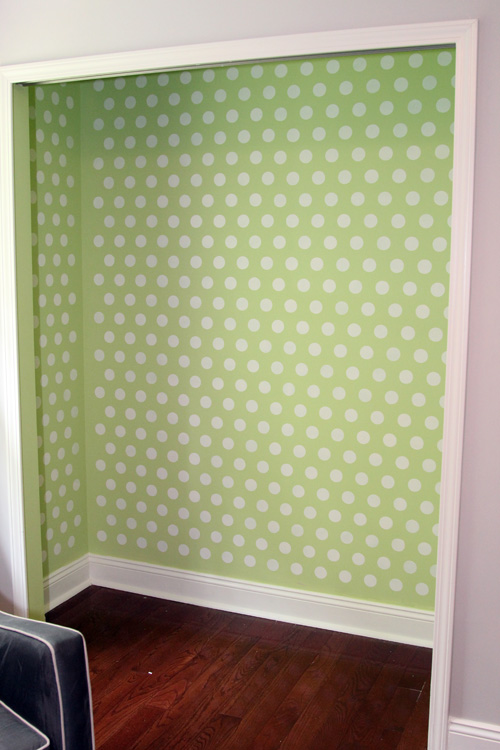
A few days ago, I showed you how I stenciled the nursery closet using Cutting Edge Stencil’s Polka Dot Allover Stencil

Now is your chance to give stenciling a shot! Cutting Edge Stencils is offering one lucky Lil House reader a stencil of their choice, up to a $50 value!

Here are some of my personal favorite stencils, in case you need some inspiration before entering:

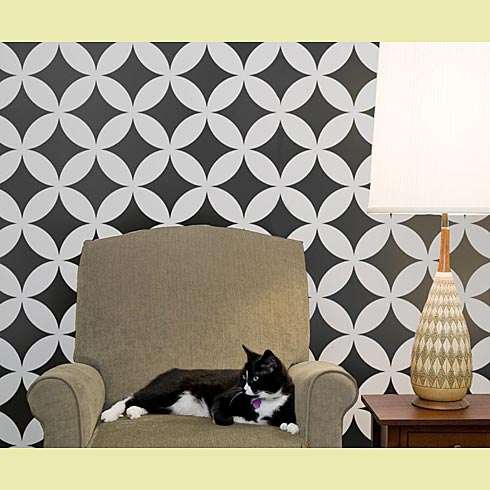
Nagoya Allover Stencil (cat not included in giveaway)

Zinnia Grande Stencil

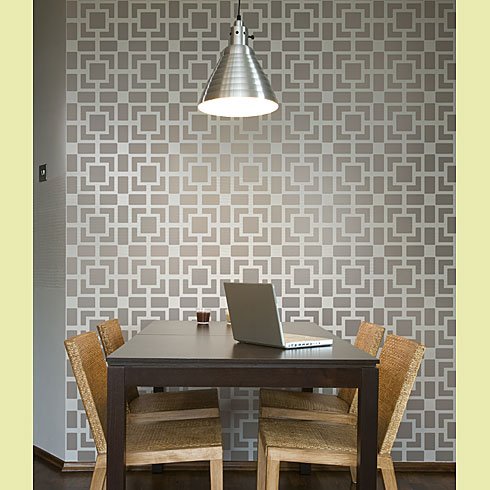
Outside of the Box Allover Stencil

Intimidated? Check out this step by step instructional video to see what the stenciling process is like:

YouTube Preview Image

Now for the deets….

And the rules…

  • A winner will be chosen using Random.org
  • This giveaway closes on Thursday, May 10th at midnight. Any entries made after that time will not be counted.
  • A winner will be announced on Friday, May 11th so check back. Even if I go into labor, I will find a way to post a winner!
Enter using this window by clicking “Do It!” for each option you’d like and good luck! (There’s no need to leave a comment, unless you have something extra fun to say. All entries should be made through the Rafflecopter window)

a Rafflecopter giveaway

Professional Maternity Photos

5 Comments

Posted by Rebecca, May 7th, 2012

A few weeks ago, Mike and I had some professional maternity pictures done. Way back when I used to think of being pregnant, I always wanted to have some photos of the two of us done to remember what it was like to have a giant belly. Then I got pregnant and felt less than glamorous, so I figured we could skip the maternity photos and just stick with our own monthly montage…

But then we met some friends of friends, Katie and Fred. Mike spent some time with Fred at our friend’s bachelor party this fall and found out he and his wife were just starting their photography business. After looking at their website, we decided to give this whole maternity photo session thing a shot. So we headed to a park the Saturday before Easter around sunset, where I froze my arse off and the wind was out of control, but they still managed to get some awesome shots.

We’re definitely planning on adding one or some of these to a gallery wall in the baby’s room. It’s crazy to think that these pictures were taken a month ago already (yeah I’m late with posting them). That shirt doesn’t even fit me comfortably now, since my stomach is defying gravity with how much it protrudes. Hopefully I can snap one last bump picture this week, if I ever make myself look decent enough to take one.

All images courtesy of S18 Photography. Go check out their blog, they do real estate photos too, which are always fun to look at. And they will be taking pictures of the baby when he/she comes, which will be more fun to look at than our awkward mugs 🙂

A Stenciled Closet

65 Comments

Posted by Rebecca, May 4th, 2012

Around the holidays, Cutting Edge Stencils contacted me and asked if I would be interested in reviewing one of their stencils. Since I was already a fan and own one of their stencils, of course I said yes! Problem was that we hadn’t yet started the nursery and I wanted to stencil the ceiling. Thankfully, they told me I could hold off on my review until I was ready and I chose their Polka Dot Allover Stencil in the small scale size.

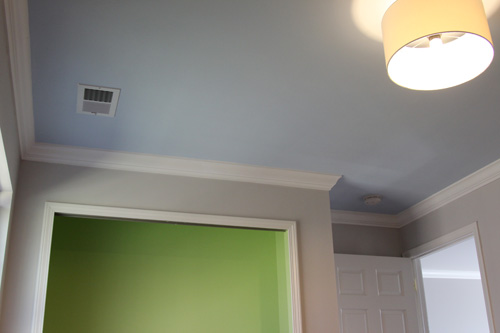
Fast forward like, 5 months. We ended up taking much longer than expected on the nursery and after painting the ceiling a dreamy blue, I decided that I didn’t want to stencil it. I focused my stencil attention on the green closet instead.
It took us a while after we painted to get to the closet, but this week I was finally able to spend some time on stenciling. Cutting Edge Stencils sent me everything I could possibly need to tackle this…. the stencil, a foam roller, a brush and a level.

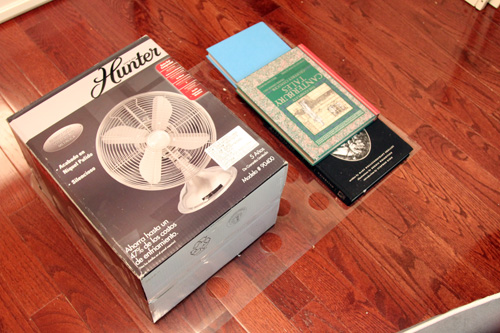
The stencil also came with detailed directions, which is how I realized that I was supposed to remove the stencil from the shipping tube immediately and store it flat. Whoops. But, like I said the other day, I flattened it with some books for a day or two and it was fine.
The directions stated that you could use spray adhesive to stick the stencil to the wall. Since I started this at night and didn’t really have an open space to spray it, I decided to just use Frog Tape to stick my stencil to the wall. Please excuse the mixture of night time, day time and iPhone pictures for these in-progress shots. I had to work on this over 3 days in small increments because you know, I’m kinda really pregnant at this point 🙂
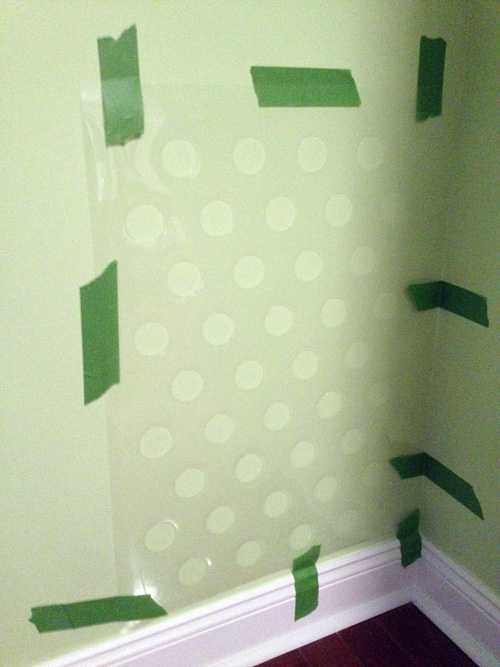
Yeah I taped the heck out of that first stencil. Since I started in the bottom corner of the closet, I decided not to use the level. It snapped on easily and worked well, but I quickly learned that the closet is not at all level! The baseboards are uneven, the side of the wall gets more narrow at the top and the level showed that it was slightly off. So I just started by lining the stencil up with the baseboard, as close to the corner as I could get and then just aligned the rest of my stencils based off of this first one.

For my method, I first started with the brush. I just personally prefer holding a brush rather than a roller so I dabbed some paint on the first two rows of dots. It was looking a little sponge painted, so I decided to try the roller on the next rows. Here is the difference between the two finishes.

I decided to go with the rolling for a more consistent paint application. You can also see from the above picture that my stencil is not completely touching the wall. I was worried this would be a problem with bleed through and that I would need the spray adhesive but it did not cause any problems! Once I rolled over a dot, the pressure applied pushed the plastic stencil flush to the wall for a clean line.

The absolute key to this process? Don’t overload your roller. I did two very thin coats of paint on each dot– too much paint at once will cause bleed through.

Once it was time for the next stencil, I just overlapped the top row of the stencil I just did with the bottom row of the one I was about to start.

I also gave it about 5-10 minutes between moving the stencil so that the outside was not soaking wet with paint when I peeled it off the wall. Mostly to protect my shirt, since my belly protrudes and pulling the stencil off made it smack into my body. It also gave me a break in between rolling. I even had Mike do most of the repositioning and taping so that I got a good 15 mins between each rolling session. I had no issues whatsoever with paint being on the back of the stencil, so I didn’t have to worry about it being completely dry when I moved it.

The halfway point (6 sheets of stencil)…
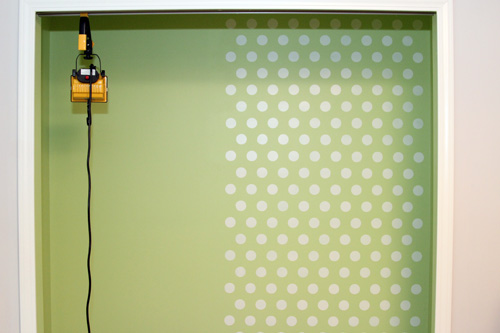
I repeated sheets like this until I got to the point where I could no longer fit a whole sheet. Then, I just overlapped the amount of dots I needed to get as close to the corners as I could.

Once I got to the top, I only needed an extra row of dots to hit the ceiling.

So I aligned my stencil with the existing dots and only had to paint the top row.

Then, I was all done!

Before…

After!
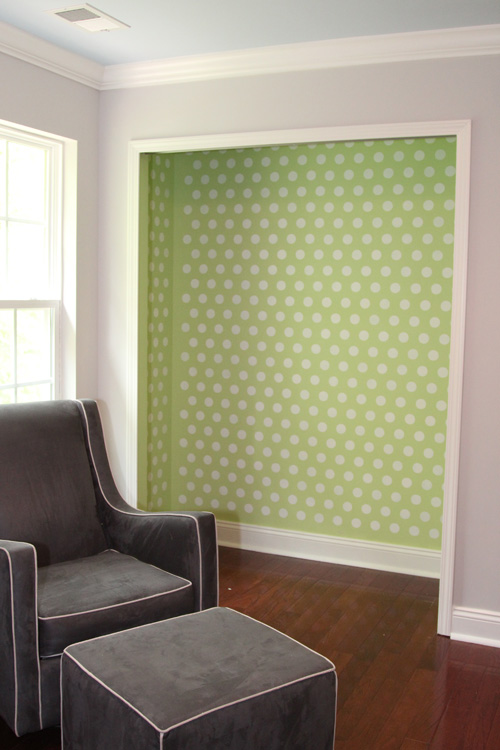
The stencil was really pretty much fool proof to use. My dots came out clean with minimal effort. This particular stencil was extremely forgiving when it came to aligning and overlapping areas.

The dot color is the same paint as our trim in the room– Olympic’s Crumb Cookie in a semi-gloss finish.

I’m so happy that I decided to stencil the closet and I can’t wait to see it with the closet organization system all in. Hopefully that piece that we’re missing arrives soon so we can get this all settled and packed with clothes!

Special thanks to Cutting Edge Stencils for sending me the stencil, roller, brush, level and inspiration. I would definitely recommend their stencils to anyone interested, the options they have are seriously endless and droolworthy.

Repetitive disclosure: I received the supplies necessary for this project in exchange for a product review. All opinions expressed are 100% mine.

Copyright 2010 - 2011. The Lil House That Could. All rights reserved.