Archive for February, 2013

A DIY Play Tent

17 Comments

Posted by Rebecca, February 27th, 2013

I mentioned a couple of weeks ago that we wanted a play tent for Easton and that we were hoping to DIY one. Well, with the Young House Love, Bower Power, Decor and the Dog and The Remodeled Life Pinterest Challenge tomorrow, I figured it was the perfect opportunity to make one. I love a deadline and I need pressure to motivate me, which is why I always look forward to these challenges. You know that saying…if it wasn’t for the last minute, nothing would get done? My life.

I started searching for some ideas a few weeks back. My goal was to make something as simple as possible. No sewing, minimal cuts if any, and I really didn’t want to paint or stain (spoiler alert: I ate every one of these words). My original inspiration was this tent from Cakies

5697877601_6db2dfc37e_b

(from Cakies via Pinterest)

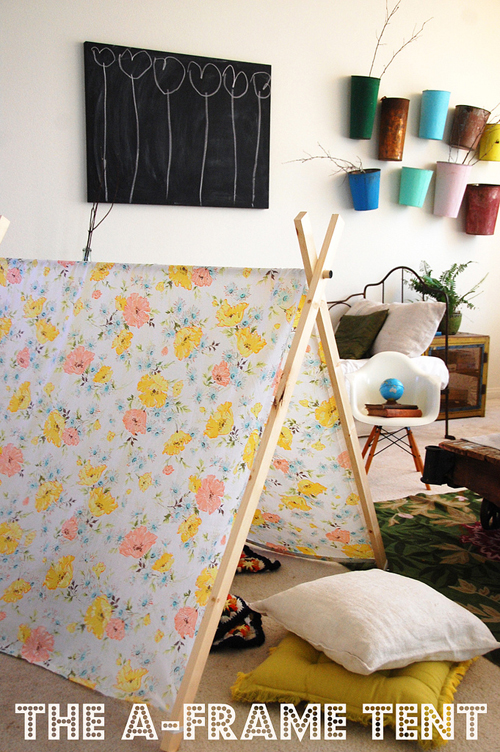
But as we actually planned to make our own, I decided to look around for some other inspiration. I found this one from The Feminist Housewife

DSC_0004

(from The Feminist Housewife via Pinterest)

And this one from Under the Table and Dreaming

100_4406

(from Under the Table and Dreaming via Pinterest)

I liked that the first two could be taken apart to be stored, but I liked that the last one used a $3 Walmart sheet. We decided to do a combination of the last two.

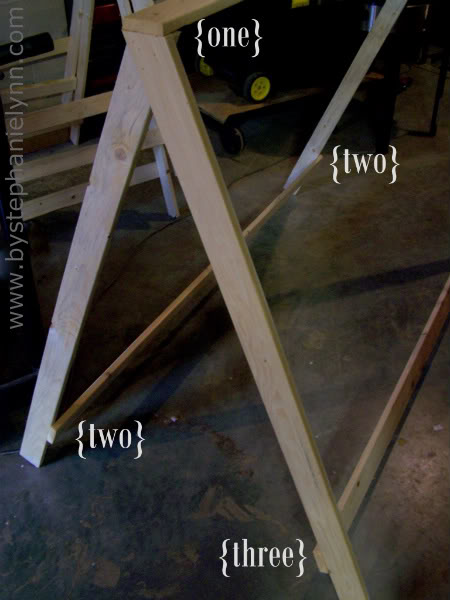
First we planned out the size of our tent. We wanted it to be small, since Easton is well, small, and so is the room. After looking at all of the other tents, we settled on some 1x3x8s cut in half (for the 2 “A” frames”. Once we measured out the sides, we realized that 48″ was too long for us, so we made the side bars 36″. Then we decided to make the top piece 6″ longer to have 3″ of overhang on each side. Confused? I doodled it for you.
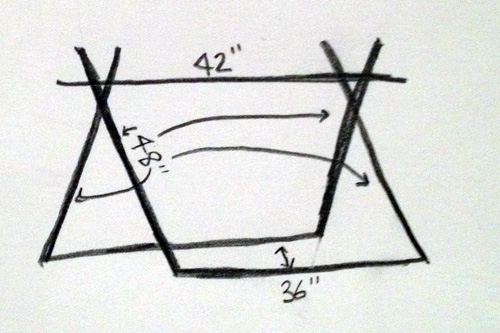
tent drawing

We also cut the legs that will be sitting on the floor at a 22.5 degree angle, as per the inspiration plans.

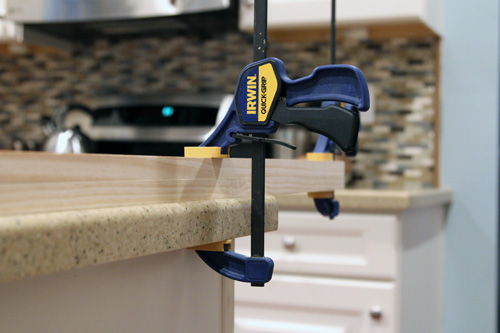
Once we made our cuts, I gave everything a good sanding. Oh and we bought pine rather than cheaper wood so that it would be a little smoother and would cut cleanly. I sanded down the harsh edges to make sure everything was safe for Easton. Then Mike clamped the wood to our island. No work table? Just use the kitchen (though we made cuts and sanded in the freezing garage).
IMG_7026_x500

He measured down about 7 inches to drill.
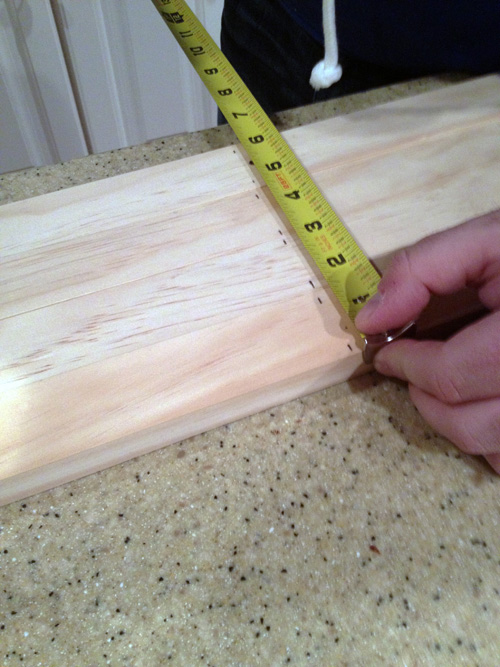
photo-378_x500

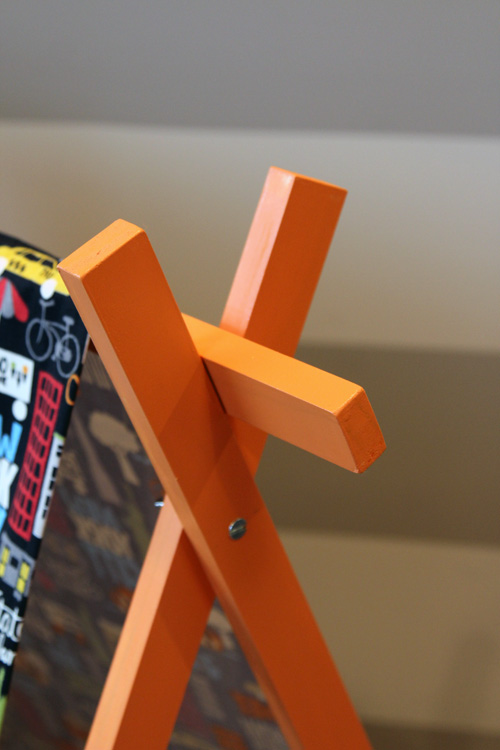
Then used these bolts and wing nuts to attach two of the pieces together.
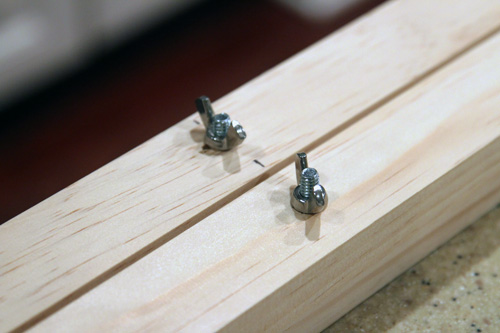
IMG_7032_x500

We spread them out and tada! The ends of our tent.
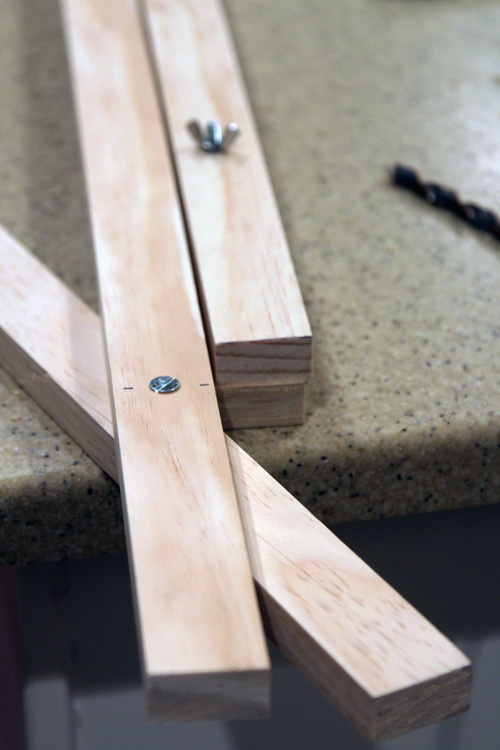
IMG_7039_x500

We then took everything apart because we decided to paint the frame.
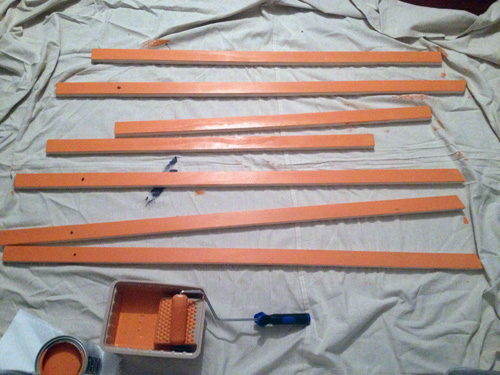
photo-375_x500

I went with Olympic One Paint + Primer in one semi-gloss in Orange Poppy and rolled it out to eliminate brush strokes.

Somewhere in the midst of this process, we realized that since we shortened the sides of the tent from the plans that I pinned, we could no longer use a twin bed sheet. I painted the frame orange because I figured I’d have to get a solid color sheet and I wanted some interest, and now the sheet won’t even fit?? I debated whether to still get a sheet and hem tape it up, but I figured if I was doing that, I might as well just pick out some fabric.

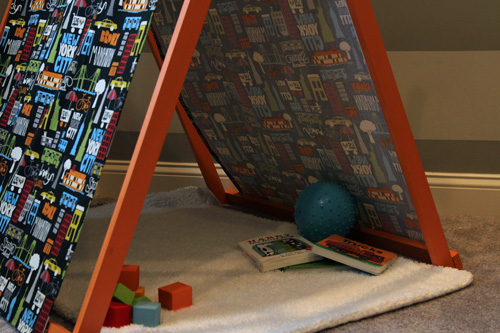
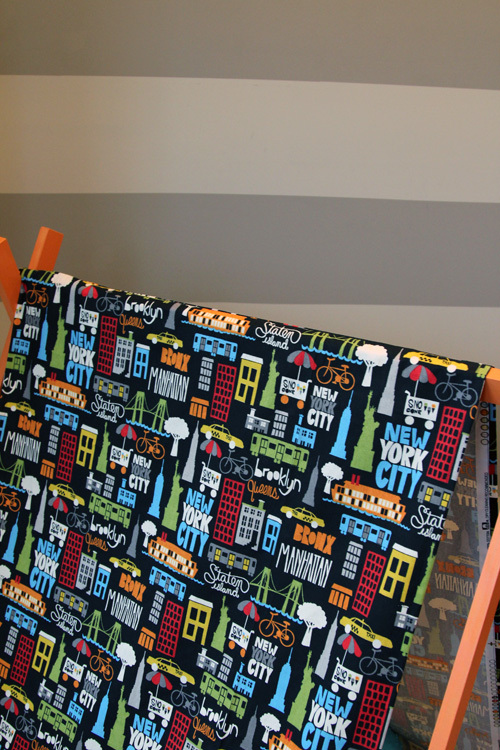
So we headed to Joann fabric and picked out fabric. We were both immediately drawn to this fun New York themed print that matched the grays in the striped walls, and somehow also matched the orange frame we had already painted the night before. We bought 3 yards at $5.99/yard. More than that $3 Walmart sheet, but totally worth it.

IMG_7057_x500

Long story short, we picked a fabric that ran in one direction and would have driven me crazy if I kept it in one long piece. I figured I needed two panels to change the direction of the fabric to be right side up on both sides of the tent. Then I had to face a reality…

I should probably sew all of this.

Yes, you read that right. I have had a brand new sewing machine sitting in the garage for 3 years because it was intimidating. The last time I sewed was 7th grade and I had no clue how to thread a machine these days. I set aside Sunday night (before the Walking Dead, of course), to set up the machine and thread it. And you know what? It was easy. I got it threaded and running in no time.
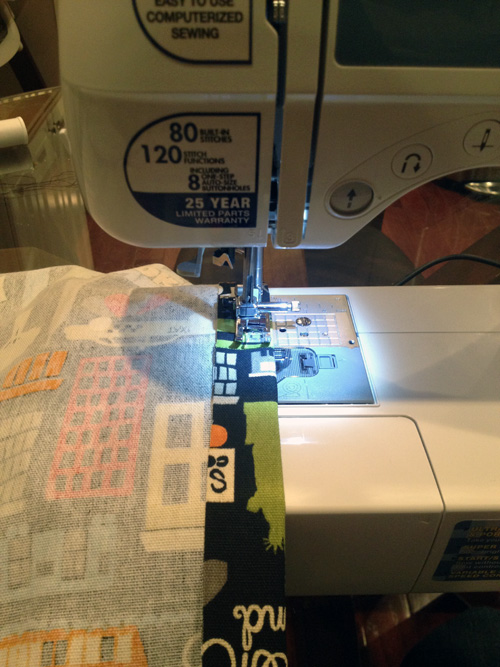
photo-382_x500

I hemmed all of the edges of the two panels and then sewed them together for the peak of the tent. It honestly took more time to pin everything. Why didn’t I open that sewing machine sooner?

We didn’t take pictures of this part, but we screwed the bottom pieces of wood into the frame and also secured it with wood glue. To attach the fabric to the frame, but make it removable to change up and wash, I decided to use 3 velcro strips on each side that were about 6 inches long.
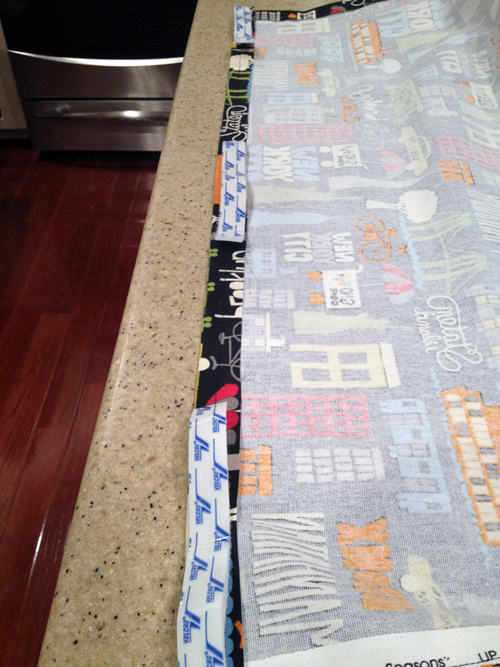
photo-379_x500

I attached them the same way I did for our no sew crib skirt. I used iron on fabric velcro on the fabric and then sticky back velcro to attach to the tent. I kept the two pieces of velcro together on the fabric, peeled the sticky paper, and then stuck it to the frame.
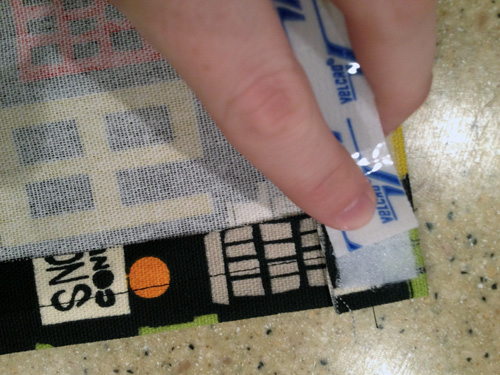
photo-380_x500

It made it much easier to make sure everything lined up nice, rather than sticking the velcro to the frame and hoping it lined up with the fabric well!

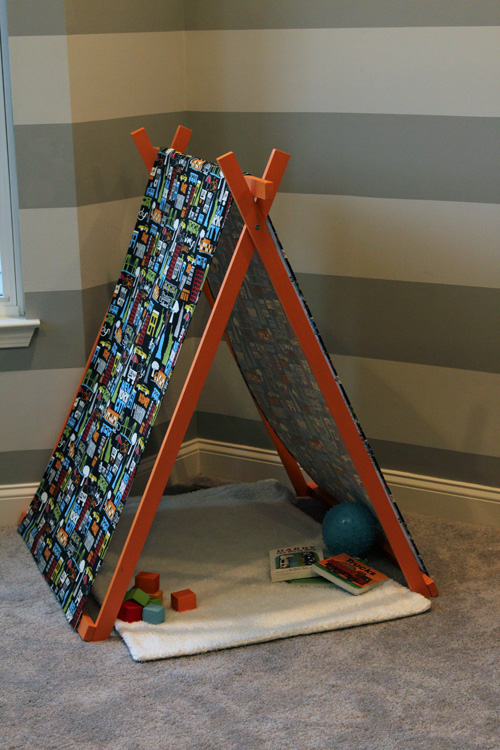
Once the fabric was all attached to the frame, we were done!
IMG_7049_x500

IMG_7044_x500

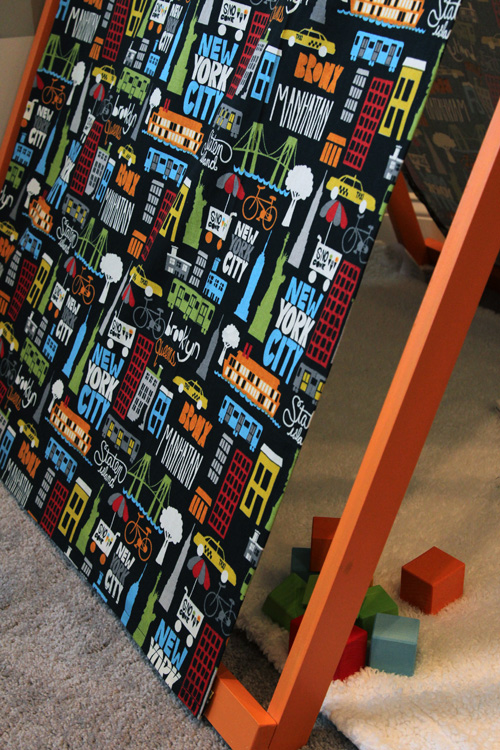
I love how it turned out, granted I could have made the fabric slightly wider so that there was less of a gap between it and the wood, but I guess I measured that wrong. Measure twice, cut once… I definitely did not. But it’s only an inch or so, no biggie.
IMG_7055_x500

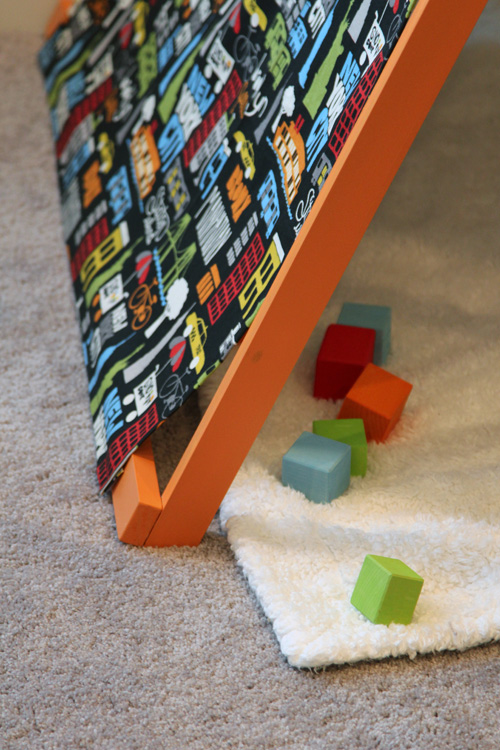
One thing we definitely will be adding are some additional supports. The way it is is NOT sturdy enough for a 9 month old. The other plans didn’t emphasize this much and one mentioned anchoring it to the wall. We will be adding additional support along the back and possibly anchoring it to the wall as well.
IMG_7042_x500

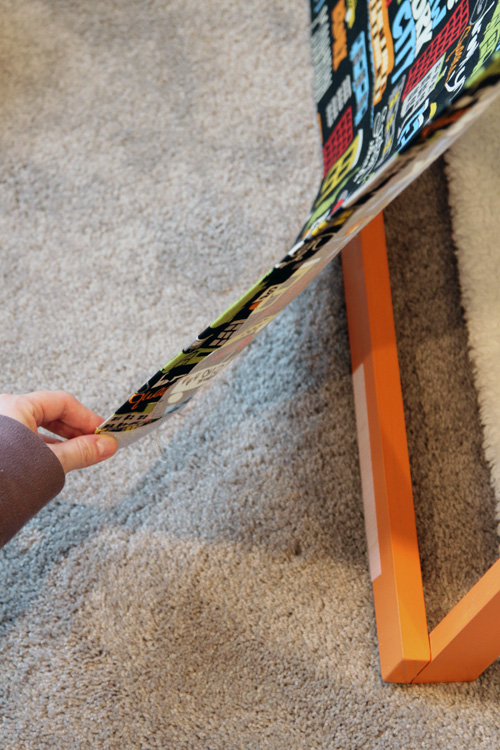
The velcro worked out well and attaches/reattaches really easily without getting the fabric bunchy or anything.
IMG_7059_x500

IMG_7097_x500

The extra 6 inches we added to the center support measurement worked out perfectly. It just rests along the top.
IMG_7094_x500

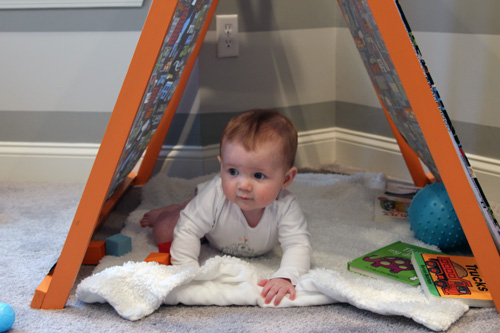
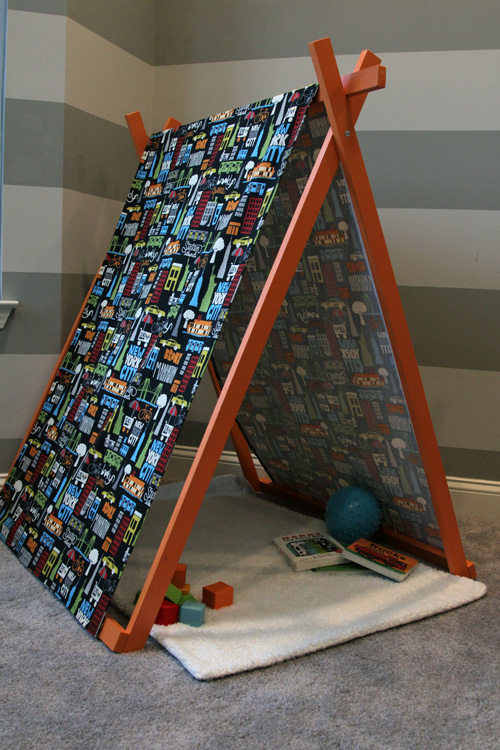
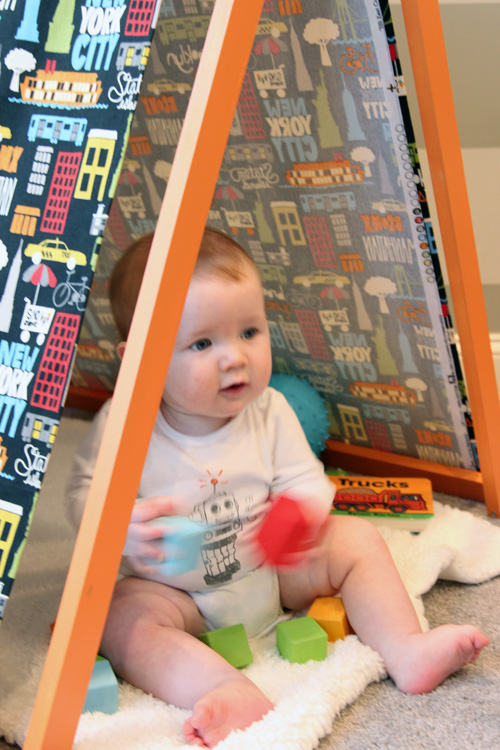
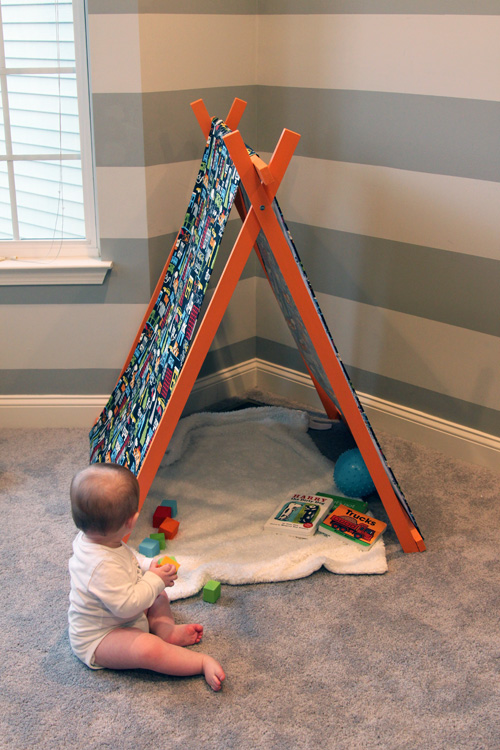
The fabric ties into the stripes well and brings in the fun element we’ve been missing in this room. It seemed as though everything we’ve wanted to add has come across as mature. The colors in the fabric are so perfect that they seem to match all of Easton’s toys. I literally picked the blocks, books and balls up off the floor and moved them over a foot into the tent, and they just coordinated. It’s a really easy fabric to work with!
IMG_7114_x500

So the verdict? The little guy was overtired when we finally showed him his tent, but he still checked it out on his own.
IMG_7075_x500

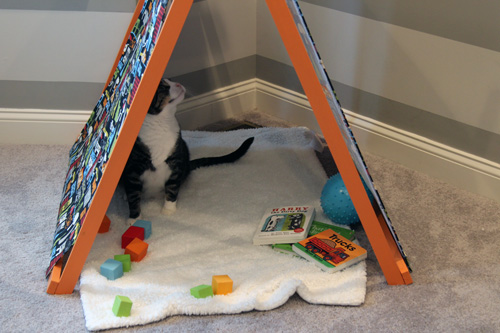
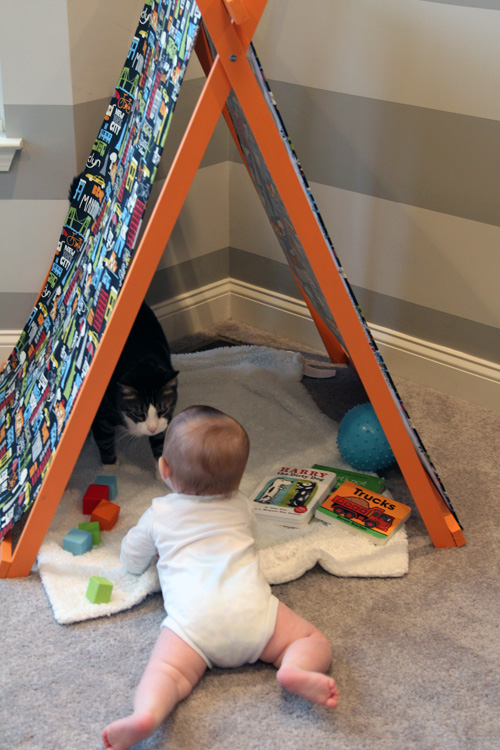
Of course, Macky loved it even more.

IMG_7091_x500

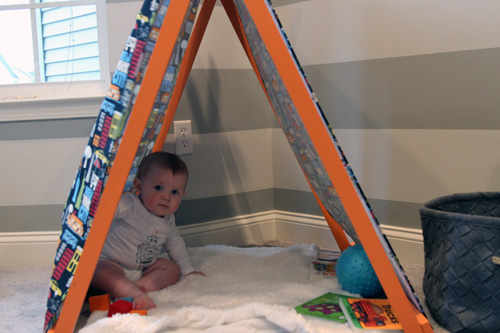
But Easton loves Macky so he wanted in on the tent too.
IMG_7104_x500

In the end, we all love our tent. I can see Easton laying in here with his books like he currently does under his jumperoo.
IMG_7112_x500

IMG_7124_x500

IMG_7129_x500

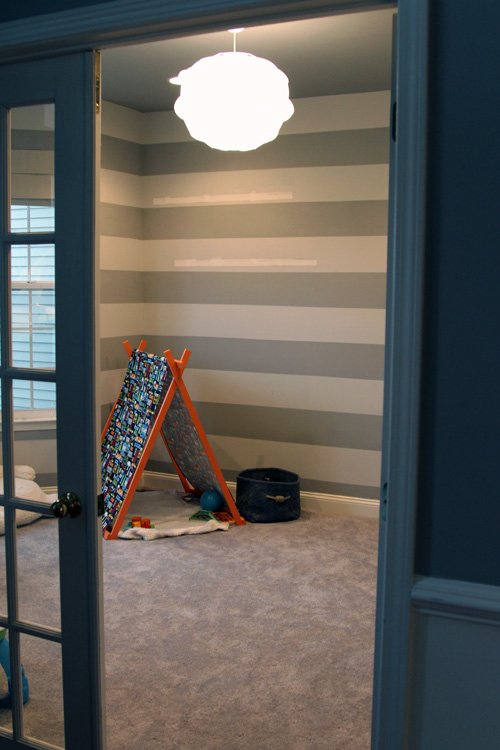
It makes the corner of the room feel so cozy and it’s the perfect miniature size.
IMG_7136_x500

Yes, we still need to touch up the paint from where we removed the previous shelves last week, but guys, I sewed and I survived. I’m going to take a day or two to enjoy that sweet victory.

ps- Here are the supplies we used in list form as a quick reference…

2- 1x2x8 boards, cut in half

2- 1x2x6 boards, one was cut in half, one was cut to 42 inches

2- bolts with wing nuts

4- long wood screws

Wood glue

3 yards of fabric

Velcro (both iron on for fabric and adhesive for wood)

Paint (if you want to paint the frame)

Two nights of a few hours of work… cutting and painting of the frame one night and the fabric the next

And please, if this is for a very young child, consider adding some additional support and/or anchoring it to the wall, we will update you when we do.

Random Ramblings

2 Comments

Posted by Rebecca, February 21st, 2013

It’s another one of those days where my brain is on overdrive and I just dump the things I’m thinking about here. Ready? Here goes!

1. We made a trip to Ikea on Monday (thank god for 3 day weekends!). It was only the second time we’ve gone since Easton was born, so it was nice be back in the land of Expedits.

photo-1

While there we restocked our frame collection for another gallery wall and bought some ledges for book storage in the playroom. We grabbed quite a few of these new (at least to me, it’s been a few months) glossy gray Ribba frames.

Picture 3(via Ikea)

I’ve made it my own resolution to hang these things ASAP so they don’t sit around driving me nuts. But…

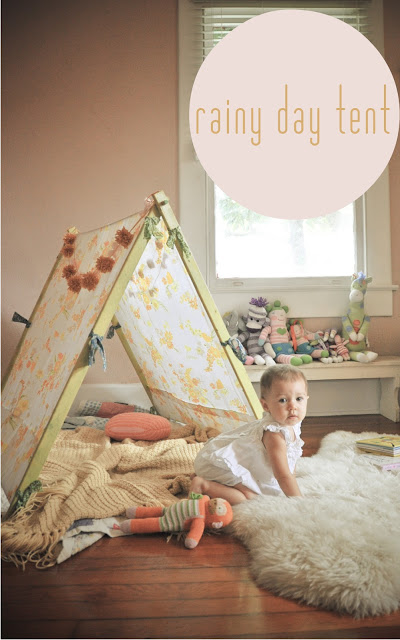
2. It’s Pinterest Challenge time again, so I have an excuse to be unfocused! Probably for the first time since these things started, I know exactly what I want to make… a play tent for Easton. Wish me luck as I buy dowels and sheets this weekend…

playtent

(from Twirl via Pinterest)

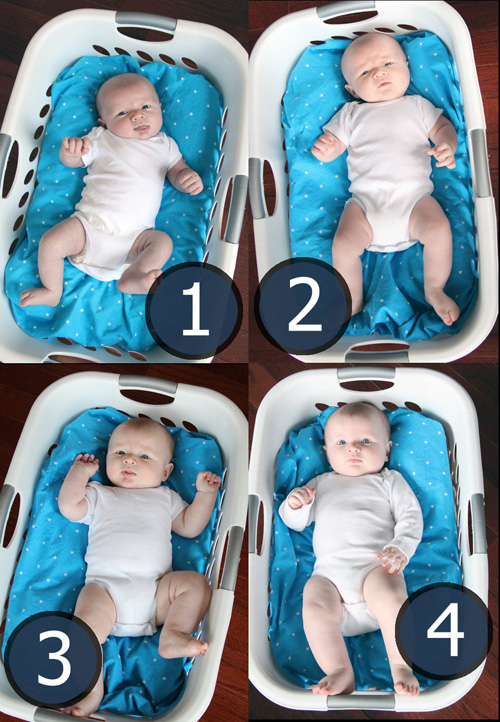
3. We’ve been behind on posting Easton’s monthly laundry basket pictures, but we have them hanging around on a memory card. I’ll get them all caught up on one post soon.

months 1 thru 4_x500

Yeah he doesn’t even fit laying in that basket anymore and he’s, um, almost 9 months now. Whoops.

4. We recently lowered Easton’s crib to the middle setting. Just as I was going to tweak the no sew crib skirt I made to fall flat with his crib, I woke up to this at 2am yesterday.

photo-373_x500

The face says it all, he’s not a morning person either. Luckily, I didn’t take a picture of my face at that moment. My hair was sticking up way more than his 🙂

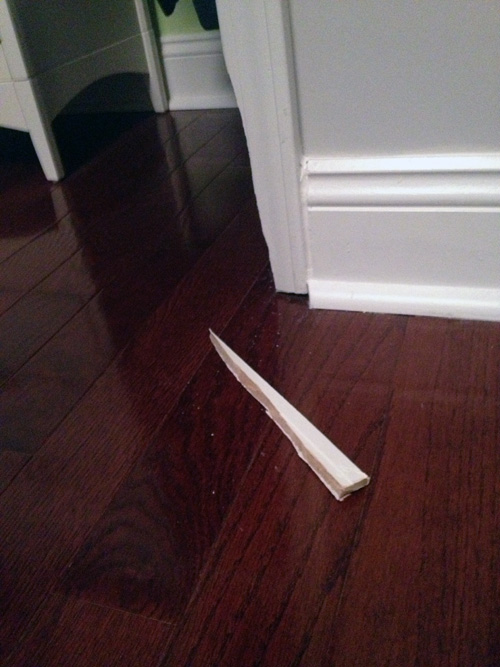
We lowered the crib fully yesterday and now I have to decide how to work the crib skirt for the small amount of space left. Seriously, the nursery feels like it will never be “complete”. Every time I plan to take room reveal pictures, something happens, like I ram a vacuum into a piece of molding…

photo-372_x500

I’m such a jerk.

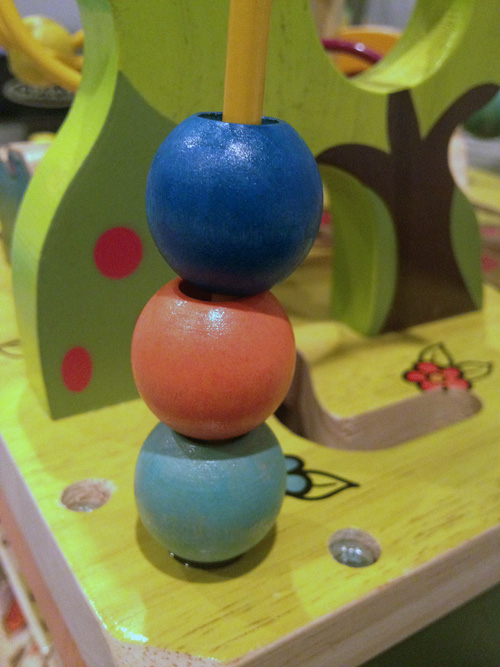
5. Speaking of my baby growing up, his first birthday isn’t too far away (3 months! only 3 months!! :() so all of that planning is stashed in the back of my head. I don’t want to do a set theme, but I’ve been playing with his Zany Zoo beads and I think I’ve settled on a color scheme…

photo-374_x500

Aqua, orange, lime green and royal blue/navy (whichever I can find more easily). My only expectation is that it be fun and fit for a one year old. I’m not trying to win any Pinterest party planning awards here. A happy baby and some full bellies works for me!

Considering all of these are on my to-do list, I’m obviously not doing a very good job at my New Year’s resolution to streamline my life. Good thing my current resolution is to get more sleep, though my miniature boss is in charge of that one.

February Wish List

4 Comments

Posted by Rebecca, February 15th, 2013

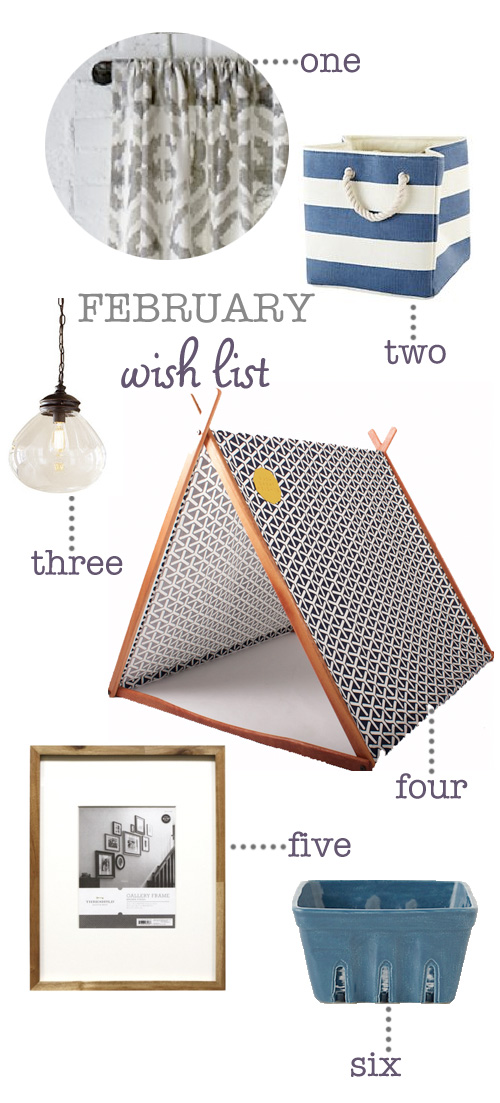
I decided to try out a new series here… our current wish list for the month. I figure I am always eyeing up something (pretty much on a weekly basis) that I desperately want. Lucky for my wallet, I don’t buy most of it. Usually you only get to see the things I follow through with and put in our house, but I’ve been itching to post more of my ideas here. I have been terrified of making any type of mood board in Photoshop since I started this blog, so I usually stay away from these type of posts. But, I figured it out! All on my own, and it was lots of fun for me.

february wish list


1. West Elm Tali Window Panel: I’ve been eyeing these up for our dining room for months. The only thing I don’t love is the price. I’m playing that gambling game where I hope they go on sale, but I’m risking them disappearing.

2. Land of Nod Stripes Around the Cube Bin: I wanted to bring some more navy into Easton’s bookcase and closet in his room (which are both painted green along the back). At first these were a “would be nice to have” item but now that he’s mobile, he clunks his head or pulls at his current wicker basket constantly. A softer option is now a necessity.

3. Allen + Roth Edison Pendant Light: Mike and I have been eyeing these for months, if not a year to change out our current kitchen pendants.

4. Play Tent (this one from Such Great Heights): Easton loves hanging out in the cubby holes of the Expedit or underneath his jumperoo, so I’d love a cute little tent for him. Though I’m totally thinking of DIYing one for his first birthday…

5. Target Threshold Frames: The gallery wall in our entryway is creeping closer to the front of my mind and I want to bring in some wood tones.

6. Farmer’s Market Basket from Anthropologie: Because it’s adorable. I’ve seen a knock off version at Michaels…

Did I mention this was fun? Mike told me ages ago that if I put some time into it, I would probably love Photoshop. I think he may have been right…

Here’s to learning something new, on a Friday night!

A Little Bit Of Whimsy

1 Comment

Posted by Rebecca, February 12th, 2013

The last time you saw the playroom, it was looking like this…

IMG_9687_x500

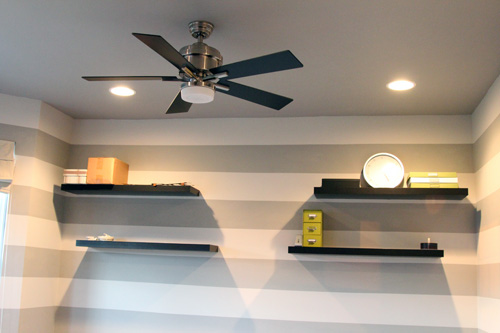
This weekend, we finally got around to taking down the floating shelves.  While we loved them for an office, we didn’t think they were too practical for a playroom.  So down they went; they’ll probably reappear somewhere else in the house.  We also took down the ceiling fan which will end up in the new office upstairs.

IMG_6920_x500

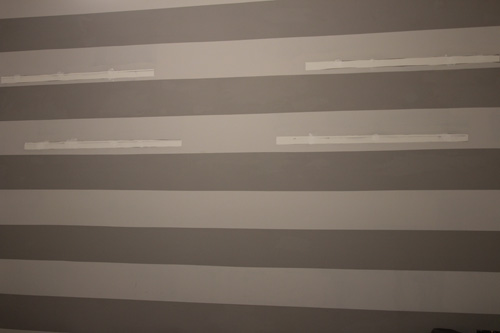
The bracket holes were spackled and sanded once and need to be sanded again. We originally painted around the shelves, so we now have a slightly raised edging.  We’ll have to spackle and sand, and then spackle and sand a couple times to get everything flush again.

I apologize in advance for all of these pictures I took at night (like an hour ago).  Our camera settings were all wacky from the last time we used it and I couldn’t get the lighting to look right at night. Oops.

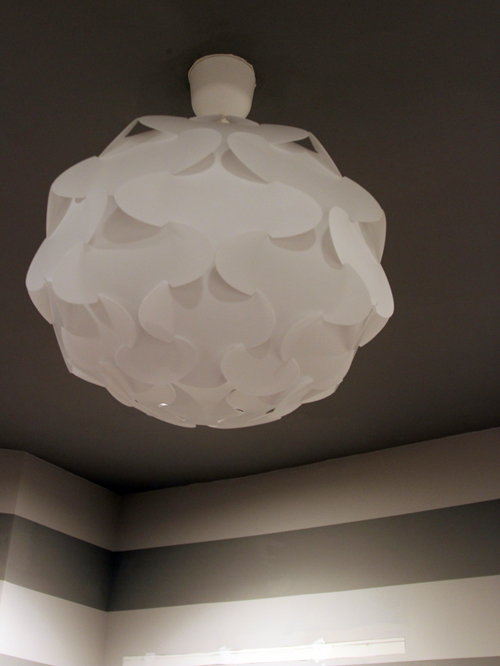
So what did we replace the ceiling fan with?  Well, a long time ago we picked up a light at Ikea. We had always knew we wanted to use it in the playroom, but never got around to installing it…until now!

ikea

(via Ikea)

We wanted something fun in the playroom, but nothing that screamed childish.  We found Ikea’s Fillsta, a playful hanging light for $29.99.  It was simple, had some shape and was cheap.  Perfect.

But much like any Ikea product, the install resulted in some head scratching.  And Mike dropping the f-bomb just a handful of times.  For anyone landing on our lil blog scratching their own heads trying to get the Ikea Fillsta installed, here’s the trick: cut the extra slack from the hanging cord to the length you need.

base

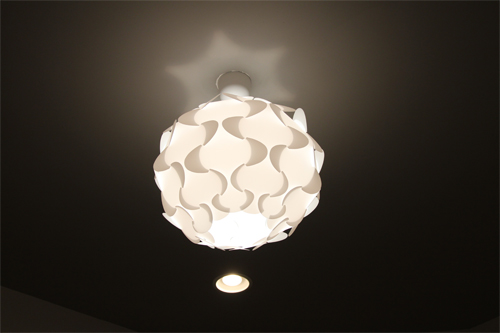
The dome base is actually held in place by tension in the cord.  So the tighter the cord inside the base, the tighter it will fit against the ceiling.  With most other light fixtures, these components typically slide or screw into place.  Nope, not with the Fillsta.  Mike originally rolled up the extra cord and stuffed it into the base.  Then he tried a bunch of zip-ties.  Finally after a couple milkshakes and a solid nap, Mike decided to just cut the cord down to the size we required.  Sure enough, it worked.  Now we just have to touch up the paint around it (though I love the white light against the dark ceiling!)

 off

Here is the Fillsta with the light off.

on

And here is with the light on. Glowing! I love the little bit of whimsy it adds to the room, which the direction I’m sort of going in here. Clean and modern, yet fun! We’ll have to get a better room shot once we finish some other items in the room. What other items you ask?

blinds

These roman shades. We were originally going to dye them when the room was an office. We were even going to dye them when we switched it over to the playroom. But after doing some Googling, we’re not quite sure how to get the color we really want (so, um, anyone have any experience dying blinds? Using fabric spray paint?).  We’re thinking we just might replace them with the white version.  Any suggestions?

Book Storage Inspiration

9 Comments

Posted by Rebecca, February 5th, 2013

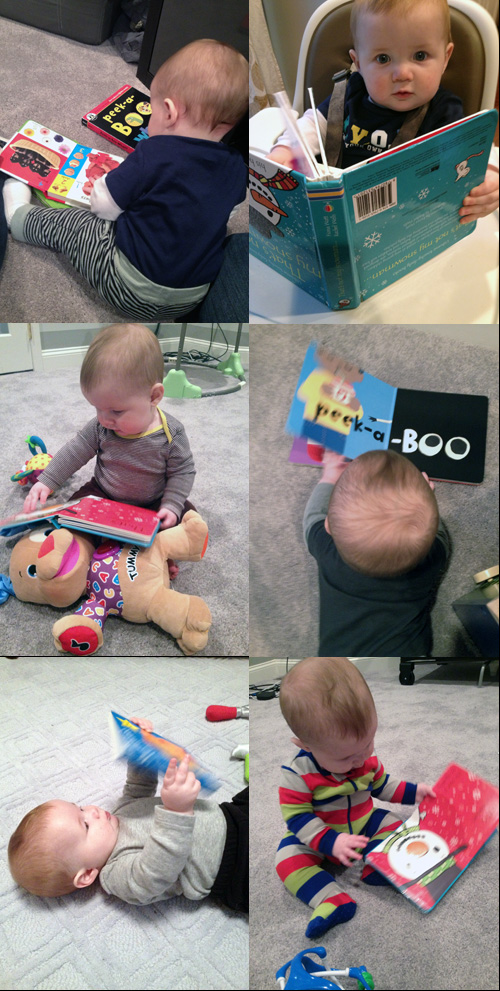
Easton loves books. I know, he’s only 8 months old, but he will sit with a book and ever so carefully turn the pages and analyze the pictures.

Eastonlovesbooks

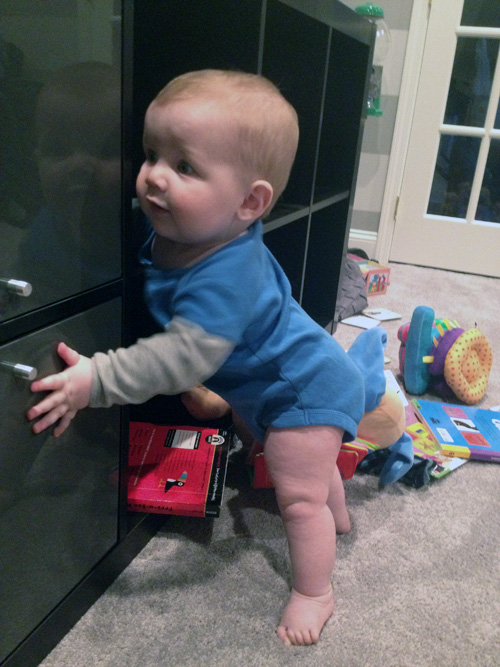
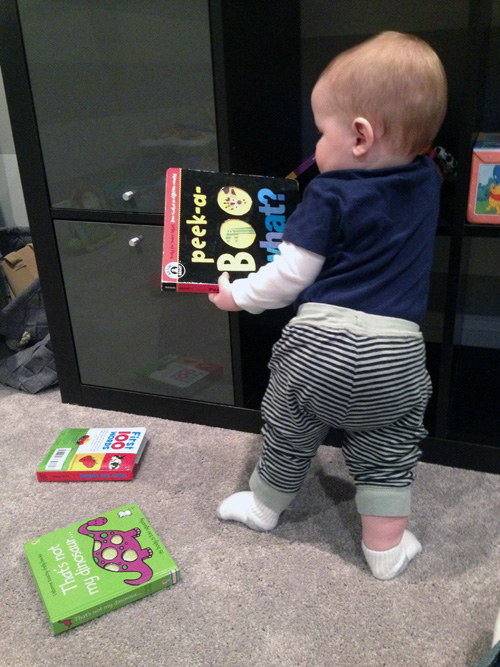
Over the weekend I was hanging out in the playroom with Easton (where I now live), and I realized that the Expedit we have in there isn’t great for his books.

He has to reach in too deep…

photo-363_x500

In order to chuck all of his books on the floor…

photo-364_x500

So I got to thinking that maybe we should have a dedicated book area. I knew I had seen so many children’s books displayed adorably on Pinterest, so why not investigate a little, huh?

Here are some options I came across:

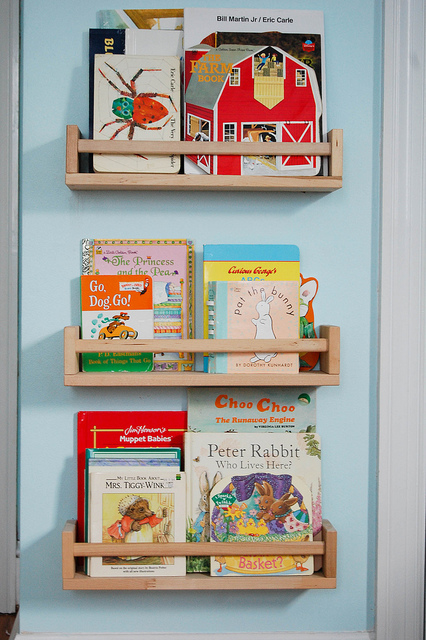
playroom bookcase 1

(via Domestic Simplicity)

Inexpensive Ikea spice racks. Could be painted fun colors, plus they’re only $4 each!

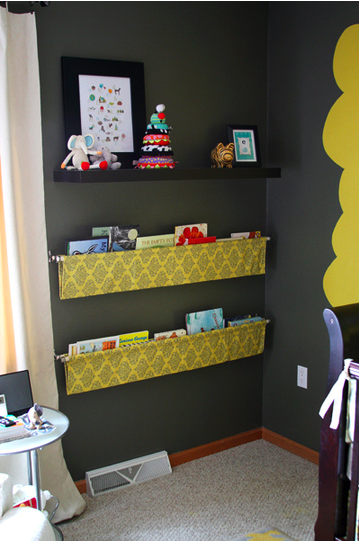
Playroom bookcase 2

(via Apartment Therapy)

Fabric book slings, so many fun possibilities.

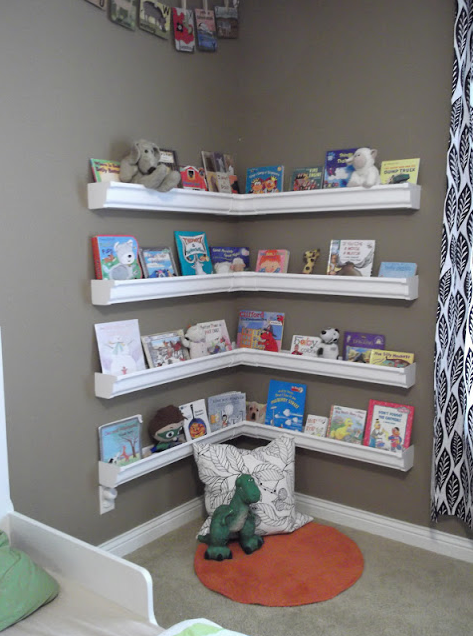
Playroom bookcase 3

(via Sunshine on the Inside)

Rain gutters for bookshelves? So creative.

playroom bookcase 4

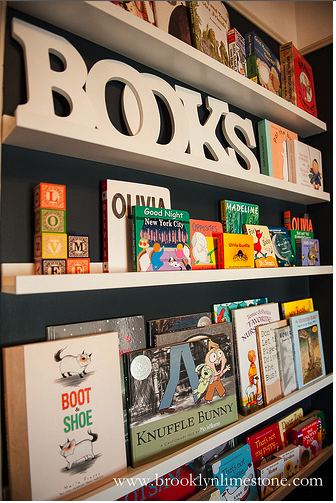
(via Brooklyn Limestone)

Ikea Ribba picture ledges.

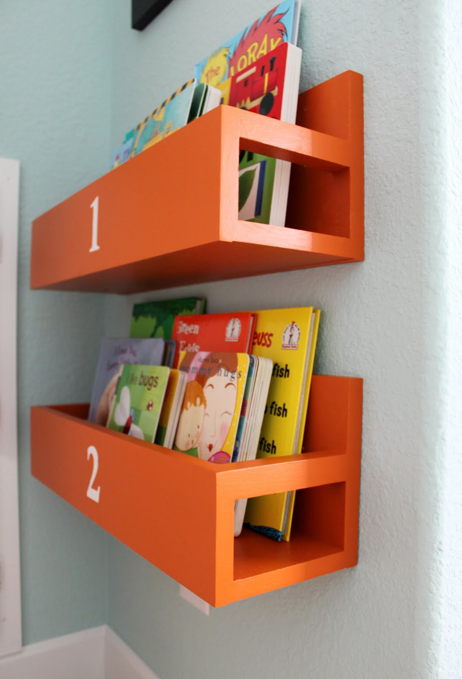
And perhaps my favorite, the DIYed numbered ones.

playroom bookcase 5

(via The Sweet Survival)

I was thinking of maybe building our own and adding a little ombre effect? Maybe 3 shelves in varying shades of yellow… or green… or orange! Maybe numbered? Hmmm…

Copyright 2010 - 2011. The Lil House That Could. All rights reserved.