Archive for the ‘organization’ Category

Ikea To The Rescue

26 Comments

Posted by Rebecca, July 17th, 2013

A while back, I posted about wanting to add some book storage to the playroom. I mentioned possibly building some ledges since it seemed fairly simple. Well, after a trip to Ikea a few months ago, we realized that we could use their picture ledges for a cheap and fast solution. Since my goal in life these days is to keep it simple, we decided to buy them.

First, let’s talk about Easton’s love of Ikea. If you follow me on Instagram (@lilhousecould), you are already aware.

(ps- I made my Instagram private since it’s more of my personal pictures than blog pictures, but as long as you look like a genuine person, I’ll accept!)

easton ikea 1

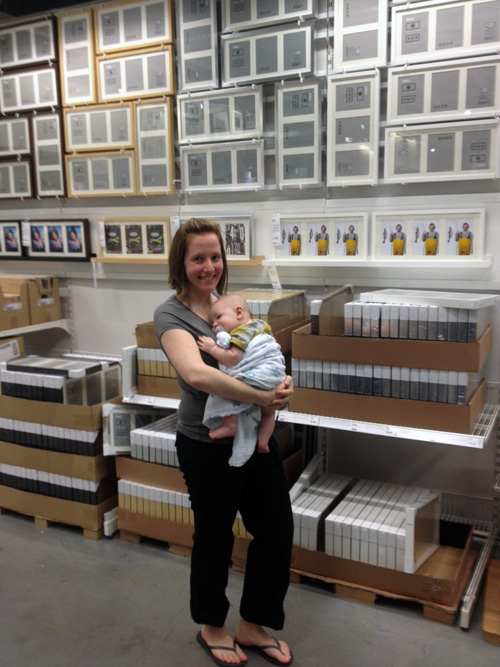
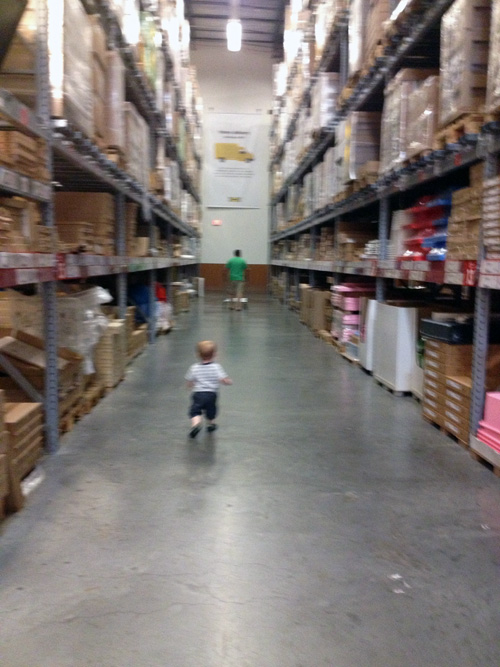
We went (again) over the 4th of July weekend, so the store was empty. Since he’s currently a full out toddler, he had enough of the stroller at the end and just wanted to run. A giant, empty warehouse was the perfect place for all of his energy.

easton ikea 2

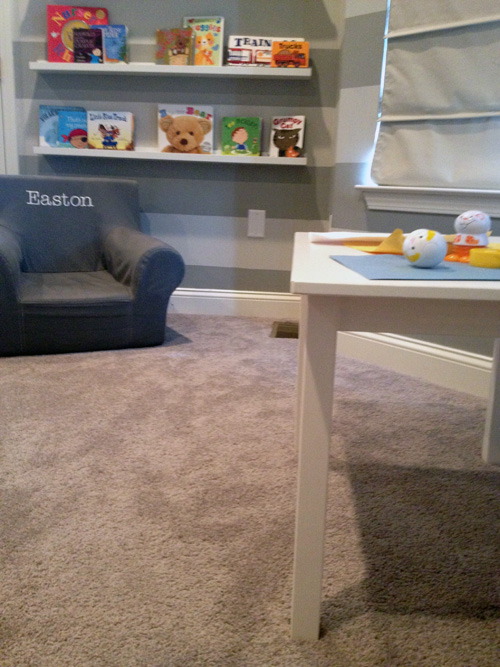
We picked up 3 of the Ribba ledges in white, in the longer length (45 1/4″). We hung them while we were together one weekend during a nap.

book shelves1

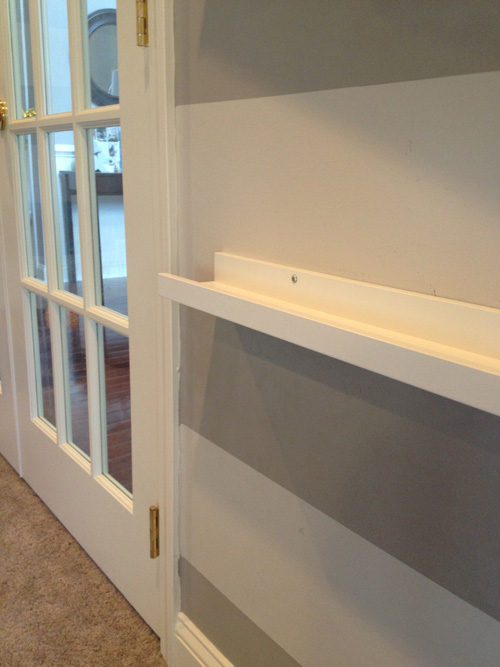
We used the stripes as spacing and decided to hang a shelf every stripe and a half to make sure Easton has space for taller books as he gets older. The stripes are 12 inches wide so the shelves are 18 inches apart from the actual flat part the books sit on.

book shelves2

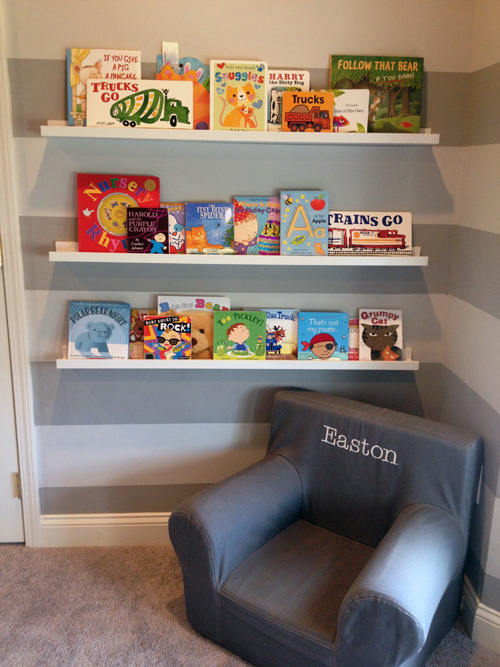
As Mike put it, it’s such a great use of space. Easton has a lot of books (he still has some in the family room and his bookcase full in his room) and this saved us precious space in his toy storage. Plus the colorful books “make it look like real playroom” according to Mike.

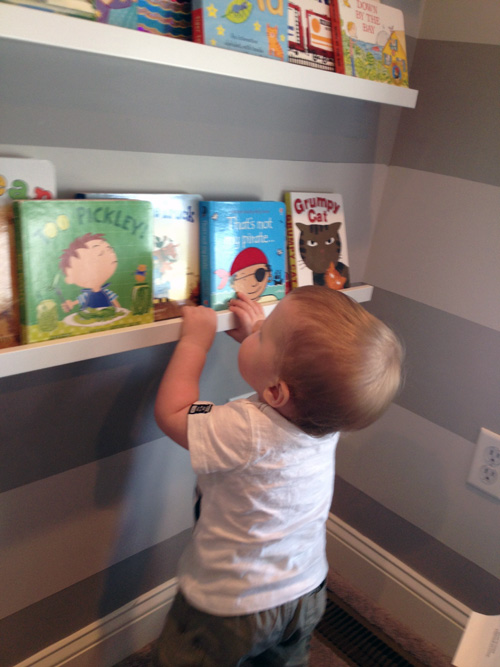
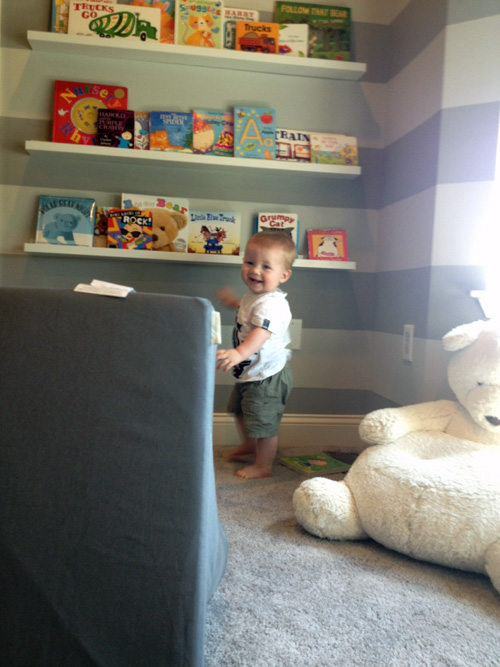
When Easton woke up from his nap, he ran over to his new book wall right away. Baby bookworm.

book shelves3

I am thankful that we did not put that lower shelf any lower or we would have a child standing on it. I originally thought of adding a 4th shelf lower for him, but it definitely would have become a ladder/climbing wall. Just to be safe, each screw that is not in a stud is drilled into a drywall anchor that holds 50lbs. Thankfully, Easton is only 24lbs 🙂

His only objection was to where I placed his chair, he prefers it like this…

book shelves4

One day I’ll have to take a picture of him rearranging the furniture in our family room. I’m talking full out chairs and ottomans moving across the room. He says he just has an eye for these things….

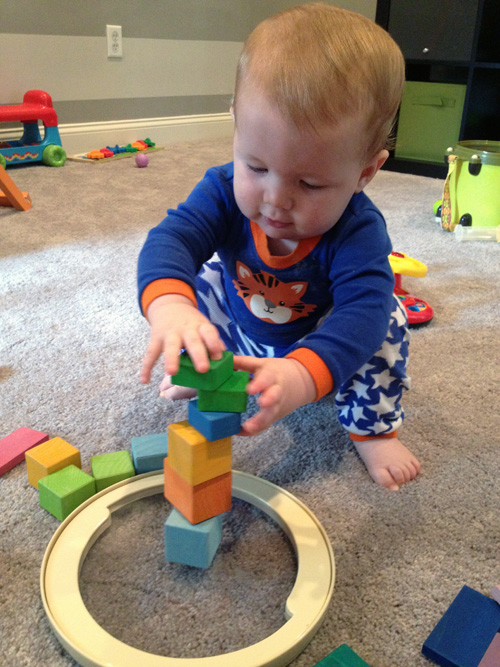
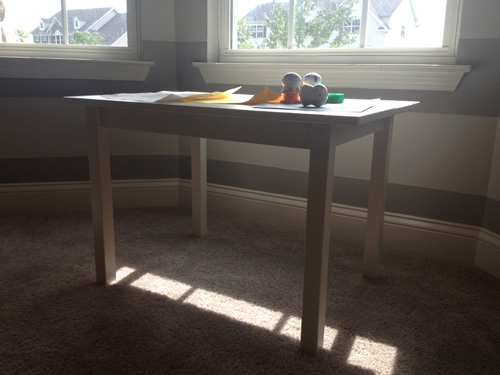
After the shelves were up, we decided to head back to Ikea (this was the 4th of July weekend trip) to look at tables for the playroom. I’ve been eyeing up sales at Pottery Barn Kids and Land of Nod, but their tables were all still ridiculously expensive. The playroom is small, so I didn’t want anything big, but something that Easton can use now and as he gets older. More and more, we’d been building blocks on the lid to his drum set, on the carpet, so I knew it was time…

blocks 1

We went with the Sundvik children’s table in white. It’s solid wood, which was something I really wanted and it is the perfect size.

play table 2

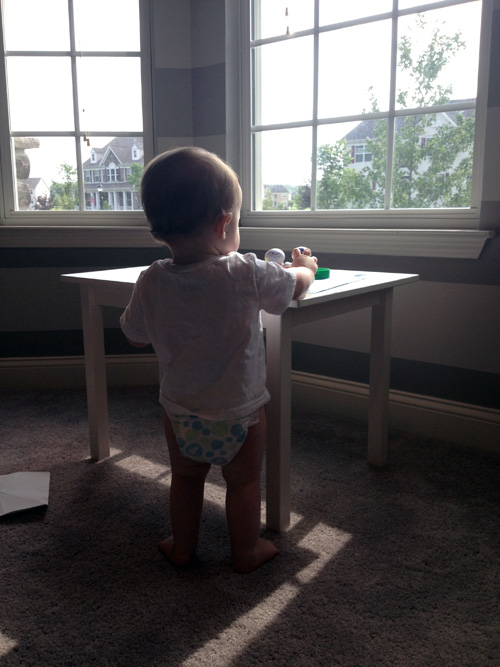
We picked up 2 of the matching chairs to go with it, but for now they are still in their boxes. Easton wouldn’t be able to reach the table sitting and would definitely use them to Spider Man himself up on the windows..or the book ledges… or my head. In a couple of months they will be perfect and I might even paint them a bright color, we’ll see.

For now, the table is perfect for Easton to stand at.

play table 4

He has a nice little section of the room furnished now. There’s still a lot I want to do in here and I know it will be never ending as his needs/skills are constantly evolving.

play table 3

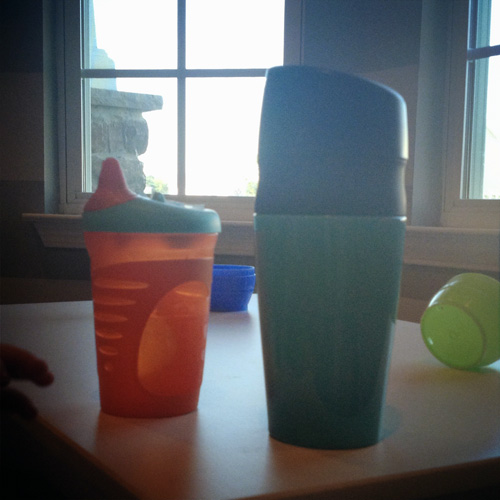
I’ve been trying to bust out some arts and crafts, but he’s more fascinated by how the crayons fit into the little Crayola palm grip things we have. He has been a master stamper though, even if it means there are stamps on the new table. We’ll be testing the durability of that Ikea paint with the multiple wipe downs. He uses the table for his blocks and stacking toys mostly, but also as a place to put his sippy cup.

play table 1

Wonder where he learned that one?

On Keeping It Simple

No Comments

Posted by Rebecca, January 31st, 2013

I have so many post ideas floating around in my head, but none of them feel complete or inspired enough to post about. I figure if I empty my head, I can start with a clean slate. Ready?

We’ll start with my new year’s resolution: to streamline. Simplify everything. Simplify post writing, organize our ENTIRE house, finish existing projects before starting new ones. Be more efficient with my routine at night immediately after putting Easton down for bed so that I can get more things done. I started using my planner again to write out what I want to do each month/week/day so that I can plan ahead. It has taken me a long time to get into a routine with the logistics of working, as far as packing what I need for the day, what time to wake up, when to shower (night!) etc. and I think I have finally simplified it enough that it works. Now I would just like to do that with the rest of my life.

planner_x500

(this is my Erin Condren planner from last year, yes half of those goals are still not done, sigh)

That being said, now that Easton is a little older and finally takes long naps (it took him until he was 6 months to take a single nap longer than an hour), I feel like we have a new sense of freedom. He also is much easier to bring places and is happy being out and about. We’re settling back into what feels like normalcy and there is SO MUCH I want to do. Too much and I need to control myself.

I’ve decided not to make a set list of goals for the year. Of course now that Easton naps and is in bed at 7pm I’m all like “I’m going to work out! Do my hair and makeup every morning! Paint a room a month!”, I have to remember to keep it simple. A to-do list turns into a never ending list that becomes overwhelming. I’ll end up staying up too late for a week doing too much, my immune system will be shot, I’ll get sick, I won’t be able to blog, then when I can I’ll forget what I want to say, then my blog will be down (okay, we switched servers so that shouldn’t happen anymore), then I’ll miss posts and get depressed that I never finished x, y or z. My mind is going constantly with house ideas, which is a good thing, but I need to reign them in. At least once a day, I start a sentence with “you know what I was thinking?…” which Mike translates as, “you know what we’re going to be buying/making/doing?” Streamline Rebecca, streamline.

While it’s good to plan ahead, keep goals and of course feel inspired, I’m keeping my goals as realistic as possible.. I’m thinking less is more right now. I’ve already started to cut back on buying things for new projects. We have a ton of things waiting to be hung, painted and installed, so I’m trying not to get ahead of myself. I’m trying to focus on one thing each weekend and actually get it done. Like, take down the shelves in the playroom and not go to Ikea for those frames I really want. I will not go to Ikea this weekend, I will not go to Ikea this weekend…

(Though I haven’t been there in 6 months and a piece of me is dying, this was my last visit with 2 month old Easton…)

ikeatrip6_x500

So as much as I wanted to write a post about how our big project this year will be x, I don’t know what that will be. I’m taking it one week at a time and trying to make what we have now work more efficiently. Whether that’s organizing our closet, building playroom storage, hanging art we already have to free up a closet, I’m not sure. I can’t pretend to be a perfect blogger with a set blogging schedule and a project line up. I’m getting there, but it has been a slow and unpredictable process.The harder I try, the more I get away from why I started this. So clean slate here, deal?

Now off to take down those damn shelves. Not revolutionary, not Pinterest worthy, but needs to be done to move on…

Nursery Closet Reveal

10 Comments

Posted by Rebecca, June 7th, 2012

I last left you with our nursery closet looking like this, after being stenciled and installing an organization system

Well, now that you know that we had a baby boy, I can share the closet all stocked with his adorable things.

We still have plenty of room to fill up with things. The top left side of the closet is sparse because that was home to his newborn sized clothes, which he is currently wearing. Since our upstairs AC broke last week, we’ve been living out of the pack & play downstairs, so all of his current clothes are in there.

I doubted the green paint for a while, but now that I see it with the bedding and the chevron curtains, I love it. The bedding is DwellStudio for Target’s Space collection, which I got on clearance and is sadly no longer available.

Right now, Easton has tons of 0-3 month and 3-6 month clothes, so those sections are stocked.

All of his pajamas, blankets and basics are in his dresser. I admit that those 2 baskets in the center tower of the closet system are currently empty. We have plenty of room to grow, so I didn’t bother decorating much there. Though we did have to include one staple that we picked up…

We’ve been debating whether or not to hang this bat somewhere or let it live on a shelf. For now, it’s just living on a shelf. Who knows where it will end up in the future. We’re still working on some wall art and I’ve been trying to devote some time to going outside to spray paint, so that we can finally hang the alphabet art I slaved over before Easton was born. Though when given the option to sleep, shower or spray paint, sleep has been winning. Where are my priorities? 🙂

Little Painted Bookcase

15 Comments

Posted by Rebecca, May 21st, 2012

Finally, a project I can show you, just not the wide angle photos 🙂 Remember that bookcase we ordered from Target a couple of weeks ago (the Carson 2-shelf bookcase)? I told you I planned to paint the back of it green, like so…

Yes I know, I am an excellent Photoshopper. I’m working on it 😉 Anyway, the bookcase arrived and it took us a while to get to the back of it, so it sat in the baby’s room like this…

I didn’t put anything on it but a fan to keep me cool while working in there because I knew it would all eventually have to be removed anyway.

The problem was that the almost cardboard-like back was absorbing the paint. The first coat of green we put on literally disappeared. Mike ended up having to use 2 coats of the Valspar high performance, low-VOC primer that we used on the unfinished wood boards on the paneled wall. After those 2 coats of primer, we were able use the same Olympic zero VOC paint we used for the closet (Lettuce Alone B68-3)… but we still did about 2-3 coats of that to get to the level of green we wanted.

Needless to say, between on our other projects and whatnot going on, this whole multiple coat process took us a while. Finally on Friday, we were able to attach the back to the bookcase!

It turned out so adorable and I wasted no time filling her up!

The top shelf holds, well, books.

And the bottom shelf holds a basket full of toys.

If only I could keep the toy collection limited to what fits in this basket. It’s already exceeded the basket and takes up a drawer in the closet, as well as an additional storage bin of older aged toys in our spare bedroom. When we realized that we haven’t even bought our child a single toy, nor did we register for any, we realized we need to start working on that playroom ASAP! Mike literally started working on the new office again yesterday so that we can have the old office for baby gear storage. Clutter is my arch nemesis.

The top shelf of the bookcase holds our adult books and that fabulous fan.

I love this fan because it’s 100% metal, even the switch to turn it on and off. It’s the Hunter Classic Table Fan from Target.

Next up is to come up with a gallery wall design to hang over this little bookcase. Off to Michael’s now to search for one part of it so hopefully I can get an idea of an arrangement today!

ps- Yes, still pregnant. 41 weeks tomorrow.

pps- Sorry if you tried to visit on Friday or Saturday and the site was down. Apparently there was a server upgrade we weren’t aware of that took for.ev.er. to fix.

Nursery Closet Organization

23 Comments

Posted by Rebecca, May 16th, 2012

During the past week or so, Mike and I have been busy chipping away at nursery projects. So busy, in fact, that we have way more to blog about than we have left to do. It’s so amazing and exciting to see the room come together and I am itching to share everything. Right now, we’ve been focusing on getting everything done before the little one is here. With each extra day we get comes a new opportunity to tackle some projects.

Right around the time Mike finished installing the giraffe sconces, the missing closet piece arrived. They sent us an entire new panel for the screw/bolt part we needed. In case you need a refresher, we bought an Allen + Roth premium wood closet system from Lowe’s.

(via Lowe’s)

We have a similar version in our master closet and love it. In our old place, we used some inexpensive Closetmaid organizers that ended up falling apart on us. Like, I literally pulled open a drawer one day and the entire front came unglued. Since then we stick to the solid wood products from Lowe’s. We can cut the shelves down to whatever size we need and customize all of the configurations.

Mike got to putting together the center tower right away. Then, being the rocket scientists we are, we had to figure out how to get the tall tower into the actual closet.

It took a few tilts and laughs, but we got it in.

By we, I mean Mike. I pretty much sat in the glider through the whole process, snapping pictures with my iPhone.

Please note the white paint all over my pajama pants. They were the victim of the spilled tray of paint while I stenciled the closet.

After we got the tower in, we went back to Lowe’s to pick up some shelves. We needed 25 inch wide shelves on each side. The shelves came in 21″, 48″ or 72″. None of those options were ideal. We literally scratched our heads in Lowe’s forever trying to figure out how we can pull this all off. Another problem was that the clothing rods Lowe’s sold were too large. We checked some of their other brands and saw some expandable rods that were 24″-36″, but they were in white. To save some money, we decided to only get one of the 72″ shelves and just do shelves over the top rod of the closet. We went to Home Depot to see if they had any chrome rods that would fit the 25″ we needed. Thankfully they did!

We got home and Mike cut 2 shelves to 25″. He installed them with some brackets, anchoring them to two walls and the tower. Just below each shelf, we put a clothing rod.

To gauge where we wanted to put the next level of rods, we grabbed one of Mike’s shirts for some scale (since baby clothes are so tiny).

Then we decided something. Since baby clothes are so small, we decided we DID want to do that second level of shelves. We knew it would look better and give us a place to put little shoes and stuff. We know for an adult a shelf might not be practical, but it can always be removed.

Back to Lowe’s Mike went for another 72″ shelf! He repeated the shelf and rod process on the lower level and we were almost done!

Next, the drawers went in… we decided to get 3. The bottom of the tower can be left as shelves, drawers, metal baskets or a shoe rack. We were going to do just 2 drawers but then decided that the closed storage is more versatile.

We went with the flat front panel, but Lowe’s also sells a more traditional, beveled drawer front. Oh and for the tower? They give you both a straight top piece and a curved one. This baffled both of us for a while because we wanted the straight piece but all of the boxes had the curved piece on the picture. We didn’t realize it came with both options, pretty clever.

We also decided to stick with the hardware that came with the drawers. Why not? We like it. Maybe down the road we’ll go for something more custom, but it’s perfectly fine with me right now.

I couldn’t back up to take better pictures because there was a lot of furniture in the way behind me (we were working on hanging curtains on the same day, so things were shifted).

I almost forgot to include a picture with the shelves in the tower! I didn’t realize that the zoomed out pictures were taken before we put them in, so here they are!

Of course, it took me about 2 minutes to run to the spare bedroom and grab all of the baby’s clothes that have been living in there since we started this. The closet was stocked about 5 minutes later 🙂 I put newborn clothes on one rod, 0-3 months on another, 3-6 months on the next rod and 6-12 months on the last rod. It’s pretty amazing to be nice and organized. In the drawers right now are smaller odds and ends, though the drawers are amazingly deep and have a nice little self closing feature. I fit an entire breast pump (still in the box) along with a bunch of accessories and a nursing cover in one of the drawers. The top shelves are home to some baskets and the tower is currently holding Boppys, a basket and some little decorative items.

The bookcase has arrived and I painted the back of it green, only to have the paint not stick at all, so Mike had to coat it with a layer of primer for me (since it wasn’t no-VOC). He finished that tonight so hopefully the next layer of green I put on actually works! I also made some chevron curtains, a bed skirt, made the crib, decorated the changing area and designed some ABC art in Photoshop. Once this baby actually comes, I can share some real after pictures!

Copyright 2010 - 2011. The Lil House That Could. All rights reserved.