How to Install Crown Molding
Posted by Rebecca, February 21st, 2012
Mike gave you an idea of our adventures in learning how to install crown molding yesterday, but I’m going to share the deets on what you SHOULD do. AKA, what we didn’t do first time around and how we learned along the way…
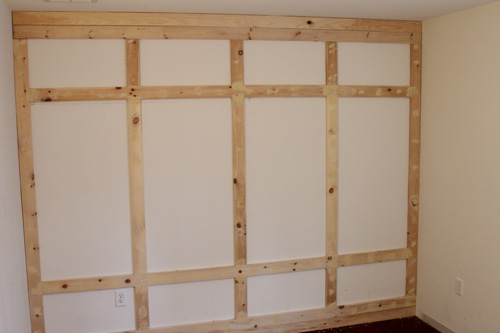
We left you with our paneled wall looking like this…
The plan was to add 4+ inch crown molding to the top that would extend all the way around the room, hence the additional 4 inch board up there. We actually struggled at first to find crown that was larger than 3 5/8″. We knew it existed because… we have it all over our house! We just wanted to match the crown we currently have and finally found it at Home Depot, in primed pine. I was okay with using MDF for the moldings because a) I wanted them to match the other moldings in the house, not because they touch or anything but because I liked them and wanted some consistency and b) there is so little molding in the room and the baby won’t be sleeping directly near it (like a crib or the paneling behind it). But, the 4 5/8″ inch crown was only available in pine at the time (we later found it in MDF), so it was a good excuse to use the solid wood stuff 🙂 But we did cheap out with some MDF baseboards.
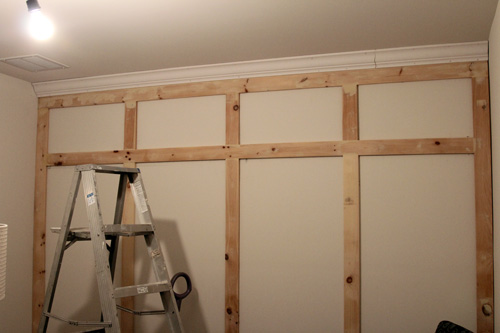
We started off simple…. we added a straight cut of crown to the top of the paneled wall…
We did the seam the same way we did our chair rail pieces– just a 45 degree cut at each end. Worked like a charm
To get the corners, we referred to this video from This Old House. In the video, they use straight cuts like ours above then an angled cut, which they cope, on just one side. To make their cuts, they angle the molding on the saw as if it was sitting against the wall and ceiling and make a 45 degree cut, like this….
(via This Old House)
Seems simple right? Well, we ran into a problem off the bat.
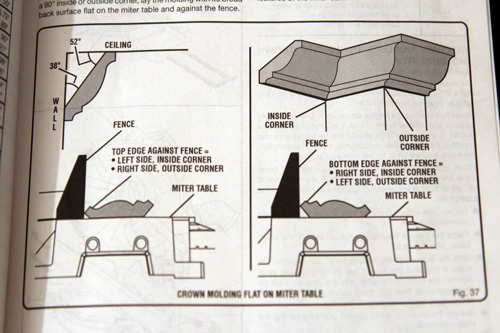
Our 4 5/8″ crown was too tall to fit under the blade of our Ryobi 10″ compound miter saw. We cursed this saw for a good hour as we took a lunch break. During our break, we figured our next plan of attack was to a) see if there was a way to make these cuts using the saw we have and b) if not, buy a $12 miter box and do it by hand. I asked Mike if we had the instruction manual to our saw and sure enough, there was a section on how to cut crown molding. Whew!
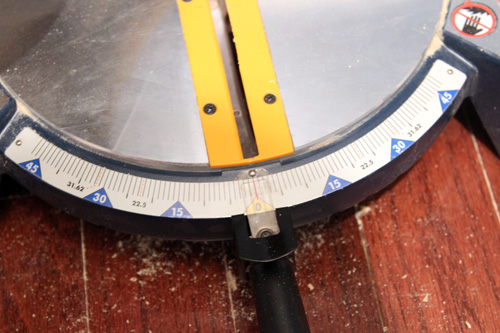
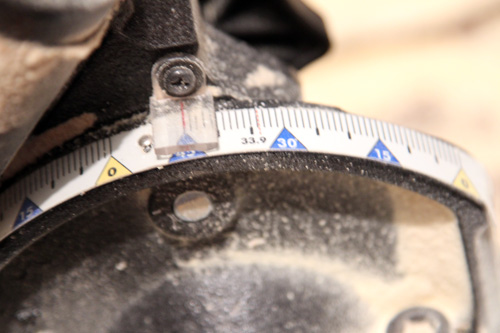
The funny thing is (there will be a lot of funny things in this story), for months Mike has been telling me that the bottom of our saw is not adjustable, despite these numbers marked on it…
The conversation went something like this:
Me- “If it doesn’t move then why are there angles marked on it?”
Mike- “I don’t know but it doesn’t move”
The instruction manual settled the score and the answer was… it moved! And that’s how you cut crown using this saw, with the molding laying flat. Mike “read” the manual and said we had to move the bottom measurement to 31.62 degrees, which is clearly marked on the saw…
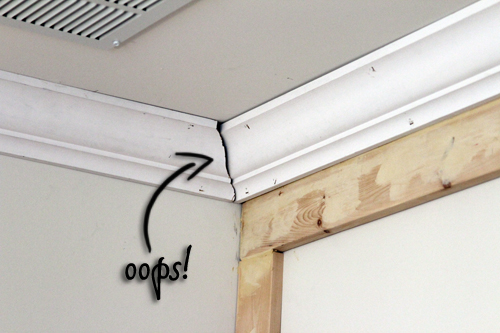
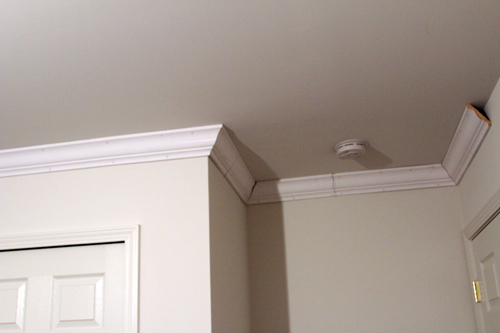
So off we went, making cuts with that one simple adjustment. Which left us with this picture Mike showed you yesterday…
We thought this messed up corner was the result of our awful coping skills, but we realized that the molding touches at the bottom, but not the top. We decided to try a new method and can the coping, so for the next corner, we cut both sides at a 45 degree angle, rather than using one straight cut with one coped 45. We got this…
Definitely not right. Our pieces were meeting at the bottom, but not the top. We knew this had to be something with how the angle of our saw was set, but we didn’t know which angle was making it not meet… the miter (bottom of saw) or the bevel (angle of the blade)? So I decided to pick up the manual for the first time and I realized that Mike missed a very important part… Okay maybe he missed the entire crown molding section and just scanned for the 31.62 measurement because I found this…
Complete with detailed instructions that explained that while the miter was set to 31.62, the bevel should be set to 33.85 and NOT 45. That was our exact problem.
We had to move our blade from the 45 that it’s set on in the picture above, to the 33.9 measurement (and just a smidge less to make it 33.85).
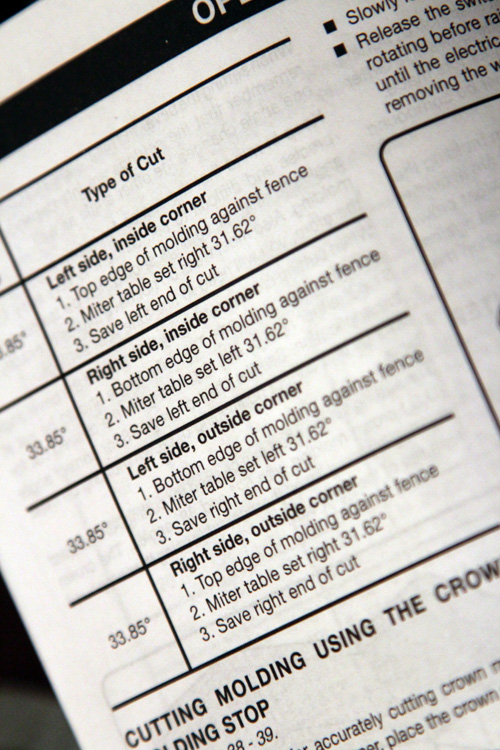
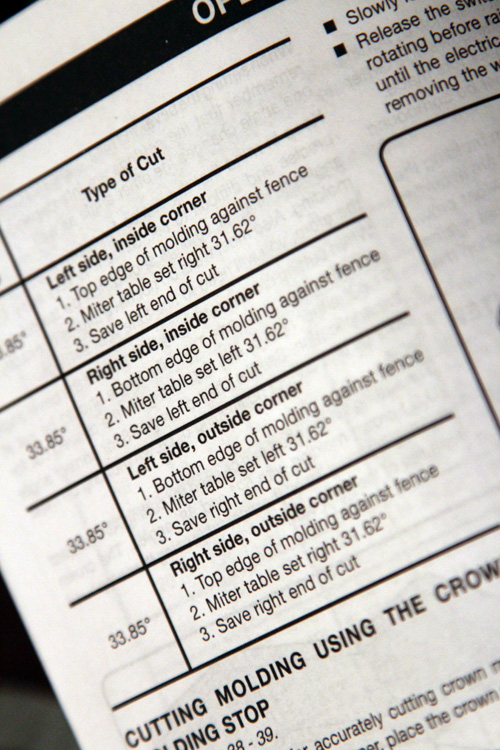
In this handy dandy instruction manual, I also found this little table which I lovingly called the bible. It saved our lives.
Yes, it tells us exactly how to get every single cut we need, which we had to think through before hand. We always play the “save the left or right?”, “molding upside down or right side up?” game when making cuts. This little table took out any guesswork and thought. We officially declared this saw that we were cursing hours before as the best saw in the whole world.
We left our other cuts, as Mike told you, assuming we would just caulk the heck out of them. We cut another corner and guess what? No match. The angles were much tighter, but still weren’t meeting as they should. Just by looking at them, we could tell that the angle was too obtuse and decided we needed to make an adjustment in the miter (bottom) measurement. Mike played with some scrap pieces, adjusting them to make them slightly smaller, but they still weren’t meeting. He asked me to go look at the saw and figure out what angle we should use (I was trying to stay out of the room with the obnoxiously loud saw to protect my poor baby’s undeveloped ears). One look at the saw and I immediately noticed something….
See where that 31.62 is? I knew it was where the red dotted line was, but I could almost guarantee that Mike was using the bolder line just above the 31.62 (which is 35). I was right. Granted, it is confusing and they should have put the 31.62 in red so that you would know that it corresponds to the red line.
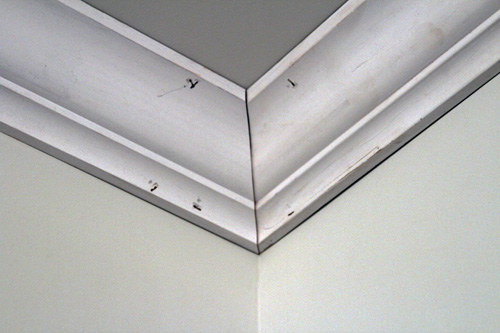
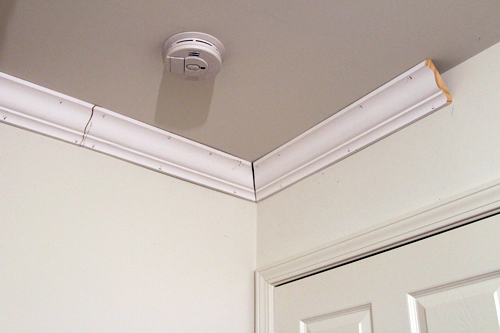
That tiny little adjustment gave us this absolutely perfect corner…
We still hit some bumps with the next 3 or so corners since our ceiling isn’t completely even, but all of the gaps are very much caulkable and nothing like what we had before!
So let’s recap for anyone who has a similar saw that doesn’t allow you to stand up your molding to make cuts…
1. Set your bevel (saw blade) to 33.85
2. Set your miter table to 31.62 (either to the right or left, depending on your cut)
3. Lay molding flat (either upside down or right side up, once again depending on your cut)
4. Follow this chart for specifics!!
With these directions, we only had to rotate the miter (bottom) angle to the left or right and kept the blade set at the same 33.85 the entire time. I should also mention that the left and right in the chart above are the angles when you are looking at the corner.
We also decided to make small cuts for the corners and cut both sides of a corner at the same time. That way, we could wiggle both pieces simultaneously to get the best fit and not have to worry about whether the other end of a piece matches its corner. That is why this wall looks so choppy…
All we have left are the two long runs (about 8 feet each) that meet up with the paneled wall, which should take us no time. We planned to finsh them up tonight, but unfortunately Macky had his first seizure since starting his meds around 3pm today. He’s been a little clingy and jumpy, so we didn’t want to break out the compresser, nail gun and saw tonight. The vet told us not to worry and to just keep an eye on him for a change in behavior, so we wanted to be able to judge that as best we could by keeping his environment normal.
With the last two pieces come our second attempt at coping… yikes…Had we known at the beginning that we could angle that initial piece on the paneled wall we would have. We’ll add it to the list of lessons learned, but at least we broke the crown molding ice around here.


