Posts Tagged ‘light fixture’

A Little Bit Of Whimsy

1 Comment

Posted by Rebecca, February 12th, 2013

The last time you saw the playroom, it was looking like this…

IMG_9687_x500

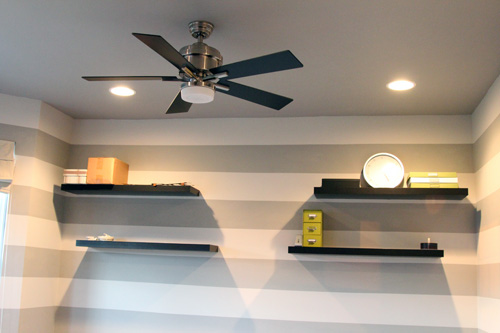
This weekend, we finally got around to taking down the floating shelves.  While we loved them for an office, we didn’t think they were too practical for a playroom.  So down they went; they’ll probably reappear somewhere else in the house.  We also took down the ceiling fan which will end up in the new office upstairs.

IMG_6920_x500

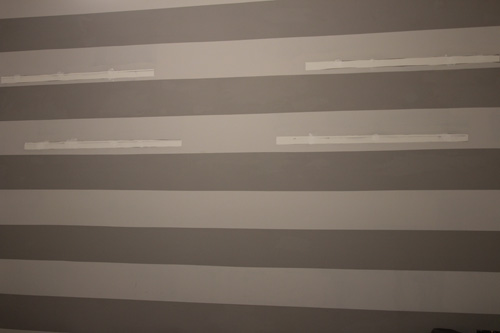
The bracket holes were spackled and sanded once and need to be sanded again. We originally painted around the shelves, so we now have a slightly raised edging.  We’ll have to spackle and sand, and then spackle and sand a couple times to get everything flush again.

I apologize in advance for all of these pictures I took at night (like an hour ago).  Our camera settings were all wacky from the last time we used it and I couldn’t get the lighting to look right at night. Oops.

So what did we replace the ceiling fan with?  Well, a long time ago we picked up a light at Ikea. We had always knew we wanted to use it in the playroom, but never got around to installing it…until now!

ikea

(via Ikea)

We wanted something fun in the playroom, but nothing that screamed childish.  We found Ikea’s Fillsta, a playful hanging light for $29.99.  It was simple, had some shape and was cheap.  Perfect.

But much like any Ikea product, the install resulted in some head scratching.  And Mike dropping the f-bomb just a handful of times.  For anyone landing on our lil blog scratching their own heads trying to get the Ikea Fillsta installed, here’s the trick: cut the extra slack from the hanging cord to the length you need.

base

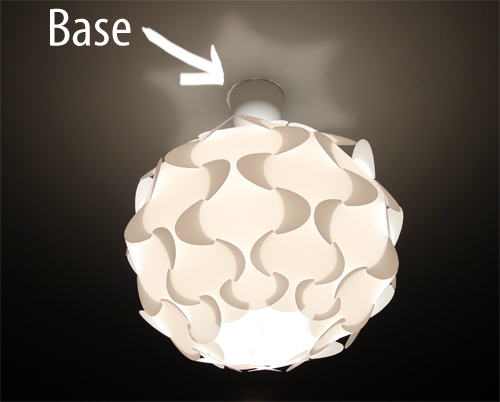
The dome base is actually held in place by tension in the cord.  So the tighter the cord inside the base, the tighter it will fit against the ceiling.  With most other light fixtures, these components typically slide or screw into place.  Nope, not with the Fillsta.  Mike originally rolled up the extra cord and stuffed it into the base.  Then he tried a bunch of zip-ties.  Finally after a couple milkshakes and a solid nap, Mike decided to just cut the cord down to the size we required.  Sure enough, it worked.  Now we just have to touch up the paint around it (though I love the white light against the dark ceiling!)

 off

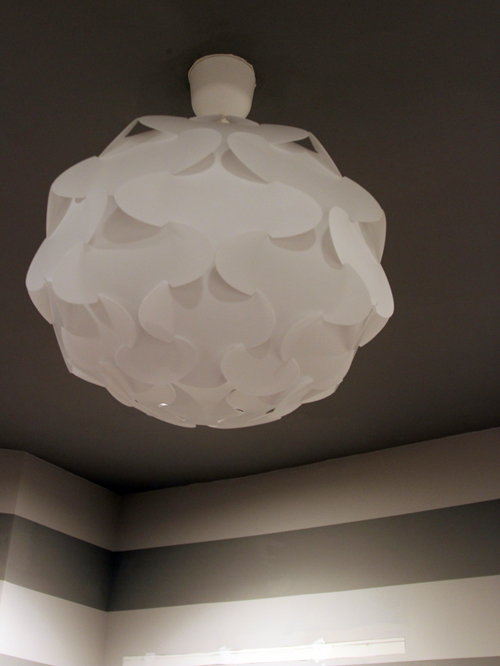
Here is the Fillsta with the light off.

on

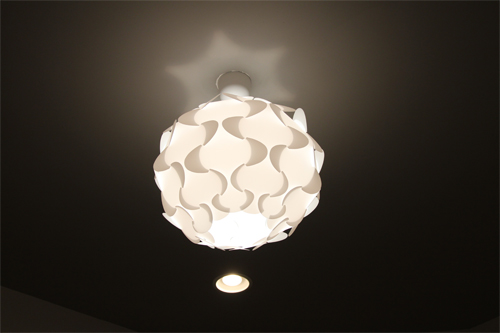
And here is with the light on. Glowing! I love the little bit of whimsy it adds to the room, which the direction I’m sort of going in here. Clean and modern, yet fun! We’ll have to get a better room shot once we finish some other items in the room. What other items you ask?

blinds

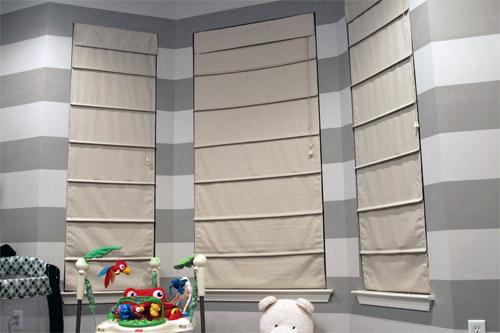
These roman shades. We were originally going to dye them when the room was an office. We were even going to dye them when we switched it over to the playroom. But after doing some Googling, we’re not quite sure how to get the color we really want (so, um, anyone have any experience dying blinds? Using fabric spray paint?).  We’re thinking we just might replace them with the white version.  Any suggestions?

Lighting Up the Nursery

7 Comments

Posted by Rebecca, March 15th, 2012

When our house was being built, we opted for just some ceiling fan pre-wires in all of the upstairs rooms. Any additional lighting was ridiculously up priced and we figured if we wanted to eventually do recessed lights upstairs, we had access to our attic. Fast forward 2 years (ah, it will be 2 years since we closed in just 2 weeks!) and we’re now ready to use a spare bedroom as a nursery. And this is our light fixture….

I wanted a clean, modern light fixture in here. I’ve expressed my love for drum pendants before, but somehow I have not put a single one in our house yet! I figured I’d start with the nursery, especially since our first nursery purchase were some Jonathan Adler giraffe sconces which come with white shades.

(via Macys)

I have a gift card to the Land of Nod and I remembered that they had some affordable pendants, the Hangin’ Around Lamp.

(via Land of Nod)

The pendant comes in a variety of colors, including white, gray, brown, hot pink, lime green, navy and orange. So many of those would work in our room. After thinking about it a little, I decided white would be best. Then I decided that $99 (even with a gift card) was too much to spend for a plain white light. Back to the drawing board it was! And by drawing board, I mean google…

I googled a bit and then discovered this…

It’s a 15″ white drum pendant lamp on sale at Target for $23.99… and it comes with a lightbulb. Perfect size, nice, cheap and I got free shipping and 10% for using my Target card. Needless to say, it took me about 20 seconds to click the buy button. Unfortunately, this was over a week ago and it’s no longer available for me to link for you guys 🙁

Tonight we finally got around to hanging it. I would post a how to install lighting, but I was holding the light most of the time and Mike said it’s simple enough… screw in your metal bracket, cut the wire of the fixture to your desired length with pliers, strip the wires, match the colored wires of your fixture to the colored wires coming out of your ceiling, twist ’em together, tape them with electrical tape, screw cap on and I think that was it? I couldn’t see beyond the giant shade I was holding. Plus my calves kept getting cramps from keeping my balance. Standing is hard when you’re super pregnant…

Here are some night time pictures of our new friend.


It looks so nice and classy against the paneled wall.

And the sky blue ceiling.

One downside to the inexpensive option is that it does not come with a diffuser. The lightbulb is extremely bright and an eyesore (in multiple ways). I started googling around for solutions and I think we’ll try a silver tipped light bulb first. The bulb hangs low and I’m a little nervous to put any sort of material on the bottom of the shade. Though I found this Apartment Therapy post which says that a CFL lightbulb emits much less heat than a standard bulb, so creating a diffuser shouldn’t be a problem. We’ll probably try picking up a different bulb first.

I am dedicating this weekend to finishing up the paint job in the nursery. I just saw that we installed the paneled wall back in the beginning of February and March has been super busy for us. I am looking forward to having a full weekend to put into the room, especially since I need to take multiple breaks (and naps!) while working on projects these days. I have to accept that what I used to be able to do in 2 hours now takes me 4 and plan ahead for that additional time. Wish me luck 🙂

Copyright 2010 - 2011. The Lil House That Could. All rights reserved.