Posts Tagged ‘Lowe’s’

Playroom Under Construction

12 Comments

Posted by Rebecca, November 27th, 2012

Has it seriously been 2 months since we started looking for a playroom carpet? We didn’t plan on waiting this long (we wanted it done for Thanksgiving), but some things happened and we ended up ordering it much later than planned. But the moral of the story is… we ordered a playroom carpet!!

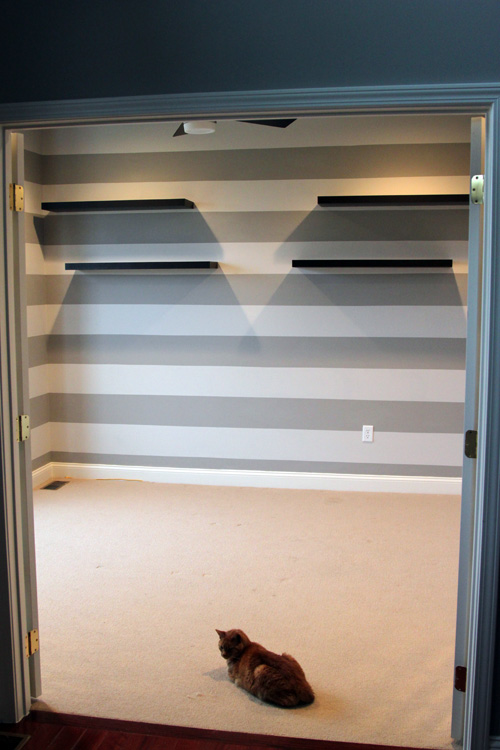
Need a refresher? The playroom is actually our former office that is downstairs with the striped walls and french doors.

Thanks to that little cat, who ironically photobombed this picture, we have to completely scrap this carpet. Darwin was diagnosed with kidney cancer last year and had a few very, very rough months that included… peeing on our carpets. We tore up the family room carpet this spring and now it’s time for this one to go.

(For those of you wanting a Darwin update, he is doing amazing. He was the first cat with renal lymphoma that his oncologist has ever treated to live past 6 months. It’s just an awful form of cancer for cats that essentially causes kidney failure even if chemo is suppressing the cancer. Darwin beat the odds and has since made it to a year post-diagnosis. Though he does suffer from some loss of kidney function, cats can actually live normal lives with something ridiculous like 75% of their kidney function lost. He has been off chemo for almost a year now!)

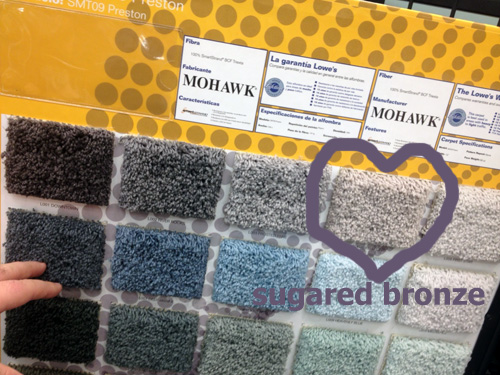
A few weeks ago I discovered Mohawk’s SmartStrand carpet, which is eco-friendly and you can clean it with just soap and water. We looked around some major retailers, but we didn’t see anything that you could clean with just soap and water. So after being frustrated that Easton had no where to roll free (though he has carpet in his room), we realized that we really need to choose something. I am generally a pretty decisive person, so we headed to Lowe’s all set to choose something. And choose we did.

So we trekked up to the salesperson, with this board and baby in hand and were like, “okay, we’ll take it”. That guy made the easiest commission ever. We wanted Lowe’s to install it (what the heck do we know about stapling carpets??), but we didn’t know that regardless of if we had the measurements on hand, they still had to send someone out fo measure. Whaaamp whaamp. So they wrote down what carpet we wanted and took our information. Then we had to wait to hear from the installer.

He called us within a day or so and scheduled a measurement for a few days away. He came, confirmed our measurements and called them into Lowe’s. Lowe’s then called us and told us the price and that we just had to come in to pay, yay! Except they lied. Mike got there and they needed all of the carpet information again, which is how I have the above picture. Since I was carrying Easton and whatnot, I trusted that Lowe’s was recording what I was choosing and didn’t take any pictures the day we selected it. Thankfully my memory is ridiculous and I remembered the style name, so I asked Mike to send a picture of the board because I knew the position of the color we wanted.

So we went with the SmartStrand Preston in Sugared Bronze with the recommended carpet pad. Using the SmartStrand pad protects the warranty and was seriously something like 10 cents more a square foot. Our room is incredibly small so it was something like $15 for the better pad. Sold!

Here is where I would normally give you pictures of the carpet I found while googling… but I can’t find any. My google-age (new word) has led me to believe that the big box stores like Lowe’s and Home Depot carry their own lines of SmartStrand carpet. Quite like mattresses, this makes it impossible to compare across retailers. So I’m guessing that my Preston is someone else’s Harrison and someone else’s Mason. My sugared bronze is someone elses shimmer metallic brown. It has to be in limited availability to have no history on the internet. Bizarre.

Anyway, we really just guessed what color would look best. We knew the paint color of the stripes in the new playroom has a tinge of brown to it. A bluish gray wouldn’t go as well as one with more of a taupe undertone. From there we just picked a mid-tone color that wasn’t too dark or too light.

As for the style of the carpet, we petted the larger samples to see how each one would feel on little knees. Then we compared prices and weighed the pros and cons. For example, our room is between 100-150 square feet, so we knew if the prices differed by a small amount, we would just go with the nicer one. A 20 cent price difference wasn’t making a big dent in the budget if it meant we were getting a more dense carpet. Using that method, we went with a mid-range carpet that was the best in it’s group. So it’s like the upper middle class of carpets.

We were told that the carpet would take only 2-3 weeks to come in, since the room is so small and the manufacturer should have enough on hand. We ordered it about a week and a half ago, so we’re hoping to hear from the installer soon. We were told that the whole room would take them less than an hour to do. I can’t wait 🙂

ps- Am I the only one that manages to kill an entire sleeve of crackers each time I open one? One blog post = a sleeve of saltines gone. Whoops.

A Picture Is Worth 1,000 Words

29 Comments

Posted by Rebecca, August 1st, 2011

It has been another week of ups and downs here at the lil household. We learned that Darwin’s kidneys are physically healthy after just one week of chemo- an absolute miracle in itself. Then about 20 minutes after that we learned that while cancer free, his kidneys are still only functioning at less than 20%. This meant that we now had to give him 100ml of fluids TWICE a day in hopes that it would somehow kick start his kidneys. While I hate having to poke him with a needle twice a day and make him stay still, it is done out of an insane amount of love between all of us. Our family would be incomplete without D, so we’ve turned fluid time into Powerade (because the fluids give him electrolytes and magic powers :)) and snuggle time. The past few days, D has caught on and has taken advantage of the one on one time to snuggle into my chest and put his head below my chin. I have taken advantage of this time to be thankful that I have another day with my family intact. None of us are going down without a vicious fight, and fight we’ve had to. 

After finally settling into a routine, D caught a cold this week. Poor guy started sneezing on Wednesday, which was followed by watery eyes, a warm head and a stuffy nose. The vet called in some anti-viral treats for him, which seem to be working. My fear is that this little cold will prevent his kidneys from improving and he won’t be able to receive the chemo drug on his treatment plan this week. Fingers crossed as we go back to the vet tomorrow!

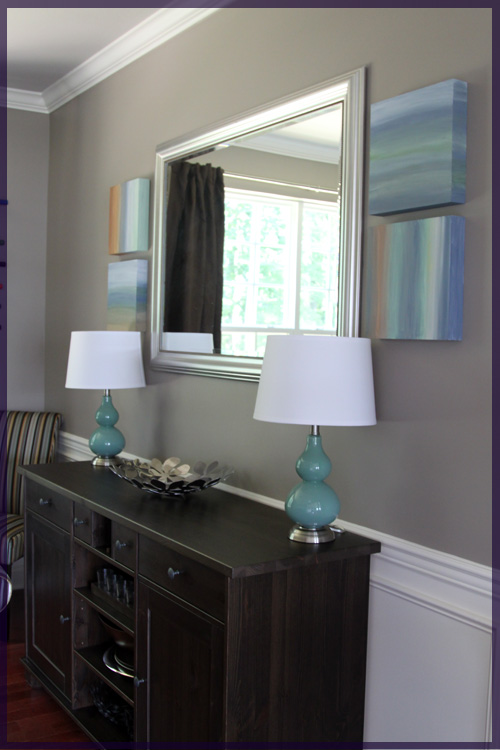
In the middle of all of this, I finally finished my summer classes and I was faced with my first free Saturday in… months? years? Not sure. I had purchased 4 canvases a few weeks back at Michael’s and decided to put them in our dining room (as mapped out in this post), with some sort of abstract landscapes painted on them. With the Pinterest Challenge from Sherry (YoungHouseLove.com), Katie (BowerPowerBlog.com), Emily (StyleByEmilyHenderson.com) and Lana (JoeyandLana.com) looming, I knew I could use some more therapeutic painting time!

I haven’t painted anything in at least 4 years. I have always been interested in art and even took some courses in college, but after I graduated I painted some canvases that other people requested and I just never felt that sense of pride from them. I think I needed to make my own little creation, on my own time, since well, I am my own worst critic and hate feeling like I gave someone a painting that wasn’t my best work. To get past my previous lack of pride, I bought these pre-gessoed, solid wood squares to paint on. I’ve never preferred canvas, but since that’s what the common painting surface is, I always just went with it. I hate the bumpiness of a canvas, so while more expensive, (about $14 at Michael’s) I thought these would work better for me!

I used all craft paint that I have accumulated from various other projects throughout the years. I used a paper plate for my paint and some random styrofoam bowl I found in the pantry for my water. My Russian Intro to Painting teacher would die.

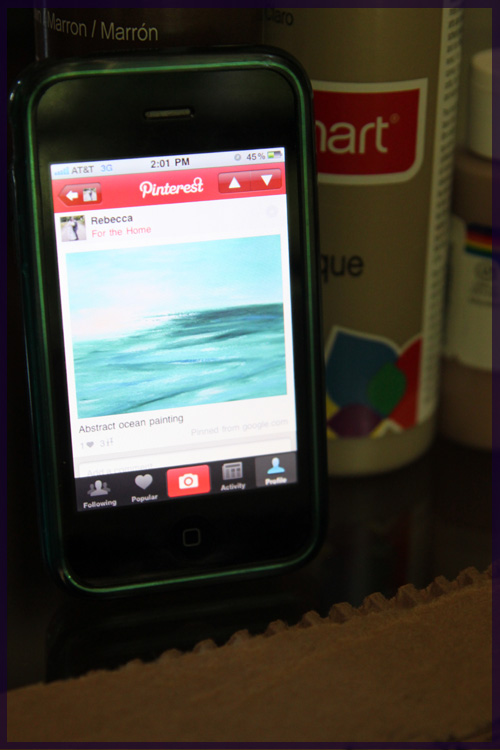
I was also armed with my (p)inspiration!

I pinned several landscape type of paintings for inspiration…

While this one was my favorite, I really just planned to wing the whole process.

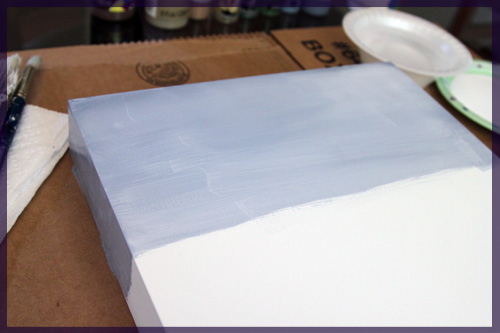
I started to casually add some paint to the first board, and this is the first and only in-progress picture since I was kinda busy figuring out what to make after this 🙂

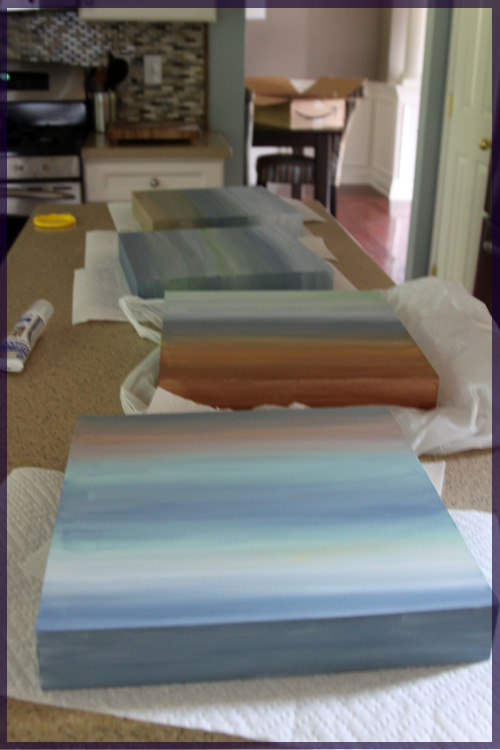
I wanted to make four clearly related, but different paintings. I really just started painting and trying things, then repainting the ones I didn’t like/didn’t mesh with the others. Finally, after painting probably six of these (since I completely re-did 2 of them), I had my finished products drying on the island 🙂

Some of the craft paints I used were metallic, which made a nice sparkly finish on some of the paintings (yes that is a cat food can cover in the background, we’ve been feeding Darwin on demand so he must have been awake and looking for food in the midst of my photo shoot :))

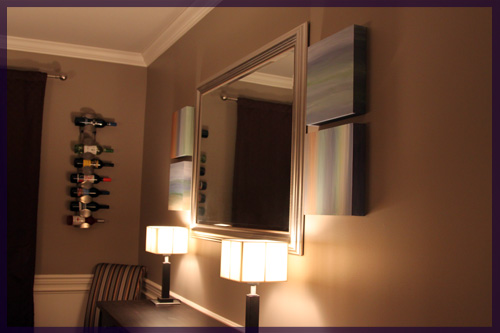
These things dried pretty quickly and I was anxious to hang them, but we had no nails! So we made a trip to Lowe’s and on Saturday night, paintings were hung!

I likes, but there was one obvious problem.

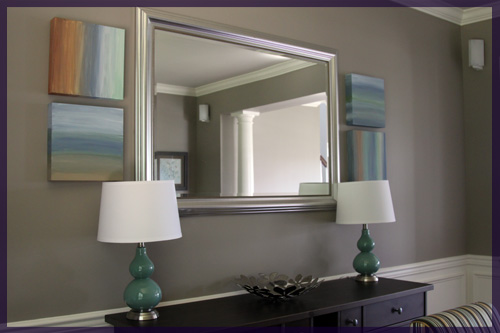
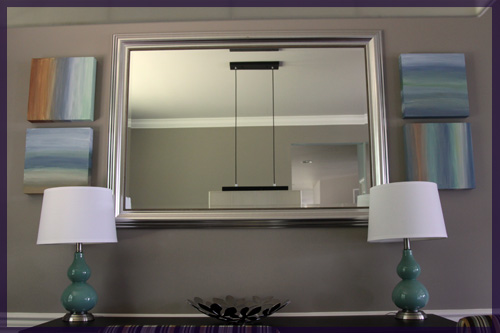
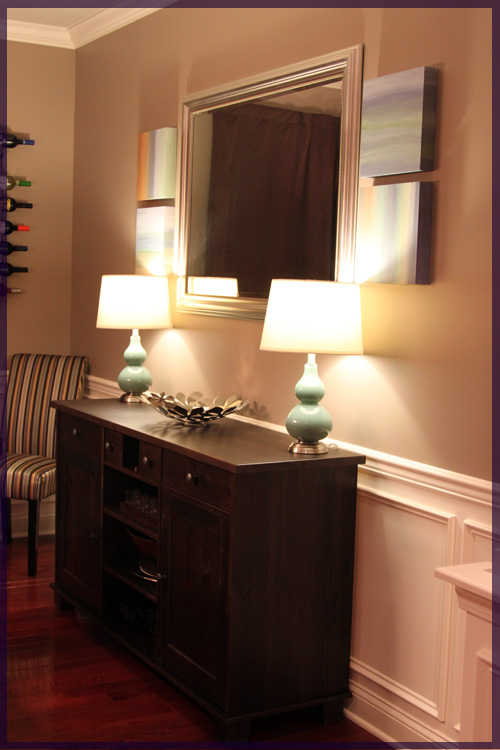
Meh lamps. Square paintings + square mirror + square lamps = Meh. Plus the height of the lamps has been irking me since they fall right at the line of the mirror, making the whole scene very uninteresting. Knowing the lamps wouldn’t work with the paintings, we found some new ones while at Lowe’s (after checking HomeGoods with no luck)
I found exactly what I wanted: blue base, round shape, crisp white lampshade. Now my paintings fit in 🙂

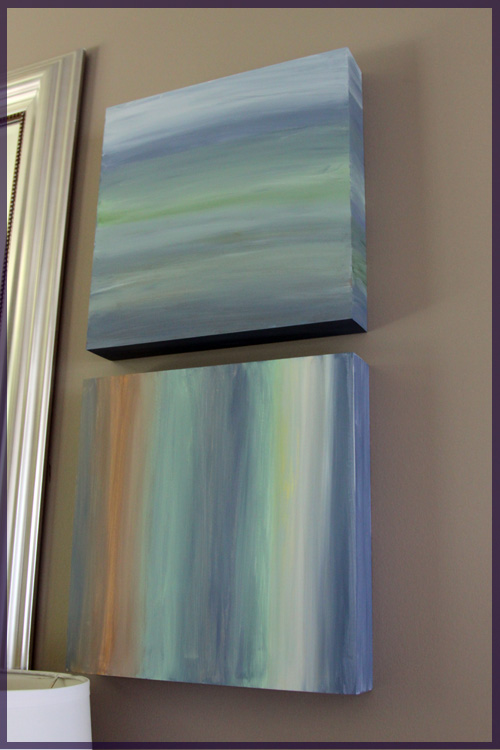
I think the top painting below is my favorite. It’s my oopsy painting that used to be a mountain with clouds, but got painted over. Somehow I ended up loving it 🙂 I love the bottom one for the tint of yellow I added as a little opportunity to add some yellow to the dining/living room down the line. I also used a smaller brush and stripey method on this one.

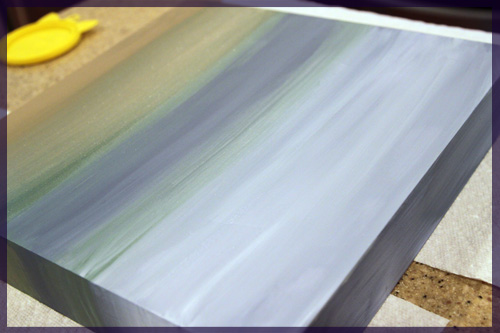
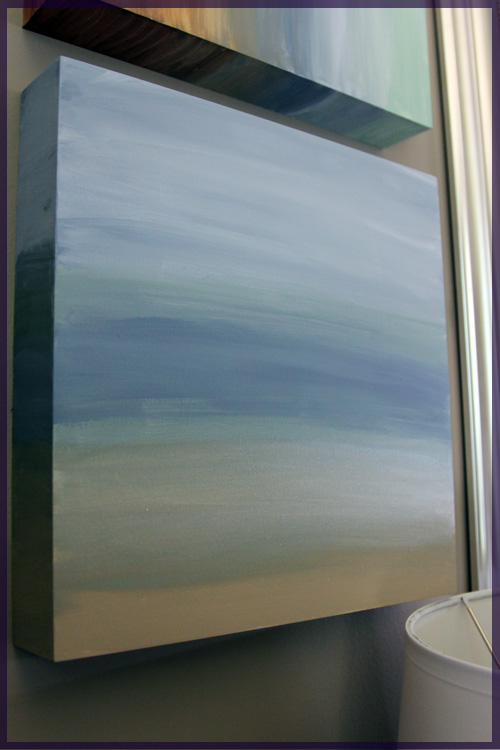
I love this one below because a) it was the first one I did, b) then it was the worst one for a while, c) I saved it by re-doing it and d) it has sparkly sand!

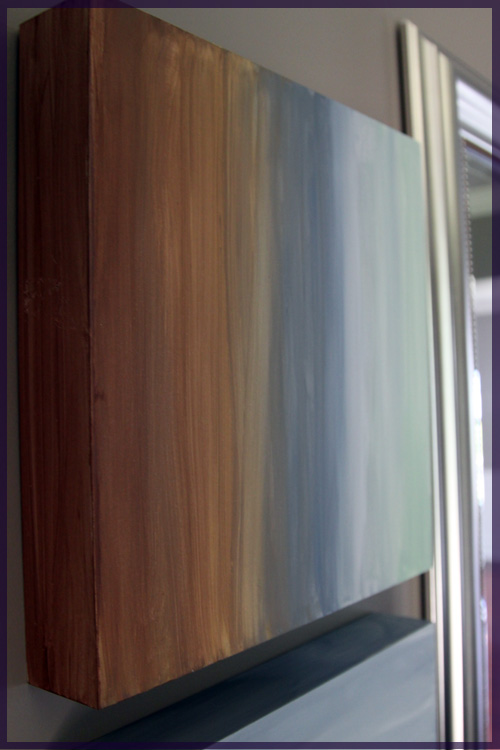
And this guy is a little streaky sideways one with some more yellow in it, almost looks like Arizona or something?

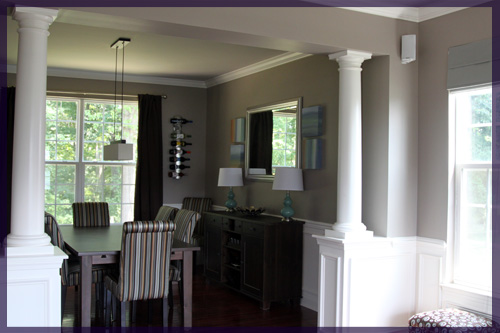
The lamps and paintings add some much needed color and interest to the dining room, though they are going to take some getting used to. I worried that it looked beach themed, which was not at all my intention, but Mike assured me it still looked classy.

Lamp height? Way better!

Now we need to change out our dining room light for a round, white, drum pendant. We didn’t expect to find lamps so quickly so we’re not in much of a rush on that one.

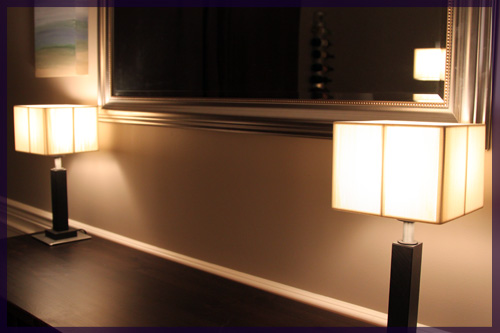
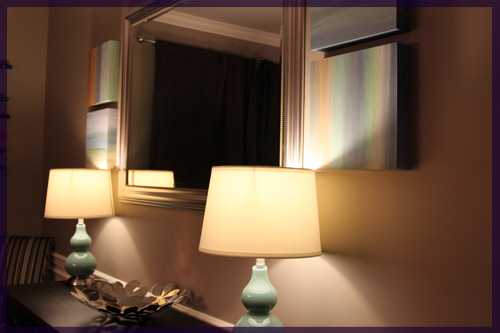
And of course, I had to take pictures of the new lamps at night 🙂

I felt good to have a brush (that wasn’t meant for walls) in my hand again. It was a very much needed break from the norm. We had a trip to Florida planned for next week, but we decided to cancel it to be home with Darwin. Now at least I have a little bit of the beachy tropics right at home, even if it was sort of unintentional 🙂

Adios Christmas in July

7 Comments

Posted by Rebecca, July 6th, 2011

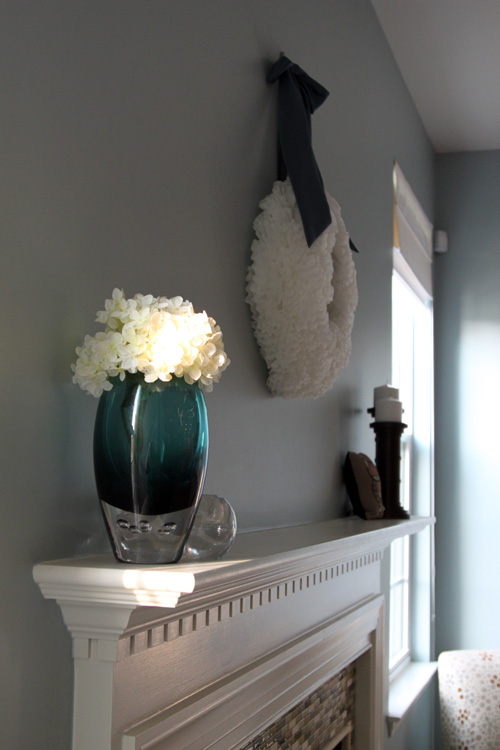
Confession: Remember that coffee filter wreath I made back in December? Well as of today, it was still hanging above my mantel…

It wasn’t still there because I’m one of those lazy people who leave Christmas around for months, since all of the Christmas stuff was packed away the first week in January. We just didn’t have anything to hang above the fireplace and I figured why not keep it around! Plenty of people use their coffee filter wreaths year round and I thought it made a decent placeholder. But I was getting sick of looking at it’s awkward, disproportionate-ness.
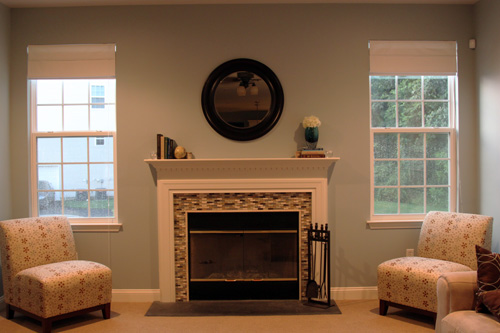
This area remained naked because of our constant flip-flopping on what to put up there. First I planned to reuse a rectangular mirror from our condo, but when we held it up over the mantel, it didn’t look right. Too small, too square, just not right. At that point we considering adding a round mirror but we thought since we have a ceiling fan in the family room, maybe a mirror wasn’t the right choice. Even though we have a pretty ceiling fan (if one exists), we didn’t necessarily want to see it’s reflection.

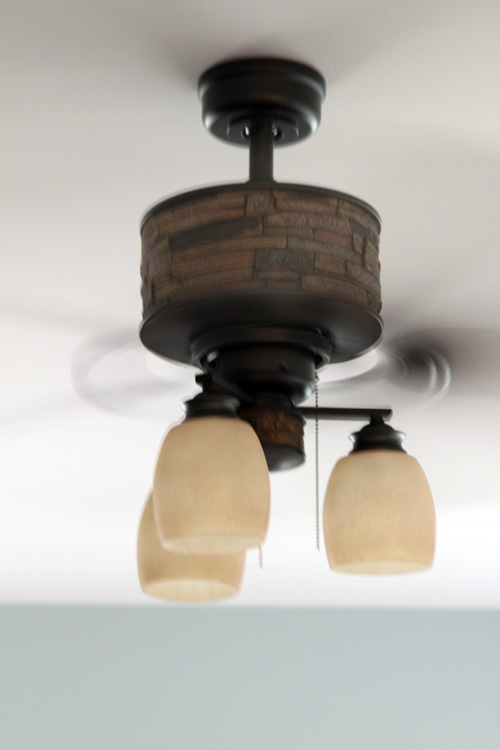
By the way, that fan has never made it to this blog. We got it on eBay for less than $100 and all proceeds went to a children’s charity. Pretty cool right?

Anyway, at that point we decided to hang some pictures from our Hawaiian honeymoon over the mantel. We just never got around to choosing 4 to hang, then we decided to do an entire entryway gallery and thought we might be overkilling the photo arrangments in the house. Back to square one it was!

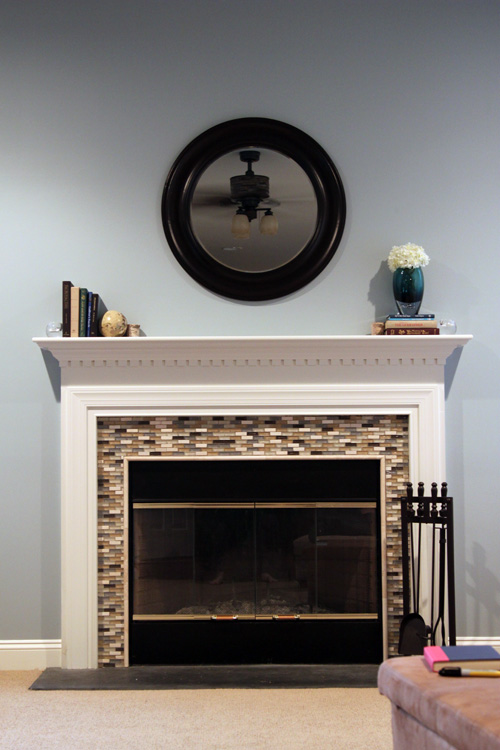
While searching for an entryway mirror, we stumbled upon a large, dark, round, chunky mirror at Lowe’s that I loved. Problem was that it was too big for the entryway. I was fortunate enough to find a smaller, yet similar mirror at Target for the entryway, but I decided I wanted the Lowe’s one too. For over the mantel 🙂

We picked it up a few weeks ago and never got around to hanging it. Tonight was extremely stormy and we decided to take advantage of the rainy evening.

When we opened the box, the mirror had a few little blemishes.

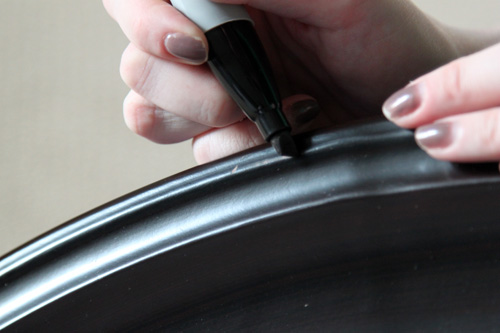
We could have marched back to Lowe’s and demanded a new one, but that would have required time and energy. Plus, those little marks were nothing a Sharpie couldn’t fix!

We took turns filling in and wiping excess marker while it was still wet. We’re all about gender equality 🙂

Meanwhile, Macky looked on and admired his mug in our new mirror.

This one is his bridal portrait, because it makes his neck look skinny…He needs a veil.

The command strip we used to hang the wreath peeled the drywall off the wall. I have honestly never removed one of those things without issues. I wanted to hang the new mirror on the low end and we were worried that the spot would show. Thankfully, we could cover it and still hang the mirror where I wanted it.

I love the way it worked out, now we just need to hang those curtains we bought 6 months ago

(the coloring in this picture is yellowy due to the setting sun and the recessed lights on in the room :()

I even purposely took a picture where you can see the fan’s reflection, which was only when I was sitting on the floor. Most of the time you see the kitchen cabinets.

Not a single imperfection can be seen 🙂

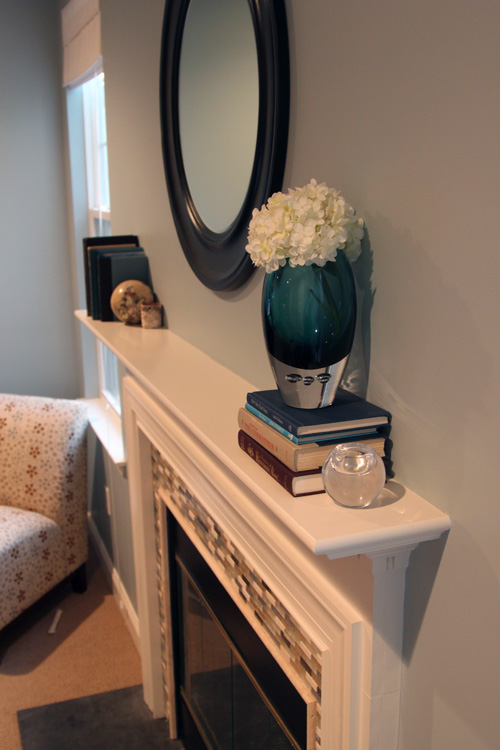
While I was futzing around with the mirror, I figured I’d put some accessories on the mantel. Sadly, I never really “styled” anything on our entertainment center or mantel. I’ve slowly been accumulating things and just sticking them wherever. The books, well, Mike was supposed to post about them a while ago, but we bought most of them for $1 off of Amazon. They’re used hardcover books with the jackets removed. These were totally Mike’s idea since he liked the way Crate & Barrel staged our entertainment center in the store and he wanted to create it himself. He’s a keeper. I moved some books and other things from the entertainment center to the mantel.

Note to self: Remove sticker from back of that book.

I thought I had a lot of accessories, but I apparently don’t since now my entertainment center is nakey. I asked Mike to order some more used books to replenish my stash. Maybe now I can get him to write that post on decorating with books? 🙂

Fiery

7 Comments

Posted by Rebecca, June 7th, 2011

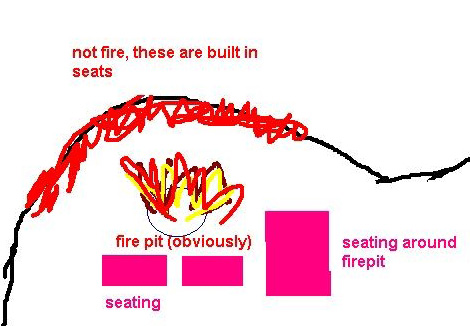
During one of our trips to Lowe’s this weekend, we picked up a fire pit. We’ve always wanted one, as evidenced in this early sketch done by Mike…

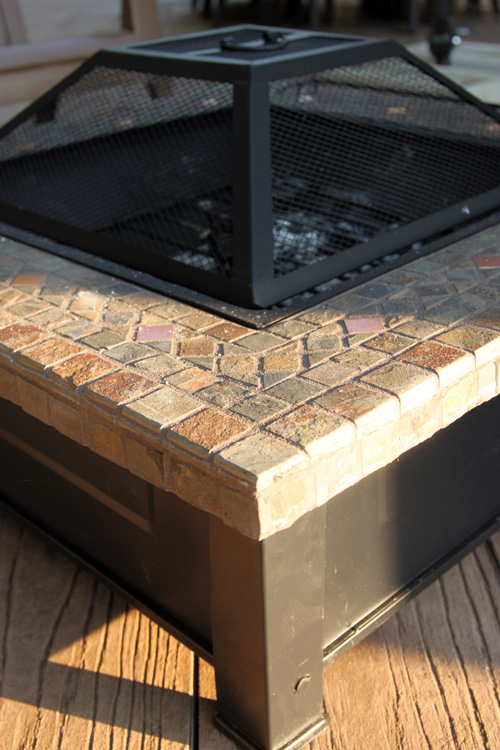
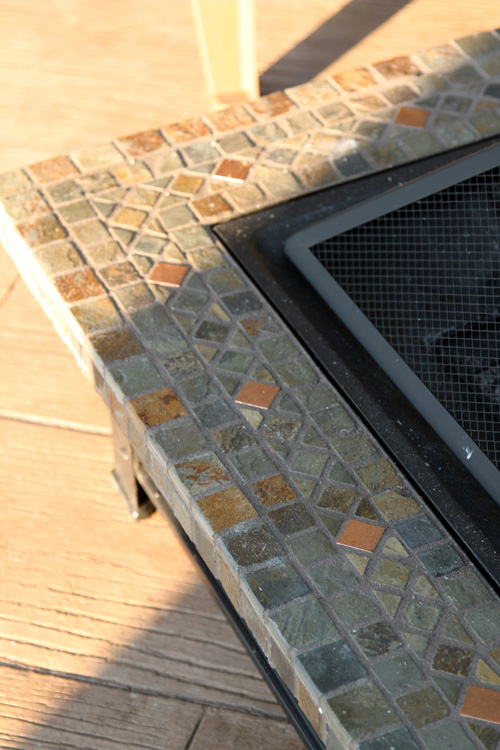
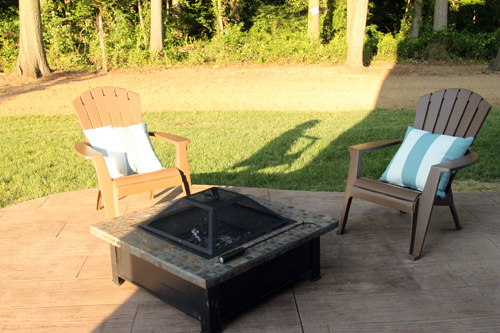
We didn’t want to do a built in fire pit, because we’ve never had one before and wanted to see how often we’d use it before committing to something permanent. Plus I think we like the idea of moving it out of the way if we need the area for more tables or something. So, we decided not to be picky and just go with a fire pit from Target, Lowe’s, etc. Normally I know every single type of whatever I’m looking to buy that exists. I pretty much memorize inventory just to make sure I find the perfect (insert house item here). But in the fire pit category, I was just going for something classy and modern that wouldn’t break the bank. When we spotted a square fire pit with a mosaic tile surround, I couldn’t say no.

They didn’t have one of these on display, so we purchased it based on the image on the box. I liked the raised panel look on the sides and I thought the base was brown. Turns out it’s black, which I was totally disappointed in, but we decided to keep it as a) the box was 95 lbs and b) Mike assured me if I hated it I could spray paint it with high heat spray paint meant for barbeque grills. Once it was all together and in place, it didn’t bother me so much, though its style is a little more predictable than I thought it would be.

Once everything comes together and we fully furnish, landscape and accessorize this space over time, I am sure this fire pit will fit in just nicely.

Mike hates those plastic adirondack chairs. With each passing day, I think he hates them more. They’re a temporary solution since we blew our furniture budget on our Pottery Barn table and chairs.  We would love a couch, since Mike and I are incredibly lame and like to sit next to each other, plus 2 chairs to round out the area. Mike thinks it would be awesome to build a curved piece of furniture somehow. I agree, I just have no clue how to tackle that one. I’ll have to consult Ana White 🙂

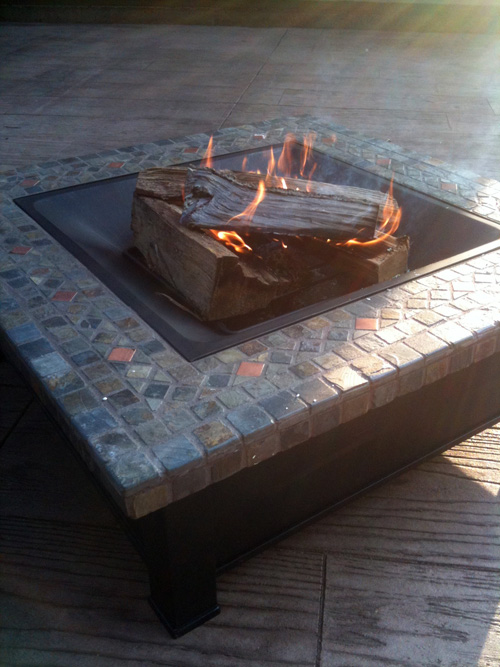
We wasted no time putting our fresh outta the box fire pit to good use (the following pictures were taken with my iPhone)

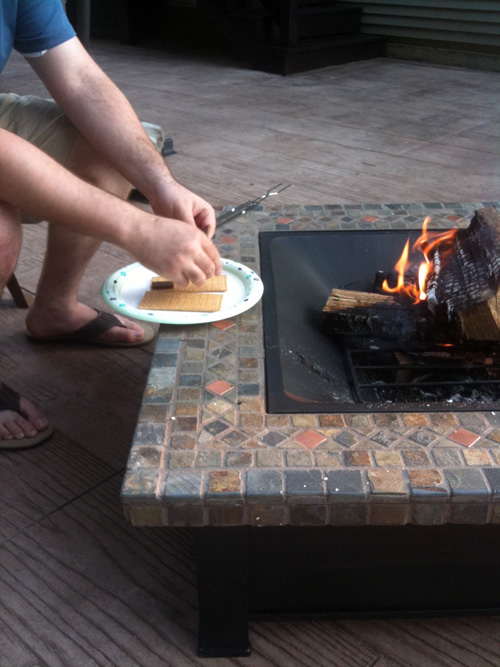
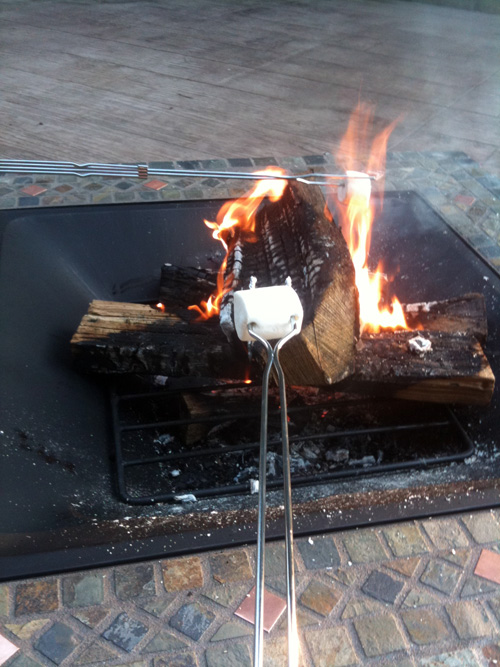
Confession: I have never made s’mores that didn’t come out of a microwave. I am no longer a rookie 🙂

We went to Target for some random things on Sunday and just out of pure luck walked by a s’mores display. It was the perfect setup for us rookies. I think we snatched up one of everything. The edge of the fire pit had the unexpected perk of acting as a tabletop and is a great area for phones when there’s no fire going.

These extendable forks were key. I think they were $7.99 for a set of 4. Another confession: I am the exact opposite of a pyromaniac. Fire terrifies me. I jumped out of fear that the fire was attacking me about 39 times, so the extendable forks allowed me to sit as far away as humanely possible while I toasted my ‘mallow.

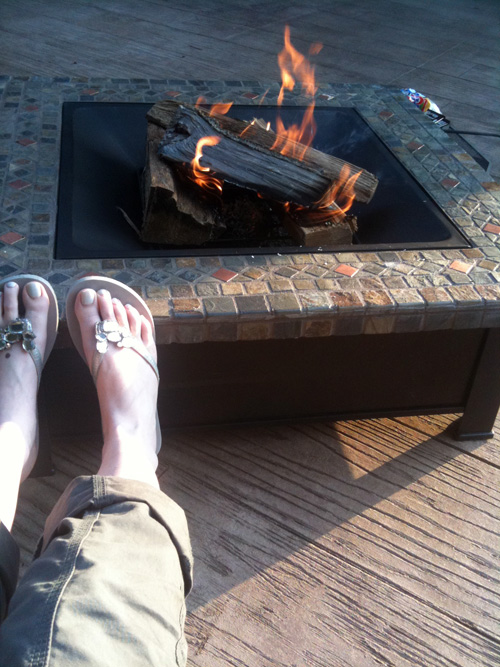
Eventually, I gathered enough courage to toast my feet as the sun set and it got chilly.

I took some night pictures, but there isn’t much to see besides a fire. Mike thought of building some sort of wooden top for the fire pit when it’s not in use so that it looks/functions more like a table. Can you tell we’re itching to build something? 🙂 I think it’s a great idea to best use the space as a fire pit/coffee table area!

Some Molding Love

6 Comments

Posted by Michael, March 21st, 2011

Rebecca and I have always loved molding in a home. Whether it was crown molding, large baseboard molding or bead-board wainscoting, we were in love with it. For me, there was something about the clean lines it presented and the overall framing of the room. It is a great finishing touch that can ultimately transform a room.

We always talked about doing our own molding, but it was something we were scared to do ourselves. How do we do the corners, how do we make the cuts, will I cut my hand off using the power saw — all scary questions that ran through my head. We previously had a friend of the family install some molding in our formal living room.  Our plan was to eventually bring the molding into our foyer area, up the stairs, and the upstairs hallway.

So when I told Rebecca earlier in the week that I had an itch to do a chair rail, she kind of shrugged me off thinking it was just another molding conversation that would soon pass.

But when we woke up Saturday morning, we began passing along ideas to accomplish during the day since we both felt somewhat motivated.  Rebecca mentioned hanging some curtains and I mentioned the chair rail.  We decided to start with the upstairs hallway since it would be the easiest in terms of straight cuts and easy angles.  We made some measurements and a couple minutes later, we were on our way to Lowe’s to pick up some molding.

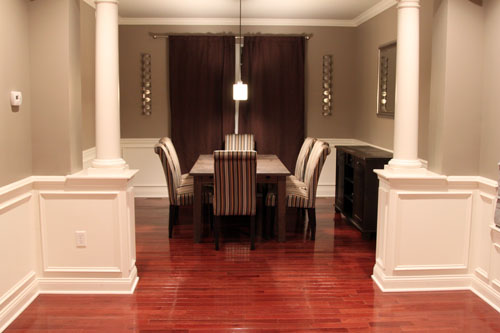
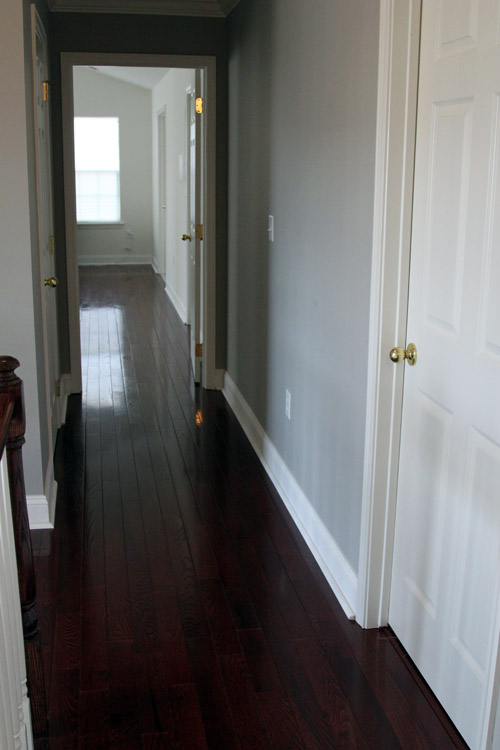
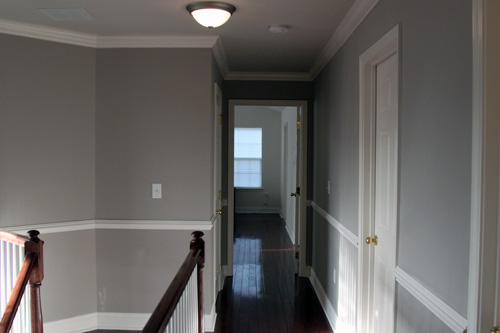
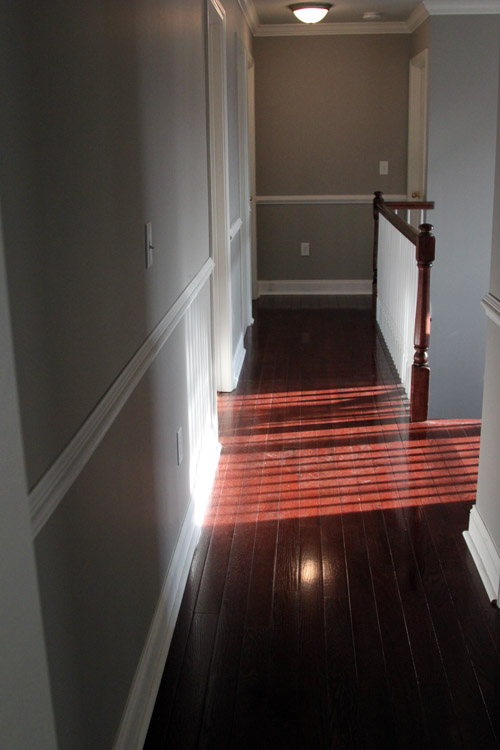
Here is the view looking down the hallway and into our master bedroom.  The plan here is to put up a chair rail and then eventually do boxes; similar to our living room in the picture above.

Everything is pretty straight so cutting+nailing would be pretty straight forward.  This was so until we got to an angle at the top of our stairs.

We struggled with this for maybe a half hour or so.  We could not figure out how to make this cut.  We tried several different cuts, holding them up and trying to determine how to do this.  We went back and forth a bit before I went downstairs to draw the angle on paper and try to calculate some numbers.  And just when I was about to lose my patience, Rebecca figured it out.  We made two cuts with some scrap, one angle at 20 degrees and the other at 25 degrees.  We held the pieces together and sure enough, we were golden.

A few more finishing cuts later, and we were finished.

So what did I learn with this experience?

  • We waited just about a year to do this project because we were scared.  We were scared for absolutely no reason.
  • Invest in a nail gun with a compressor.  We used an electric nail gun and half our nails barely went completely in.  We had to hammer a lot of them flat with the surface.
  • Take your time.  Measure twice, cut once.  Or if you have scrap pieces, make some cuts as an example and work from there.
  • The molding area at Lowe’s isn’t scary nor overwhelming.

I categorized this post as inexpensive design because this was an incredibly cheap project to accomplish — especially compared to what we would have paid a contractor.   All said and done, 40 linear feet of molding and some tubes of caulk ran us just under $100.  An absolute steal.

Copyright 2010 - 2011. The Lil House That Could. All rights reserved.