Two Months

5 Comments

Posted by Rebecca, July 24th, 2012

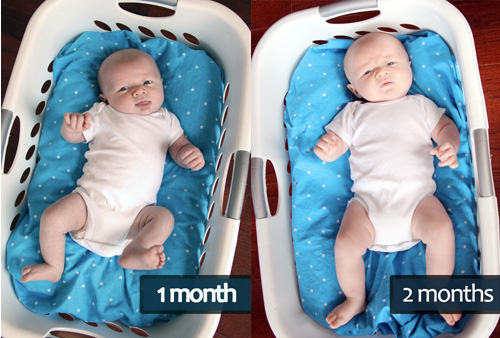
I know, it seems like I just posted about Easton turning one month old. Because that post was late, I practically did! So I set out to make sure this one was a little more on time. Yesterday, Easton turned two months old.

Can I tell you how much I love this baby? He has so much personality and it’s just such a great one. He has so many great expressions…

Every morning now I wake up to that smile. He’s been waking up and just cooing until I wake up. When I make eye contact with him, I get the biggest smile. The coos, the smiles, the giggles (which sound like a hur-hur) are so much fun. Sometimes he goes on and on with his two favorite noises, the owl (who-who) and the iGoo. Mike and I often wonder how we got such a chatty kid when the two of us are pretty quiet.

He had his two month check up today and he weighed in at 15lbs and 24 inches. He is seriously 2 months old and weighs 15lbs already?? The man loves his milk 🙂

By Easton’s 3 month post, I will be back at work full-time. I cannot believe I have only 3 weeks left at home with him and I’m trying to soak them up. As much as I want to ease him into the transition, I also cannot resist the urge to cuddle and kiss him all day long while I can.

Happy 2 months bub-bub! Now stop growing up so fast…

  • StumbleUpon
  • del.icio.us
  • Twitter
  • Facebook
  • Google Bookmarks

Some Built-in Updates

4 Comments

Posted by Michael, July 19th, 2012

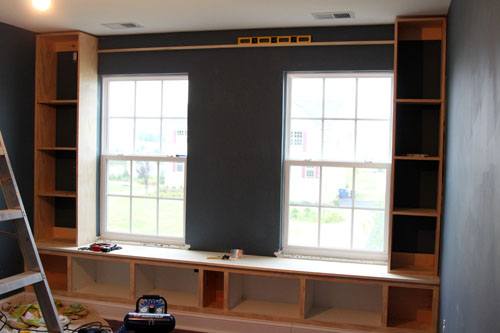
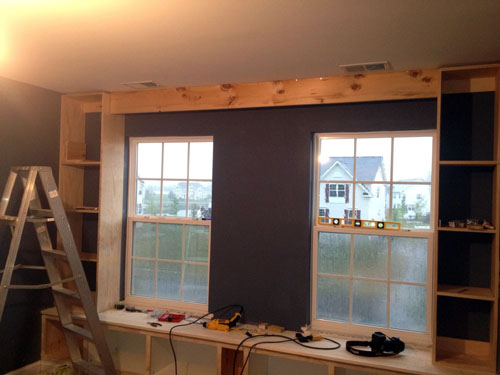
When I left you, I had just finished the base of our built-in’s for the new office.  The next step was to build up the sides and then finish up with the valance.  The sides weren’t too bad; mostly straight cuts, a couple nails and some glue.  I left off the back because we don’t have the right tools to make the exact cuts required.  We figured we’ll just prime the back and then paint it white to match the finished built-ins.  Not bad.

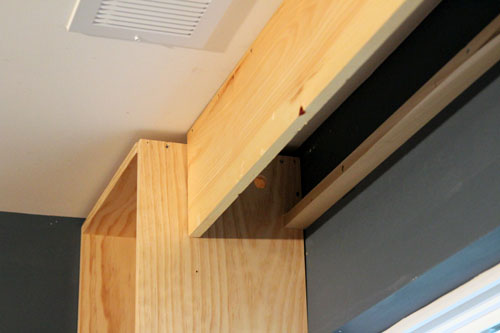
You can see in the pictures below, I put support braces at the tops and bottoms of each bookcase.  This was to ensure we could secure this thing into another stud besides through the sides.  I also used a boatload of liquid nails.  I’m pretty sure this thing is going nowhere.  I feel bad for the next homeowners should we decide to move and should they decide to take this thing down.  Oh man, they’re in for some fun.

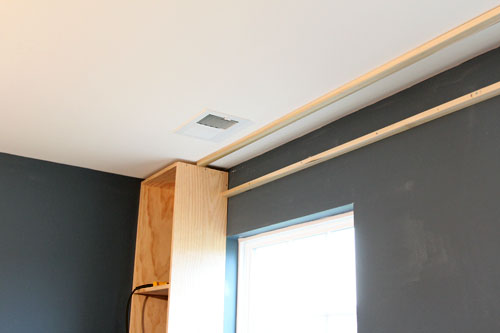
Next up was beginning the support pieces for the valance.  This is where I became nervous.  I knew this would have to be able to support plenty of weight between the wood valance, molding and puck-lighting.  In addition to support, I knew this would need to be completely level.  But how do you get it completely level when your ceiling is about a half inch height difference from one end to another?  I’m not sure.  But it all worked out; one way or another.

I supported the valance cleat to the wall by drilling screws through just about every stud between the two bookcases.  It also has support with lots of liquid nails.  I think I’m forming an obsession.  I also secured each end to the bookcases via screw.

I then began securing my second cleat to the ceiling.  Do you know how hard it is to find a stud in a ceiling?  I knocked and knocked on the ceiling for probably a half hour trying to find each stud.  The stud finder didn’t help, at all; probably because I’m a bit too awkward holding that thing up against the ceiling.  You’re probably wondering where I am going with these cleats and how it all ties into the valance, huh?  Here is the plan.

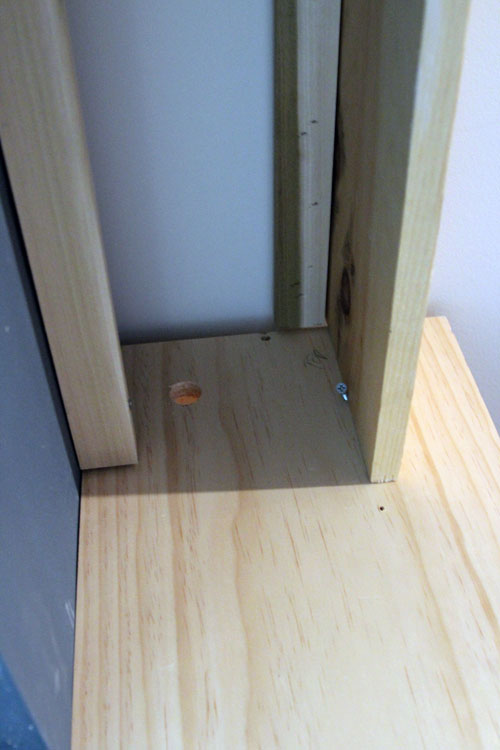
Each cleat will secure a portion of the weight from the valance face and bottom.  Then the valance face will secure into the bottom creating a nice clean edge.  Dear god I hope so. You’ll also see I drilled a hole for the puck lighting which will sit on the bottom of the valance bottom.

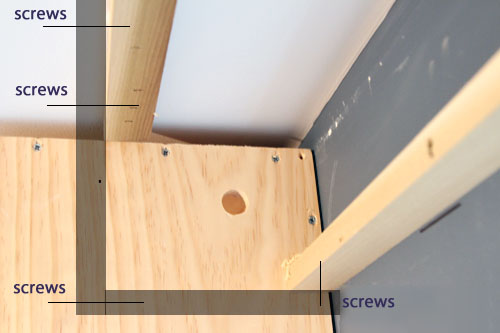
Here you see the valance face mounted via screws to the front valance cleat. It’s also secured with screws through the sides of the bookcases.  This thing is going nowhere. Don’t worry about those gaps you see between the ceiling and the bookcase; the crown will hide a lot of these imperfections.  Phew.

This is the view from “inside” the valance.  You’ll see I drilled a hole for the puck-lighting again.  See that random screw?  It was my clever way of making sure the valance face stayed level and straight while I was securing it to the cleats.  The valance bottom will fit snug behind the valance front and the rear cleat.

So what’s on the remaining to do?  A couple things actually.

  • Install puck-lighting to valance bottom.
  • Run wires to the left bookcase (where the outlet is).
  • Secure valance bottom to the rear cleat and valance face.
  • Install crown molding.
  • Caulk the heck out of this thing.
  • Prime the heck out of this thing.
  • Paint.

Stay tuned. 🙂

  • StumbleUpon
  • del.icio.us
  • Twitter
  • Facebook
  • Google Bookmarks

The Finishing Touches

12 Comments

Posted by Rebecca, July 17th, 2012

Now that we’ve used the nursery for a bit, I feel like I’m finally ready to wrap things up in there. For the longest time, I didn’t know if I wanted a rug and a mobile. I also had no clue what kind of arrangement to do for the gallery wall. I think I (mostly) figured it out!

First, the mobile. Back in January I posted about how I had no clue what kind of mobile to add or if I even wanted one. Well, once we finished the crib area with the paneled accent wall, the bedding and the chevron crib skirt I made, I decided that I didn’t want a mobile and liked the less is more look we had going on.
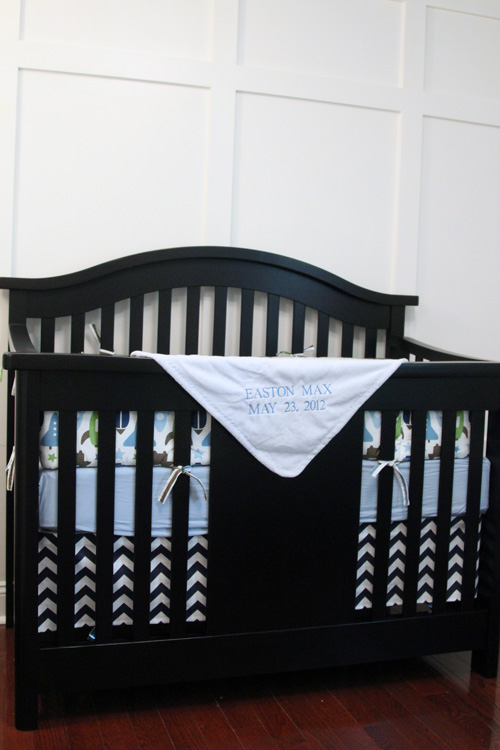
Well, fast forward a few months and Mr. Easton had other plans. He’s becoming so much more aware of his surroundings and I’m happy to report that he loves his room. He stares at his curtains, ABC art and giraffe sconces… like honestly, he does. He even sometimes enjoys his room so much that he giggles at inanimate objects. There’s something around his closet area that captivates him and always gets a giggle. I like to think it’s those polka dots I slaved over while 9 months pregnant. He’s a future designer…

As we begin to think about putting him in his crib in the upcoming months (sniffle sniffle, tear), we know he would absolutely LOVE a mobile. Wanting to stick with something minimal, I decided to go with one of the ones I found originally, from Little Dreamers Inc on Etsy.

I wanted to make a mobile on my own, but I saw that the Little Dreamers Etsy shop sold DIY mobile kits for $25. I figured that would save me some time cutting out all of those stars and I would pay probably $10-$15 in materials, so I set out to order it. When I told my mom, she told me that Easton would like his mobile before he’s 12. She offered to pay for it fully assembled so that I didn’t have to put it together. Since I’m still feeding Easton every 2 hours and the mobile has around 165 stars, I agreed to accept the offer. It will be here in 2-4 weeks 🙂

Up next is the gallery wall I’ve planned to do over the bookcase.

During one of Easton’s naps this weekend, I was actually able to make some progress! I settled on a nice little arrangement…

I also had a chance to spray paint the darker frames white, when the can of spray paint I was using decided to clog beyond repair. I’m also working on selecting photos and art to fill these things (though that little onesie is staying, after it gets ironed), so the details will be coming. Hopefully this week…as long as the spray paint gods are nice to me for round 2.

Finally, the rug. I knew eventually we’d want an area rug for the room, but I knew it wasn’t an urgent item so I held off. Now that Easton plays more, I really want to be able to put him down in there. I was originally eyeing up the Capel rug from Pottery Barn Kids in either light blue with navy or navy with white…

We have a gift card and I thought the 4’x6′ size would work. But when I measured it out in the room, it is way too small. We need a 5’x8′ rug, which means way more money. I’m back to the drawing board on this one, anyone have any suggestions? I’m actually not all that picky about looks on this one and I’d take any solid blue or green rug in various shades. Heck, I’d take a cool patterned rug as well! The important thing to me is that it’s soft for little knees and that it’s safe and not full of chemicals. All of the 5’x8′ cotton/wool rugs I’ve found seem to be $500. Recommendations welcome 🙂

ps- If I owe any of you an email, I apologize for the wait. Never mind the feeding a baby every 2 hours thing, but my laptop charger kicked the bucket so my computer time is limited. How does one’s charger die? One word… Macky. He chews wires. Twice in one month apparently. He needs to get a job.

  • StumbleUpon
  • del.icio.us
  • Twitter
  • Facebook
  • Google Bookmarks

Easy Art Switcheroo

3 Comments

Posted by Rebecca, July 10th, 2012

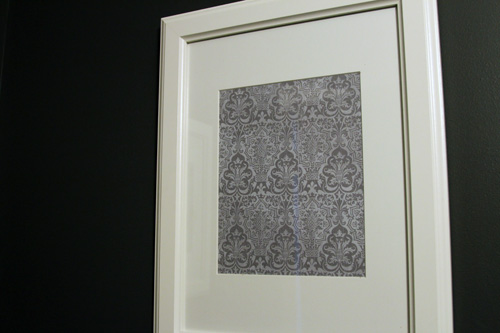
Remember way back at Christmas time, when I framed some metallic wrapping paper to make our powder room all festive?

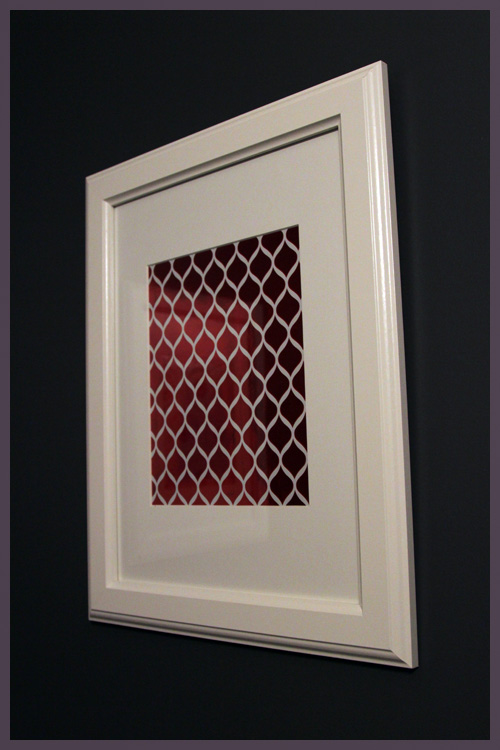
Well it stayed like that for much longer than I’d like to admit. One of my to-do list items before Easton was born was to switch out the paper in these frames. I planned to browse Target or Michael’s or something to get some brand new wrapping paper but I ran out of time and ended up using what I had around. I had a few sheets of different scrapbook paper hanging around and I dug out some gray and white damask sheets.

This time around I went with two of the same sheets of paper since I didn’t have two related patterns. But to change it up, I put one right side up and one upside down 🙂

This room is insanely, insanely hard to photograph since it’s well, a small powder room and painted nearly black. A full room shot is nearly impossible, but this gives is where we stand now…

Now that I look at that above picture, it’s quite funny that we can never get the frame and the shelves in the same picture. It looks like a drunken bathroom picture… or like our camera accidentally took that…while drunk.

We originally planned to add aqua accents to this room, but right now it’s just shades of gray and white. And I like it! I like the idea of keeping the shelves white and painting the mirror we have in there white. Then we can change out the accessories as we want and make a hand towel, pictures or little things on the shelf aqua or even red again around Christmas. Up next, I have a date with a can of white spray paint and the bathroom mirror. It’s long overdue.

  • StumbleUpon
  • del.icio.us
  • Twitter
  • Facebook
  • Google Bookmarks

Front Door Dreaming

16 Comments

Posted by Rebecca, July 6th, 2012

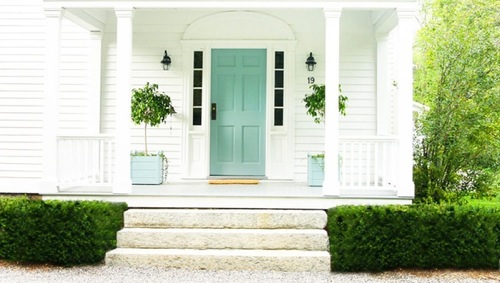
About a year ago, I pinned this picture on Pinterest…

(from Tar Paper Crane via Pinterest)

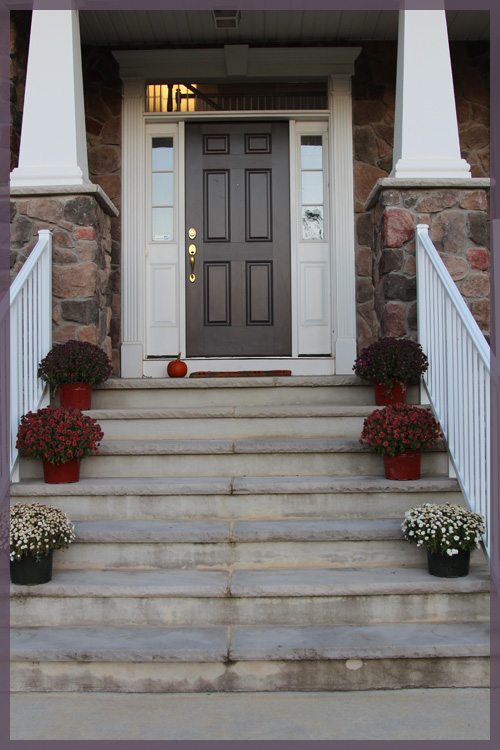
It got me thinking about painting our front door, which is currently the same brown color as our shutters (this is an old picture from the fall).

Then I saw this picture on Pinterest and I loved the blue door with the blue hydrangeas.

 (from House of Turquoise via Pinterest)

So I started thinking that color could work because we also have blue hydrangeas. I love them, so why not make them stand out a little more? Btw, look at how big they are now after just 2 years!

After teaching Mike what robin’s egg blue was, I did a little Pinterest search to find some more inspiration. Why not share, eh? Since I don’t have much time for projects, I spend a lot more time brainstorming and googling for ideas these days 🙂

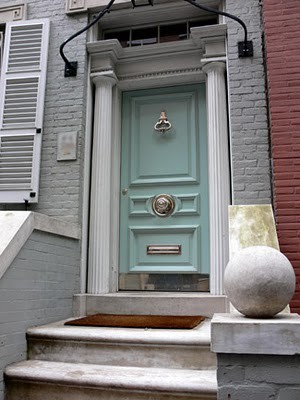
#1. Love this blue gray color, so classy

(from Pink Wallpaper via Pinterest)

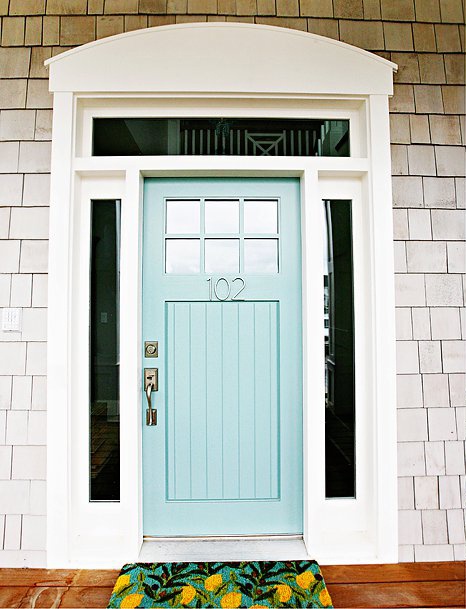
#2. We’ve even talked about putting some numbers on the door itself, sort of like this (I also love the door itself but buying a new door is not in the plans…)

(from House of Turquoise via Pinterest)

#3. This looks nothing like our house, but fabulous none the less

(from Katy Elliot via Pinterest)

#4. Nice and clean, and looking more like our door

(from Desire to Inspire via Pinterest)

I’ve been itching to spruce up our front porch (replace the lights, get a bench, do some cleaning). Why not add another goal to the list? We just started giving Easton bottles, so maybe once this heat wave ends I can spend some quality time out there. I mean, it’s been almost a year since I pulled a weed myself 🙂

  • StumbleUpon
  • del.icio.us
  • Twitter
  • Facebook
  • Google Bookmarks
Copyright 2010 - 2011. The Lil House That Could. All rights reserved.