Previously on The Lil Office 2.0
Posted by Michael, June 28th, 2012
Previously on the lil office that could, we told you our plans and initial work for the new office. Fast forward a baby and six months later, the project resumed!
To recap, we’re moving the existing striped wall office upstairs (sans stripes). The existing office will become a playroom and toy storage for Easton.
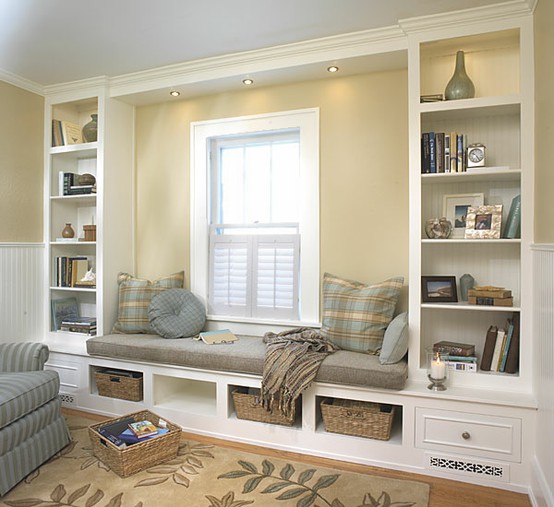
We knew the new office needed storage, so we decided to do built-ins cabinets along the wall with our windows. Our end goal is for the new office to have built-ins much like below.

(via Plans Now)
Way easier said then done, especially when Rebecca and I lack any type of building experience.
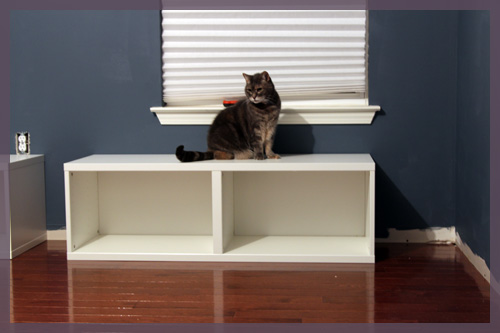
In late December and into early January, we thought the entire thing out. And after several trips to Lowes to browse building materials, we decided our best option was to go with prebuilt cabinets via Ikea.

We figured having the base cabinets somewhat prebuilt would make the process a ton easier. It did make things easier. But looking back now, we should have just built these things from scratch. Oh well, there’s always next time!

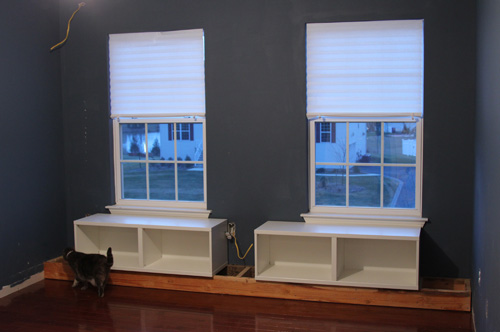
I built a frame out of 2×6 boards. This allowed us to elevate the cabinets so we can place molding underneath them. As you can see above, I also ran some electrical towards the top of the wall in order to do some puck lighting down the road.
The above is where I left you, six months ago.
With Easton here now, we knew we had to get this office completed. Since I work from home these days, I need a space where I can work and Easton could play. The existing office just couldn’t handle that. So while Rebecca feeds Easton during the day (just about every 2 hours), I’ve been working on the new office.
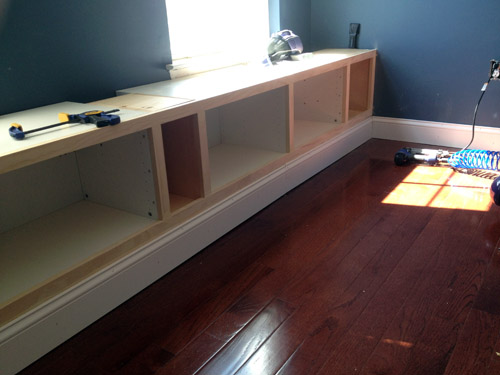
Due to the length of the wall, the Ikea cabinets couldn’t eat all the space. I built boxes to fill the space and then attached them to the Ikea cabinets with some glue and screws. I built 3 of these boxes; two for each end and one in the middle.
Once the boxes were completed and attached to the Ikea cabinets, I secured the entire unit to the frame on the floor and to several studs within the walls. Now since we couldn’t match the sizes between wood available at Lowes and the Ikea cabinets, I decided to add some trim.
As you can see above, adding the trim really gave everything a unified look. And if you look even closer, I even began adding floor molding!
Once the trim was added, Rebecca and I began wondering what we should do with the top. We eventually want to add a fabric top, but ultimately wanted this thing to look finished.
Since my saw is unable to do these types of cuts, I had Lowe’s cut down two ready-to-paint wood boards to our size.
The top hangs off the cabinet tops by about a half inch which is exactly what we wanted. It gives the cabinets a nice finished look.
And here is where we currently are. I mounted the top with some liquid nails and some screws. There is a seam between the two boards, but I used some wood filler to really hide it. I also added quarter round molding to the floor to match the rest of the house.
So what is next? There is a slight gap between the top and the trim. I had to use some shims in order to get the top completely level and in doing so, it left a teeny tiny gap. When you walk into the room, you can’t see it. I debated if I should let it be, but I knew it would annoy the crap out of me; even if no one could see it. I’ll be off to Lowes in a couple days to pick up some trim to fill in this area. Easy stuff.
I’ll also begin building the side bookcases during the week. Now that I’m incredibly more comfortable with building these things, I’m sure I’ll be able to bang them out in a day or two. Once completed, I’ll then work on the valance to go across the top along with the puck lighting. Almost there!
Diggy was the first to discover the new built-ins and immediately jumped on top to check out the view!


Looking good guys! I love the fact that you built this around the IKEA cabinets… haha… I think it will look pretty sweet when you add the side pieces… Hopefully it comes out like the “inspiration shot” at the beginning!
Go you two! Projecting and building with a newborn. This looks great!
Well done Michael. Its coming along really nicely, Im very impressed. Keep up the good work 🙂
You guys are awesome! Can’t wait to watch this project come along! 🙂
I’m jealous, I would love to have window seats! The office looks great so far- love the floors too!
Nice!! Not sure how I missed this. Coming along really well!
Looks great so far!! Love your blog. My husband and I are working on built-ins as well. Good luck and I can’t wait to see it finished!!
Lura
x
Nice look ! Thanks for posting.
Can you explain where you got the drawers or did you make them ?
Thanks