Posts Tagged ‘cabinets’

Previously on The Lil Office 2.0

8 Comments

Posted by Michael, June 28th, 2012

Previously on the lil office that could, we told you our plans and initial work for the new office.  Fast forward a baby and six months later, the project resumed!

To recap, we’re moving the existing striped wall office upstairs (sans stripes).  The existing office will become a playroom and toy storage for Easton.

We knew the new office needed storage, so we decided to do built-ins cabinets along the wall with our windows.  Our end goal is for the new office to have built-ins much like below.
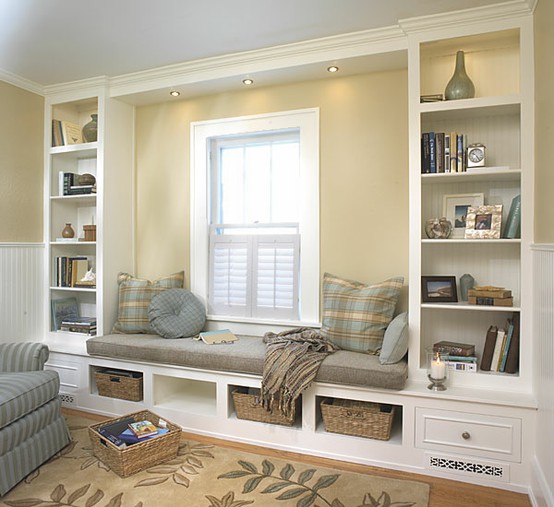
(via Plans Now)

Way easier said then done, especially when Rebecca and I lack any type of building experience. 

In late December and into early January, we thought the entire thing out.  And after several trips to Lowes to browse building materials, we decided our best option was to go with prebuilt cabinets via Ikea.
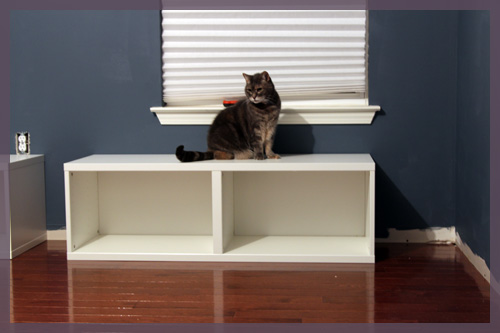
We figured having the base cabinets somewhat prebuilt would make the process a ton easier.  It did make things easier.  But looking back now, we should have just built these things from scratch.  Oh well, there’s always next time!
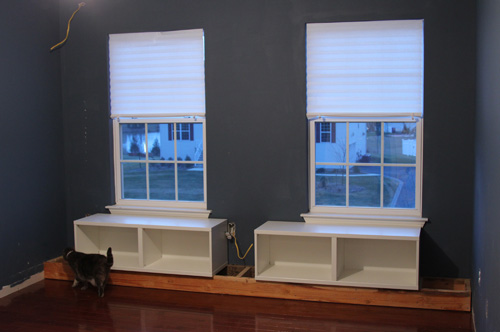
I built a frame out of 2×6 boards.  This allowed us to elevate the cabinets so we can place molding underneath them.  As you can see above, I also ran some electrical towards the top of the wall in order to do some puck lighting down the road.

The above is where I left you, six months ago.

With Easton here now, we knew we had to get this office completed.  Since I work from home these days, I need a space where I can work and Easton could play.  The existing office just couldn’t handle that.  So while Rebecca feeds Easton during the day (just about every 2 hours), I’ve been working on the new office.

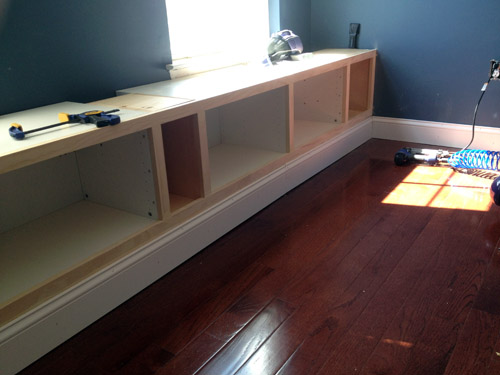
Due to the length of the wall, the Ikea cabinets couldn’t eat all the space.  I built boxes to fill the space and then attached them to the Ikea cabinets with some glue and screws. I built 3 of these boxes; two for each end and one in the middle.

Once the boxes were completed and attached to the Ikea cabinets, I secured the entire unit to the frame on the floor and to several studs within the walls.  Now since we couldn’t match the sizes between wood available at Lowes and the Ikea cabinets, I decided to add some trim.

As you can see above, adding the trim really gave everything a unified look.  And if you look even closer, I even began adding floor molding!

Once the trim was added, Rebecca and I began wondering what we should do with the top.  We eventually want to add a fabric top, but ultimately wanted this thing to look finished.

Since my saw is unable to do these types of cuts, I had Lowe’s cut down two ready-to-paint wood boards to our size.

The top hangs off the cabinet tops by about a half inch which is exactly what we wanted.  It gives the cabinets a nice finished look.

And here is where we currently are.  I mounted the top with some liquid nails and some screws.  There is a seam between the two boards, but I used some wood filler to really hide it. I also added quarter round molding to the floor to match the rest of the house.

So what is next?  There is a slight gap between the top and the trim.  I had to use some shims in order to get the top completely level and in doing so, it left a teeny tiny gap.  When you walk into the room, you can’t see it.  I debated if I should let it be, but I knew it would annoy the crap out of me; even if no one could see it.  I’ll be off to Lowes in a couple days to pick up some trim to fill in this area.  Easy stuff.

I’ll also begin building the side bookcases during the week.  Now that I’m incredibly more comfortable with building these things, I’m sure I’ll be able to bang them out in a day or two.  Once completed, I’ll then work on the valance to go across the top along with the puck lighting.  Almost there!

Diggy was the first to discover the new built-ins and immediately jumped on top to check out the view!

My Parents’ New Kitchen

10 Comments

Posted by Rebecca, June 19th, 2012

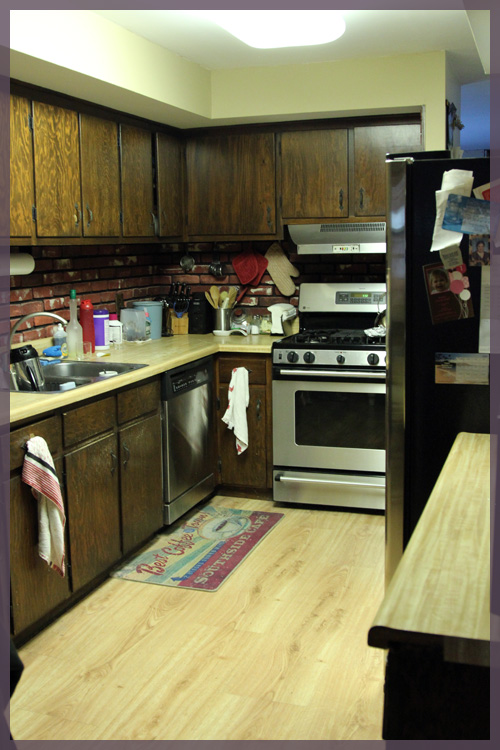
Waay back in the fall, I shared some before pictures of my parents’ kitchen before they were set to remodel it. The kitchen had remained practically the same since we moved in when I was 2 years old… 26 years ago.

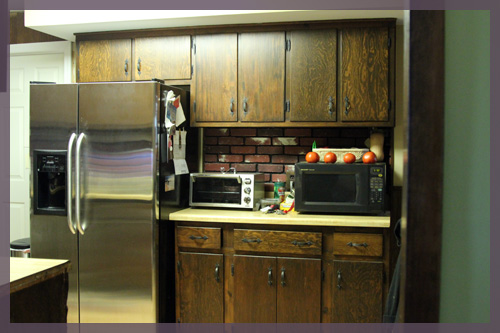
My parents updated the flooring and appliances, but the old dark grainy cabinets, florescent lighting, faux brick backsplash and faux wood laminate countertops were there when we moved in.

I shared the mock ups my parents had done for their new kitchen layout and said that the contractor was all ready to start. The kitchen was set to be done by Christmas, and it was… but we had so much going on post wise getting ready for the baby that we didn’t share it. Now we shall 🙂

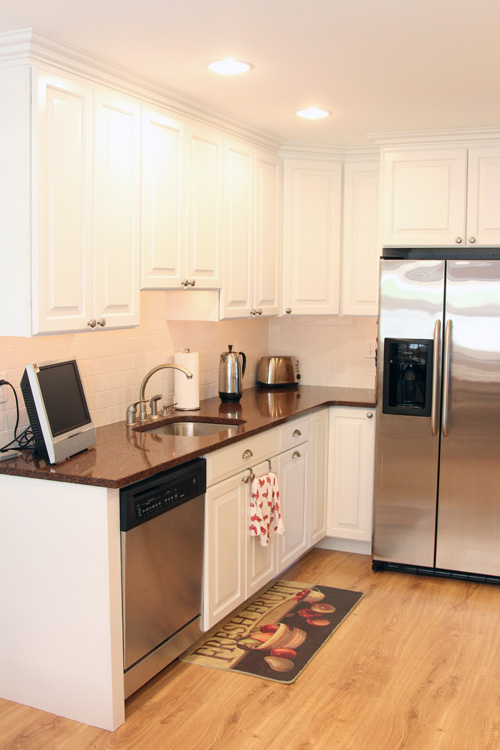
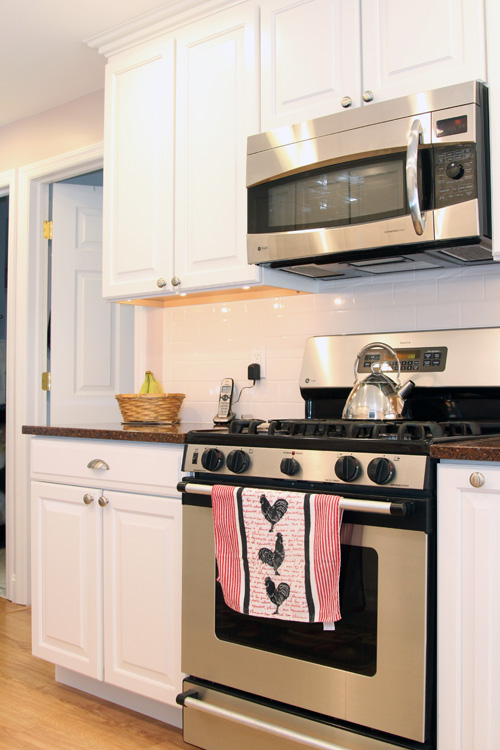
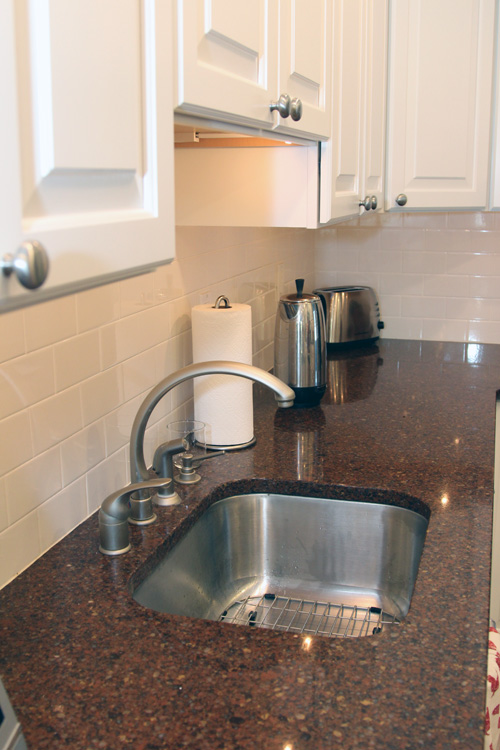
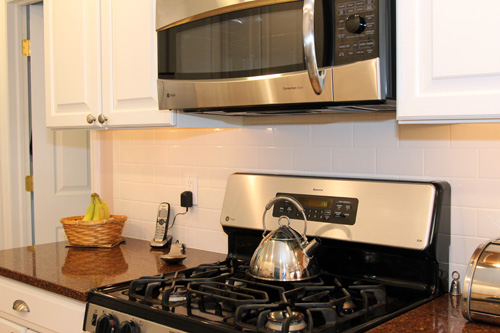
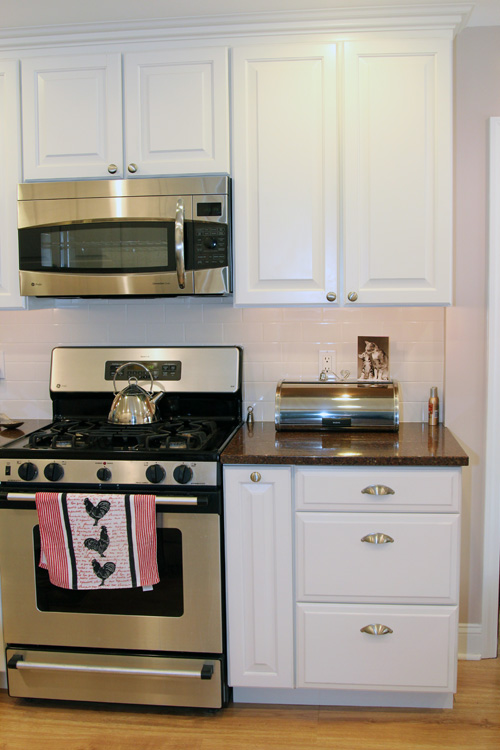
Pretty drastic change, huh? They went with white cabinets, white subway tile backsplash and darker Silestone countertops. Oh and they removed those awful soffits.

The lighting alone makes a world of difference in the room. The florescent light was long overdue for a kick to the curb. They added recessed lighting throughout the kitchen as well as under cabinet lighting.

By reconfiguring the location of the stove, they gained a ton more cabinet space as well.

I really still can’t believe it’s the same kitchen I looked at for my entire life. It looks so much bigger and brighter, quite the drastic change!

Okay, we all love a good kitchen remodel, who else has one to share?! With all of the time I spend watching HGTV while nursing every 2 hours during the day, I’ve been scheming some small updates for our kitchen…

So Much Wood

8 Comments

Posted by Michael, January 11th, 2012

It’s been great being able to work on SongMeanings during the day and have time at night to work on projects around the house.  Just a few weeks ago, it was working all day at Corporate America, coming home exhausted and working on SongMeanings as much as I could until my eyes got too tired and strained.

It was nearly impossible for Rebecca and I to really get anything accomplished house-wise during the week.  My schedule has been roughly 8:30-5:30 dedicated to SongMeanings and the business; mostly coding away on new features and taking a few conference calls.  At night, it’s been a mix of things — still working on SM, calls with the business partner, spending quality time with Rebecca when she’s not blogging (err on Pinterest), annnddd building the office window seat.

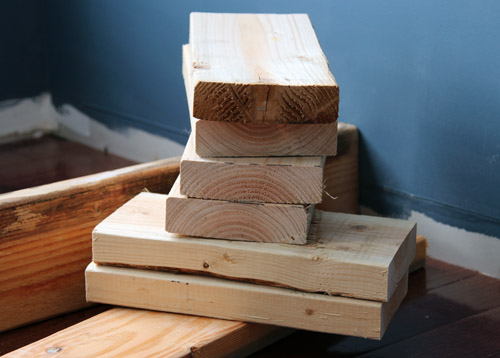
This weekend, Rebecca and I picked up some lumber from Lowe’s; three 12-foot 2×6 boards.  The car ride home was quite funny with a good foot of wood sticking out of the trunk.  Rebecca was paranoid as can be thinking a) we’d kill ourselves or b) we’d kill someone else.  I kept telling her I’ve seen my father do much worse and be successful, but for some reason that didn’t exactly comfort her.

I cut two of the boards to be able to span the entire width of the wall, or just under 12ft.  With the remaining piece of 2×6, I cut out eight 12-inch pieces.  These would connect the long boards to essentially make up the frame.

I used wood screws to screw the boards together.  There was conflicting information online on whether to use nails or screws when building a frame.  Some said nails allow for flexing while others said screws would be more reliable.   Using the screws were fairly easy; the hardest part (or tedious rather) was continually drilling pilot holes.

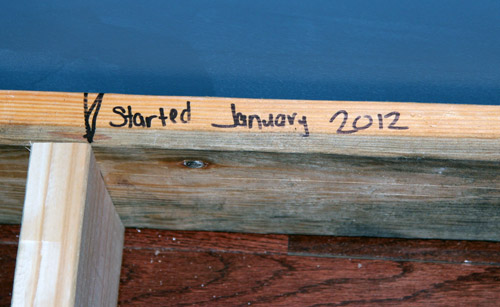
And for fun, I decided to write our lil domain on one of the planks.  I figured if someone ever dismantled this thing and the blog was still operating, he or she could then contact me to ask me what the heck I was doing building this thing.  I’m still asking myself that same question.  I also wrote when we started the project.  But the world is going to end in a few short months, so I’m not quite sure why any of this mattered.

(via Plans Now)

We wanted to install puck lighting on our built-ins much like the inspiration above.  We had an existing outlet centered on the wall which I could tap into.  The only problem was actually running the electrical wire through the studs and up the wall.  I discussed the plan, and route, with several friends.  When one of them told me to stop being wuss and do it already, I took the leap.  After a couple of hours that spanned two nights, a dozen or so curse words, getting shocked once and causing some open wounds, I finally succeeded in running the wire — all within code, too.  Phew.  The idea was to get an outlet at the very top of the bookcase and then use the variance to hide the additional wiring for the puck-lighting.

That wire you see on the cabinet (isn’t live) and is just extra cord.  I’ll be trimming that down to fit into the outlet — or as seen below.

One issue I ran into, and it was one we were expecting, was the molding on the window sill.  The cabinets come up too high, so we’ll be removing them shortly.

I was expecting when I finished the frame and rested the cabinets on it, it would not be level.  But best thing ever?  I put the level on it and sure enough, it was damn near perfect on both sides.  I was assuming I’d have to use shims to get this puppy level.  I’m not sure how I accomplished it being level, but hopefully it makes the rest of the project much easier.

So next steps?

  • Attach the frame to the studs in the walls for a secure fit (right now the frame is just resting in there).
  • Remove the molding from the window sill.
  • Start building the open boxes which will sit on side each of the cabinets against the wall.

Besta Husband Ever

7 Comments

Posted by Rebecca, January 5th, 2012

Today is Mike’s birthday, yaaaaay!

But he’s not the best husband just for being born. Today the Philly Ikea got 17 units of the Besta cabinet bases that we tried to buy on Monday in stock. I don’t know if I’ve mentioned this here, but Mike left his full-time gig at Merrill Lynch just before Christmas to dedicate his life to SongMeanings. Since he wanted to put the cabinets together ASAP so we can get the new office rolling, he decided to go pick them up this morning. When I told him he should call just to make sure they had them his response was “well I haven’t moved my car in a few days and I should probably take it for a ride”. Ahh to work form home… especially when the wind chill makes it feel like 2 degrees out like it literally was yesterday morning…

Mike told me that Ikea was completely empty. Gloriously empty. He even considered stopping for some 99 cent breakfast, which strangely for all of our Ikea trips, we have never been in the cafeteria. Occasionally we’ll grab a drink or a frozen yogurt on the way out, but we’ve never been in the full size place. Instead he got his cabinets and cruised through to the register with his 2 bases. Hallelujah! We considered them to be a joint birthday gift since mine was last week and we decided not to exchange in order to save for the many larger purchases we have coming up (babies are mucho dinero).

Not only did the Besta Husband Ever to go Ikea alone on his birthday to buy cabinets, but he assembled them. Not only did he assemble them, but he made a video of the assembly then emailed me at work proclaiming that he had a video for my blog 🙂

Please note the Italy shirt and the fist pumping music in honor of the season premiere of Jersey Shore tonight! Of course he also included some Kanye and Jay-Z terminology. This may be the only house blog out there where you also receive an education in the latest rap music. The music he used is by will.i.am, which replaced his initial choice of Jay-Z and Kanye. When I played it, it was full of bad words. I had to remind Mike that my mostly female population of readers do not necessarily appreciate the eff word…. Thankfully, even on his birthday, he changed it up. Keeping it PG-13 around here 🙂

Anyway, seeing the cabinet frames together made us even more excited to get to work on this project!

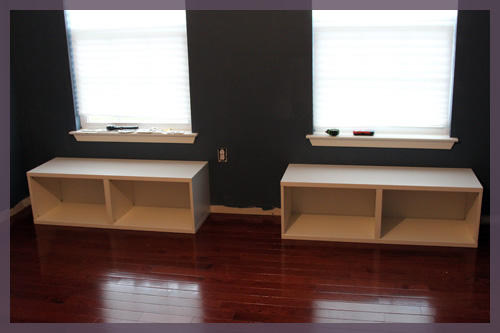
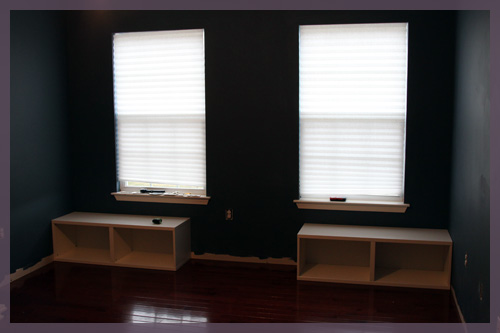
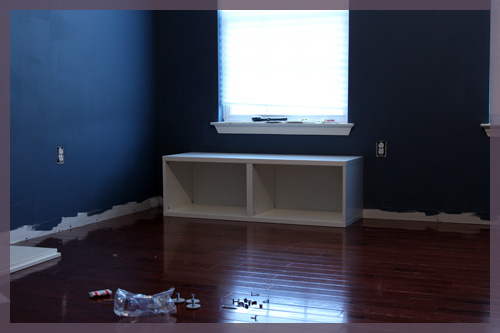
The before shot, which is hard to see because of the lack of window treatments and dark paint…

The in-progress with some cabinets…

We played around with some configurations to see how we’re going to work this all out. By we, I mean Mike because I was still at work 🙂 He also added some paper blinds in an attempt to block out some of the daylight for the pictures. They failed.

When I got home, Mowie decided to give the new bench a trial run, despite the fact that it needs 8 million additions to be a bench…

Where Mowie is sitting will probably be the final placement of the cabinets. At least as of today. We’re going to have to tweak our inital plan and therefore, ditch the single cabinet we bought at the last minute on Monday. We plan to build small bookcases on each side (though at one point today we considered doing a center bookcase, or no bookcase). We also have to build a base for the cabinets and raise them up a few inches to add baseboard. Then we’ll need to add some filler pieces, paint everything, add crown molding, put the doors on, make a cushion… oh and do something with those window sills until it looks somewhat like this…

(from Plans Now via Pinterest)

This weekend should give us enough time to do all of that, right? 🙂 Probably not, but a girl can dream.

This Used To Be My Kitchen

208 Comments

Posted by Rebecca, October 6th, 2011

Whenever Mike and I drive to our hometown, we bust out some version of Madonna’s “This Used To Be My Playground”. Sometimes it’s “this used to be my Riiiiita’s” (my first job scooping Italian Ice) or “This used to be my Targeeet”. Have no clue what I’m talking about? Well there’s an official Madonna YouTube channel!

YouTube Preview Image

Why am I rambling about Madonna songs? Well this weekend we took a trip to my parents’ house (who live about an hour away now). They are remodeling their kitchen and I wanted to take before pictures. Remember how I always say that I want old house to remodel because of the awesome before/after pictures? Well, of course I jumped on the opportunity to cover this on the blog! Plus this isn’t just any remodel, this is the remodel of my childhood kitchen. The one that has remained untouched since we moved in when I was 2 years old. Yes, it has been the same, minus several appliance upgrades and new flooring, for 25 straight years.

Yes old dark grainy cabinets, florescent lighting, faux brick backsplash, faux wood laminate countertops, a lack of storage space and cabinets that no longer stay closed. The 70s had a lot of style. When we moved in there was actually brown and orange peel and stick laminate flooring, which my parents upgraded to Pergo maybe 10 years ago? We also used to have a robin’s egg blue stove, brown dishwasher and a brown refrigerator. Those were the days.

Let me tell you a little about my parents first. My dad was green before green was ever cool. However, he isn’t eco chic like many people today and chooses function over form. He once famously rewired a halogen lamp to fit a more energy efficient light bulb…which then protuded out of the light and was the became the ugliest lamp ever…but we dare not throw it out. They’re just very practical people, which is something to admire in a time of waste and consumerism. Though I inherited the urge to complain to Mike about wasting and things sitting in landfills, my mom often reads my blog and wonders how the apple fell so far from the tree. Hi mom! 🙂

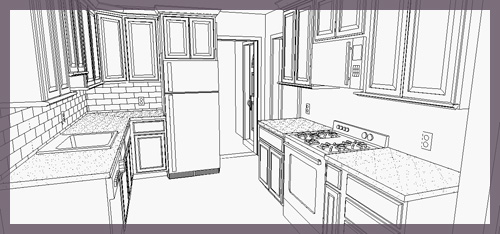
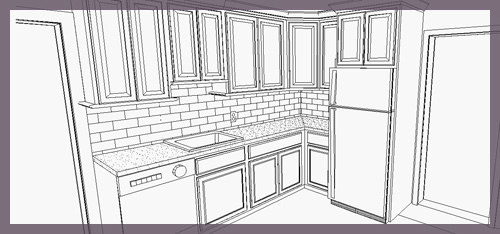
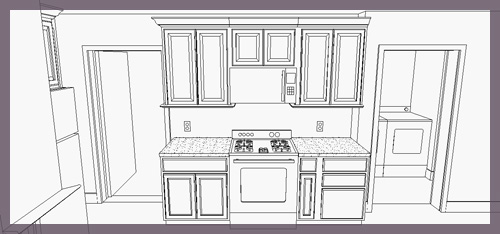
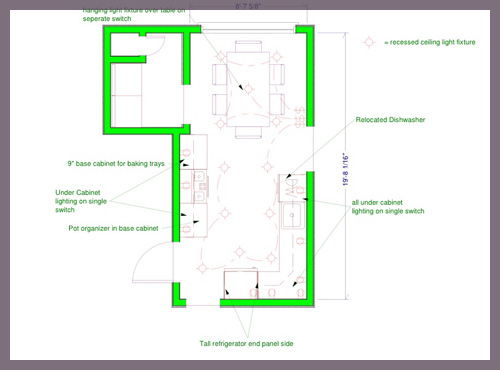
My mom had been telling me that they were looking at cabinets and having a contractor come to let them know if they could remove the soffits, which I thought was a great idea. I recommended that they get rid of the hood and get a microwave with a vent built in, to save counterspace. We also talked about some pull out drawers for pots and pans, since their storage space now is nearly impossible to navigate. My dad works with a lot of contractors so I knew they had professional opinions weighing in, but I was completely floored when my mom sent me the plans for their new kitchen.

Yes, they moved the fridge. Why didn’t I think of that? My mom had mentioned to the contractor that when she cooks (which she does often), she casts a shadow on the stovetop. So the guy moved it, making it look more open overall.

The dishwasher is also moved since it was always in the way of the stove and the corner cabinet. Another genius move.

The new stove area, complete with overhead microwave. That door on the left is my old room 🙂 On the right is the laundry room, which they are also getting some cabinetry for. My camera battery died after literally 5 pictures, so I didn’t get a chance to get everything.

As if all of the appliance moves and tile backsplash weren’t enough for me, I was also sent the electrical plan.

It’s hard to see, but it’s full of recessed lighting and under cabinet lights!

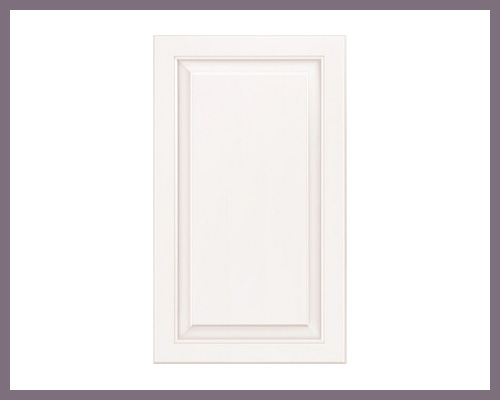
Last night my mom asked me to look at the cabinet website and help her pick one out, so I told her to go with a white linen (not a complete bright white) in a simple bevel.

Look familar? Yes it’s similar to ours, but my mom always admires our white cabinets and in a small kitchen with little natural light, I think white is the way to go. They still have to choose hardware and a tile for the back splash, but they still have some time for those extras. My mom mentioned doing a Silestone counter top, which I think is a great choice.

They’re hoping to have it done by Thanksgiving and I can’t wait to see (and share) the finished product. As I said earlier, my mom loves to cook and she really deserves an awesome kitchen. 25 years and 3 kids is long enough to wait, I think 🙂

Copyright 2010 - 2011. The Lil House That Could. All rights reserved.