Square and Shady

4 Comments

Posted by Rebecca, June 15th, 2011

Yesterday I got a 10% off coupon code from Pottery Barn. It was just in time because we also just received our reward certificate for buying our patio furniture! Okay that also means we got our bill for that patio furniture, but let’s not focus on the negative okay? If you don’t know what I’m talking about, if you open a Pottery Barn credit card, you receive 10% of all of the money you spend back in a gift certificate. Highly recommended if you shop there a lot or are planning a large purchase like we did (Banana Republic, Gap & Old Navy have a similar system on the clothing front in between all 3 stores)ย We ripped open that envelope and pulled out that reward certificate!

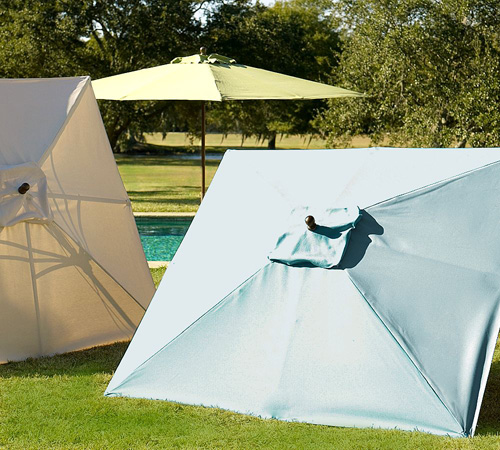
We planned from the start to get a square market umbrella in the fresca color. We just decided to wait and get it for free rather than find a cheaper version elsewhere. I love the square shape as an unexpected alternative to the standard round. But, I did begin to think that with square furniture and a square fire pit, our backyard was turning a little too square. I always try to balance my shapes in rooms to make them a little more interesting, but then I remembered that our entire patio itself is curved. Sold on the square! ๐Ÿ™‚

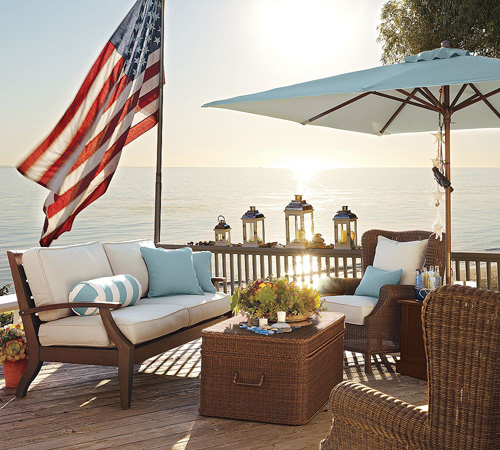
This next umbrella isn’t the right color, but I love the lanterns hanging from it. It’s a nice alternative to hanging lanterns in trees when they are too tall ๐Ÿ™‚

Even after shipping, we had some money left in rewards and we decided to purchase the umbrella cover. I know that we could have gotten a cheaper one elsewhere, but we’ve made that choice once already. We bought a cover for our table and chairs from Target and it’s not working out so well for us. It only attaches to the table in 2 places, which are diagonal from each other, and air gets under it and it becomes uncovered. It has a bungee pull thingy to tighten the bottom, but it doesn’t pull. I cannot get that thing tight for the life of me. So in windy weather, the cover just blows to the side but stays attached to the legs. Sort of as if our table had been pantsed.

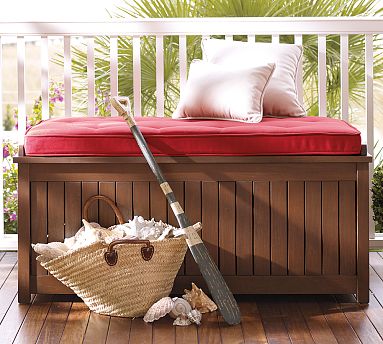
We were considering getting an additional piece of furniture with our rewards when Pottery Barn had an umbrella sale over Memorial Day weekend. They were 20% off and we figured we’d take advantage of the sale, despite the fact that we didn’t have our reward certificate yet. But we forgot about the sale and didn’t order it. It’s probably for the best, considering we’d have to pay something about of pocket for anything else we would have chosen. We love most of the Chesapeake collection, including this much needed storage.

Instead of spitting out 500 bucks for this thing, we headed toย Target last weekend.ย Yes I know, I love Target. If I could camp out in a store ala that episode of “Saved by the Bell”, I’d sleep in a Target.

Okay I couldn’t resist, here’s a really awful clip from that episode…

YouTube Preview Image

Anyway, we picked up this plastic deck box from Target for $60.

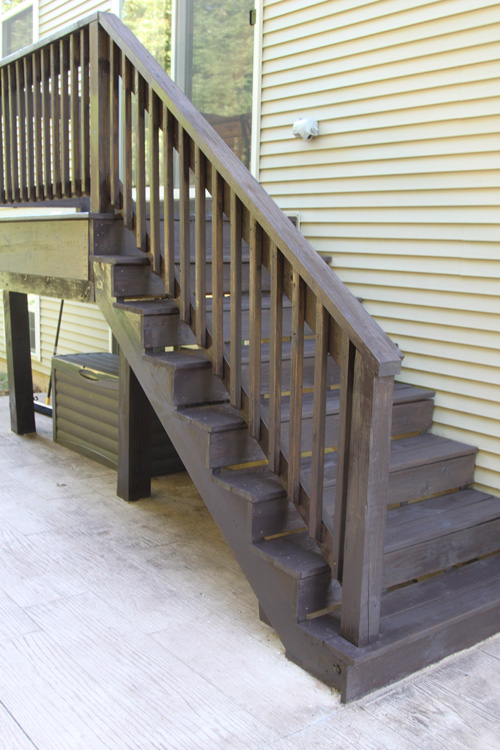
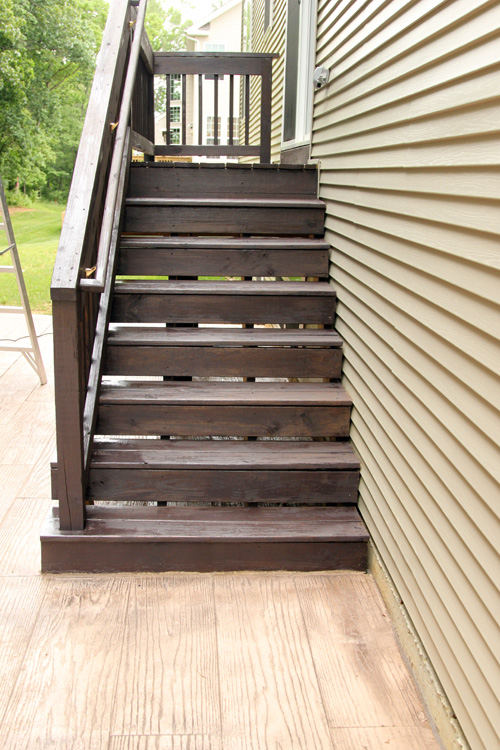
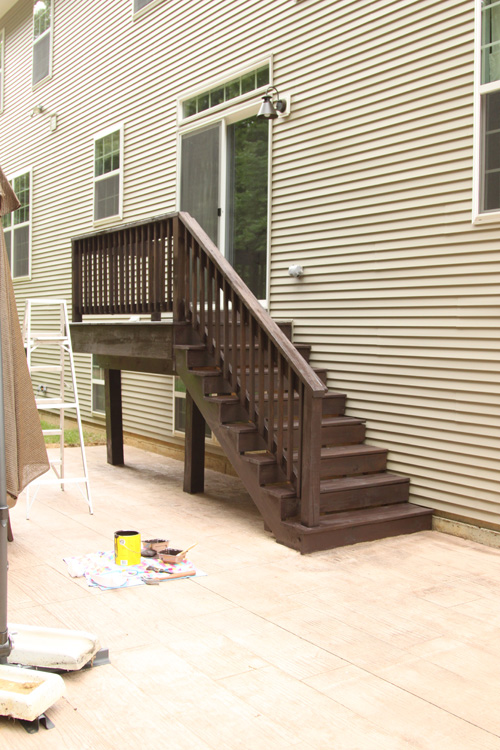
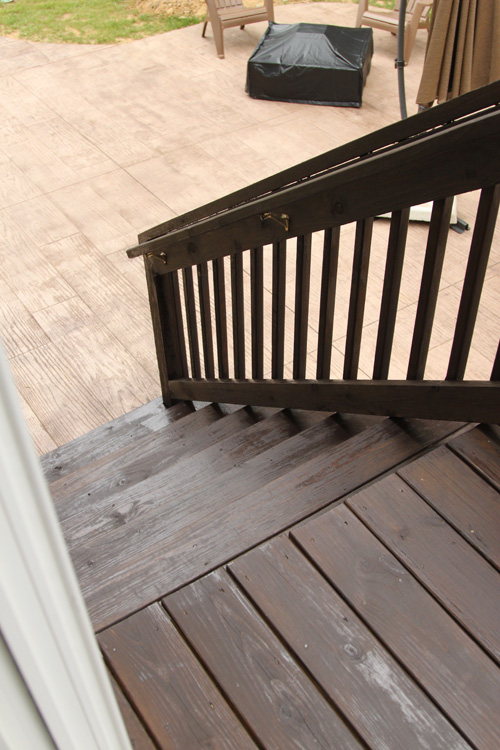
See it down there? It fits under the stairs quite nicely. Sorry I don’t have more pictures because my camera died ๐Ÿ™ It’s plastic and waterproof, so it keeps our wide striped pillows nice and dry when we’re not using them. We have some citronella candles in there too. We also wanted storage to have a place to put our furniture covers when we take them off for the day. So when the pillows and candles come out of the box, the covers go in! It works out nicely. It matches the color of our newly stained steps pretty well and it snapped together in a few minutes, like a giant lego.

Long story short, we got an umbrella and cover from Pottery Barn for free, opted for the cheaper storage option and I love “Saved by the Bell” and will now go watch more videos. I recommend you do the same ๐Ÿ™‚

Stained

6 Comments

Posted by Rebecca, June 6th, 2011

This weekend was uncharacteristically cool with temperatures in the 70s or so both days. I wanted to give the house a good spring cleaning (yes I know, it’s nearly summer) and my closet needed to be organized. But we couldn’t resist the chance to work outside without sweating or getting sunburn, so we decided to tackle a project on our outdoor to-do list. Mike put in his vote for staining the stairs that lead to our patio.

We started later than planned on Saturday since we had some errands to run and we were trying to decide what project to tackle. Once we decided to stain the stairs, we figured we just go to Benjamin Moore (which just happens to be around the corner from our house) to get Pottery Barn’s Chesapeake Brown stain. This is the color of our outdoor furniture and once we saw that they sold the color at Benjamin Moore, we figured it would be an easy choice. We went to our local Benjamin Moore store and they didn’t carry their own brand of stain! We debated whether or not to go to another Benjamin Moore, but we figured since it was already noon we’d just head back to Lowe’s (we had already been over there) and choose a dark stain. Our furniture is a dark brown so we figured it wouldn’t be too hard to get something similar.

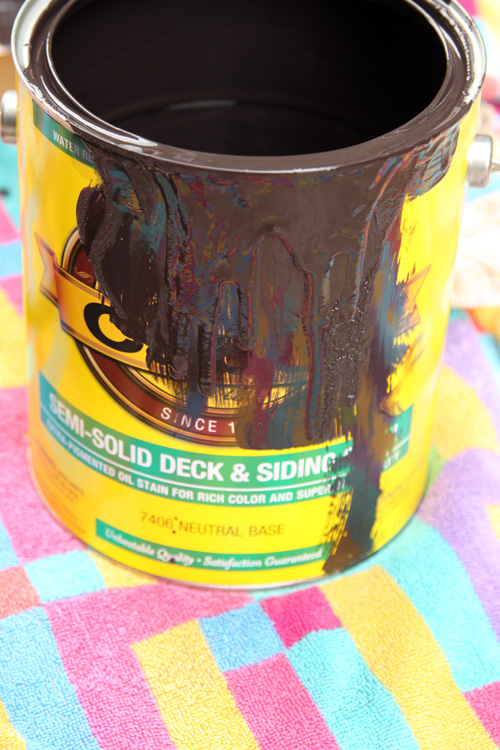
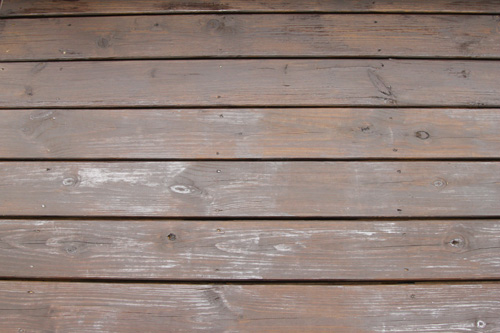
We ended up choosing Cabot Semi-Solid Deck Stain in Cordovan Brown. It was literally the darkest color Lowe’s had and it had to be mixed. I took a before picture, but I apparently butchered some settings on the camera when I did so the picture looks like a trippy x-ray. But here’s the can while we were using it ๐Ÿ™‚

We have never stained anything before and didn’t know anything about the products. We chose something that said it was meant for the outdoors and then basically went for a color. However, this stuff stunk and I was not a fan of that.

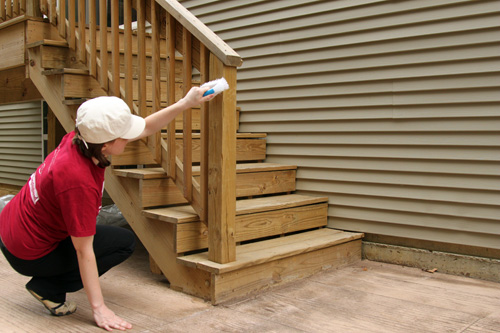
We had to clean off the stairs first, since they were covered in some dirt from the patio process. I used a scrubby brush we bought for our laundry room floor that we haven’t used yet.

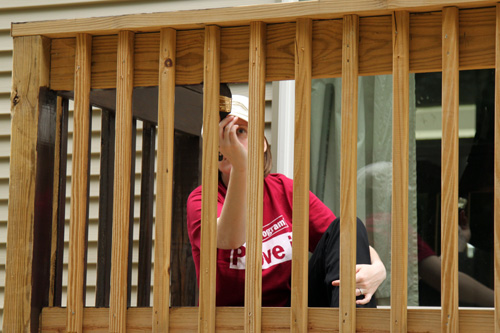
Who’s that 14 year old boy?? No wait, that’s just me… wearing a men’s shirt and a hat. I just got my hair cut last week and it’s in that too-short-for-ponytail phase, so I needed the hat to keep it out of the stain.

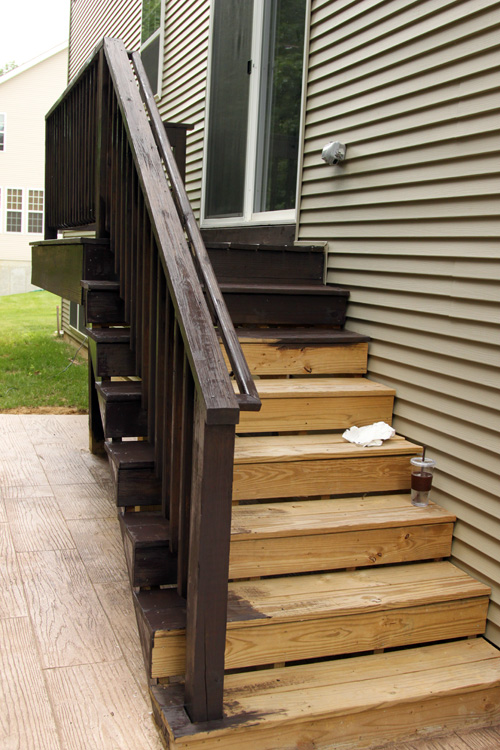
We had some plans Saturday night, so we were only able to tackle the outside and railing/spindles. We saved the areas we had to walk on for last so that we could get up and down the stairs for as long as possible.

I also suffered from several splinters in my…pants. Sitting like this and scooting around made me jump out of my seat several times. Luckily my pants were thick enough to protect from serious injury and/or death ๐Ÿ™‚

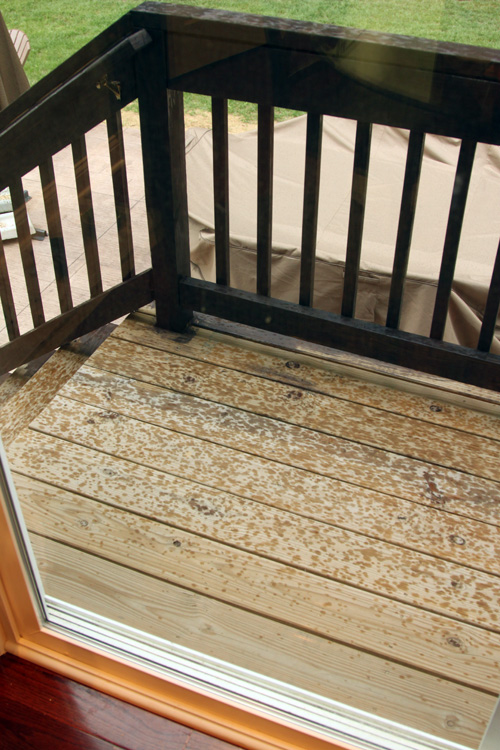
We had to stop for the night around 5 and when I got out of the shower the stairs looked like this…

Yes, it started raining on our hard work minutes after we stopped. Thankfully, it didn’t ruin anything or cause stain to run all over our patio. But can I just say that the weather is a jerk?? This has been happening to us for weeks. I specifically checked the weather and wanted to stain on Saturday because it was supposed to be dry, while Sunday was supposed to have thunderstorms. But of course, Sunday was dry…

Day 2 began the staining of the walkable areas. We started earlier because, you know, I was waiting for those afternoon thunderstorms that never came.

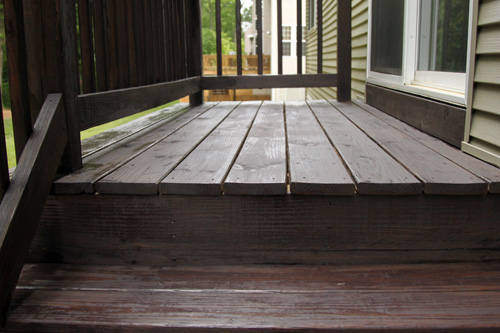
The large, deck portion was a breeze. I thought because it had the greatest area it would be hard, but it went so fast and was pretty fun to do.

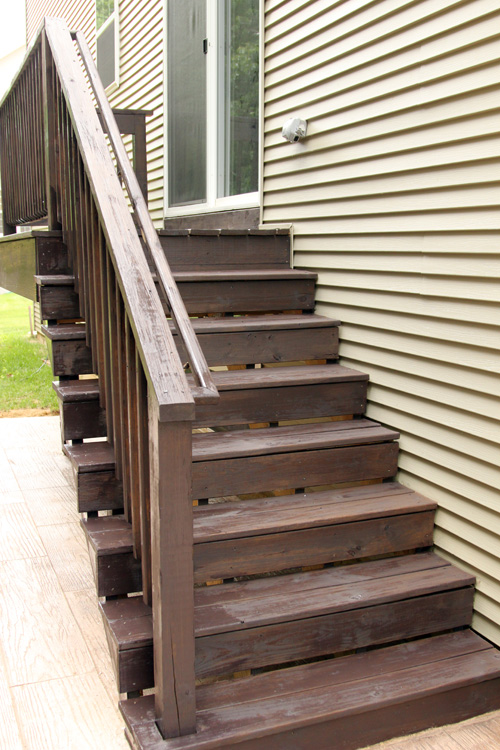
The steps were not so fun and took much longer. There were so many pieces of wood and edges hugging the house that it took some attention to detail.

By early afternoon yesterday, we were all done and just waiting for it to dry!

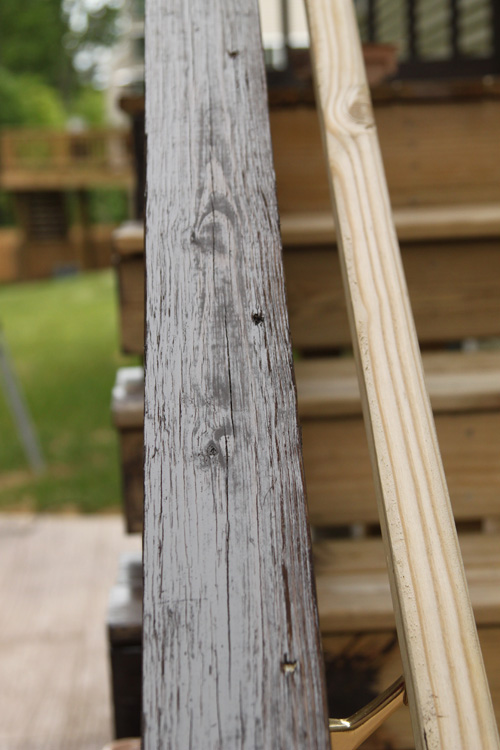
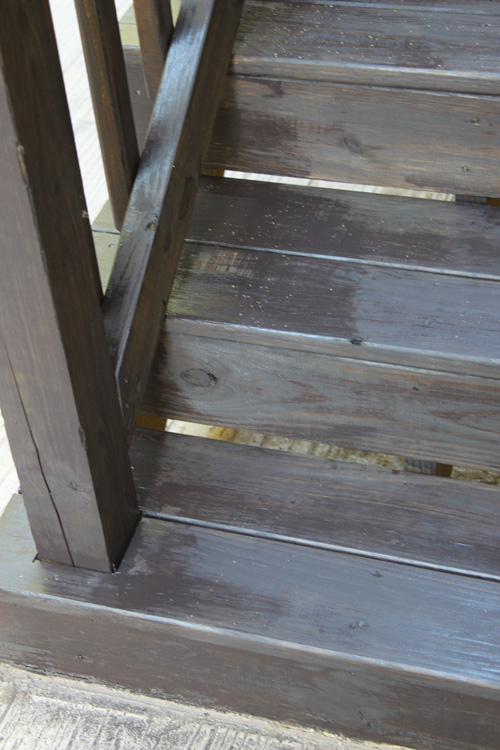
I went outside today to check on the drying process. It was dry to the touch, but I was a little disappointed to see that there was some obvious unevenness. We didn’t wipe off the excess stain, mostly because we wanted it to be dark and because I was putting on thin coats and essentially dry brushing the heck out of it. Mike did most of the outside parts and he put his stain on thicker. So some spots I assumed were wet are actually permanently shiny. I noticed the thicker stain on Saturday and tried to wipe and dry brush the areas out, but it was too late ๐Ÿ™

I’m planning on sanding down these super shiny areas and re-staining them to look a little more rustic like the other parts. Rookie lesson learned- make sure you’re both using the same staining method when working in a team ๐Ÿ™‚ No big deal, you live and you learn.

psst- I’m linking this post up to Thrifty Decor Chick’s Before & After Party today ๐Ÿ™‚

Land Ahead

9 Comments

Posted by Rebecca, June 1st, 2011

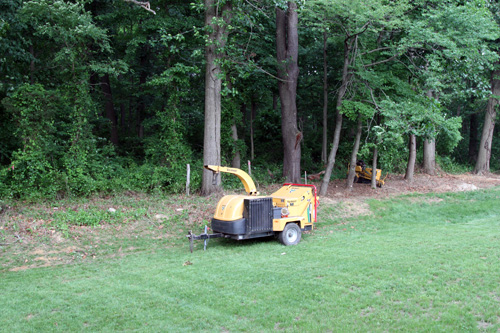
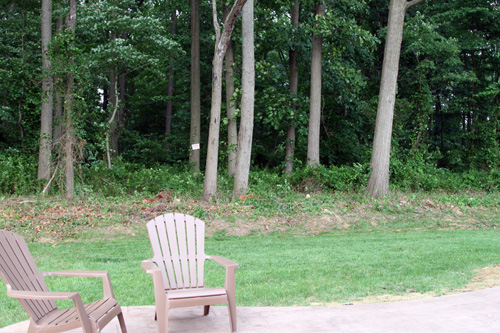
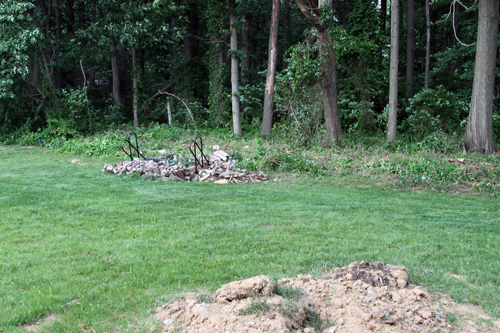
Today started the backyard clearing process! When our house was built, the land was only cleared to a certain extent. We have a lot of sticky bush type things, dead trees and even an old log hanging out in our backyard. They all clearly had to go so we could enjoy all of our space, since we couldn’t even see our property markers before today. It’s not completely done yet, so I only took a few pictures to share and hopefully I can give you some before and afters when it’s all done tomorrow.

Here is the right side. All the way to the right you can see our neighbors also had their brush cleared and theirs is all done and looking pretty ๐Ÿ™‚

A little more center…

Sort of left center…

And left field side.

We still have 3 dead trees that are getting cut down tomorrow, which is good news considering NJ has a tornado watch in effect tonight. I’ve never lived in an area of tornado watches in my 27 years living here. Yeah so, all the more motivation to get rid of trees that may fall on my house in high winds ๐Ÿ™‚

Oh! More good news! Our tree buddy is going to dump our pile of wood at the back of the property line so that we don’t have to carry each of those pieces back there! Yay!

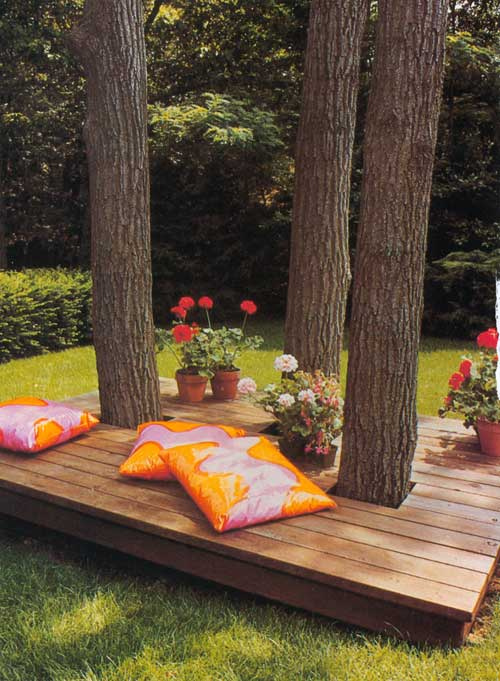
The backyard looks 10 times better already. I’m already thinking of whether I could defy the odds and grow grass in the summer. Hm worth a shot in the shady area between those trees? Then maybe I can do this, which I found on Pinterest…

(via)

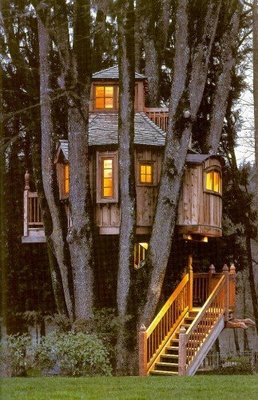
Or maybe build a kick ass treehouse, also found on Pinterest?

(via)

Time will tell what we do with our new found land!

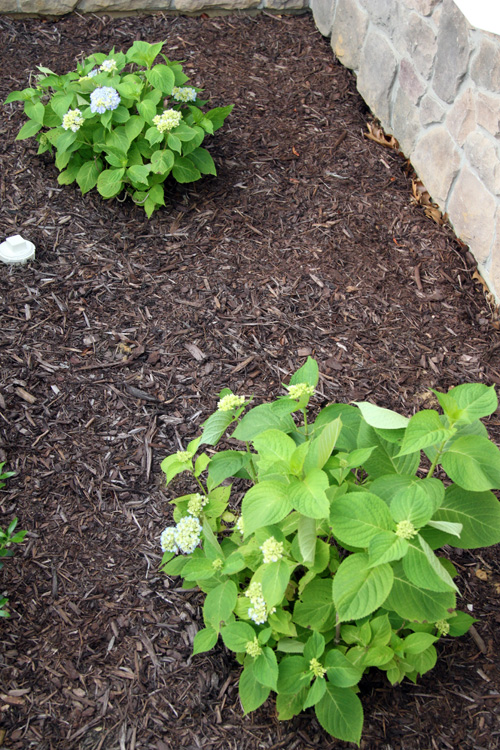
ps- two days later and both hydrangeas in the front yard are blooming!

The Patio Day 2

126 Comments

Posted by Rebecca, May 3rd, 2011

Hey it’s me! I know it’s been a while, but I’ve been super busy with school. I never got a chance to thank everyone for the support you gave me after the post I wrote about our kittiesย Mac and Sunny last week. It really meant the world to me, so thanks ๐Ÿ™‚

Unfortunately, Macky had a seizure at 1:30 this morning. But he is doing okay and had a happy birthday last week. We were all very tired and stressed when the cement truck pulled up at 7:00 this morning. As excited we were for the patio, having the doorbell ring that early and having to move our cars out of the driveway was not fun. But, we now have a patio!

Wait, what? You thought we were doing a wood plank stamp?

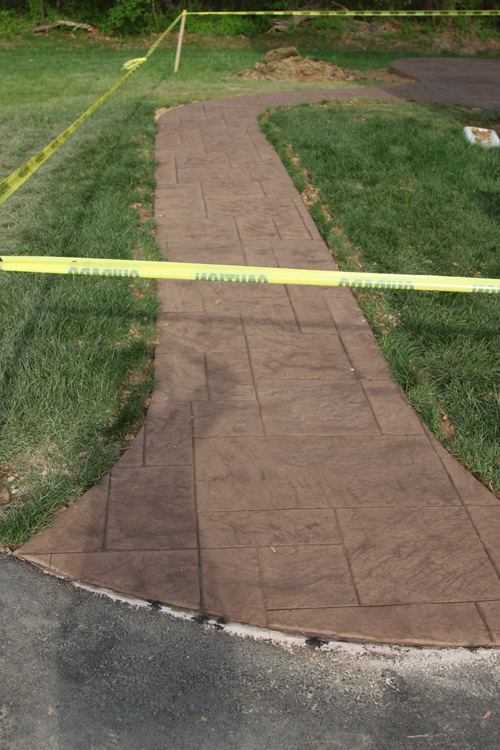
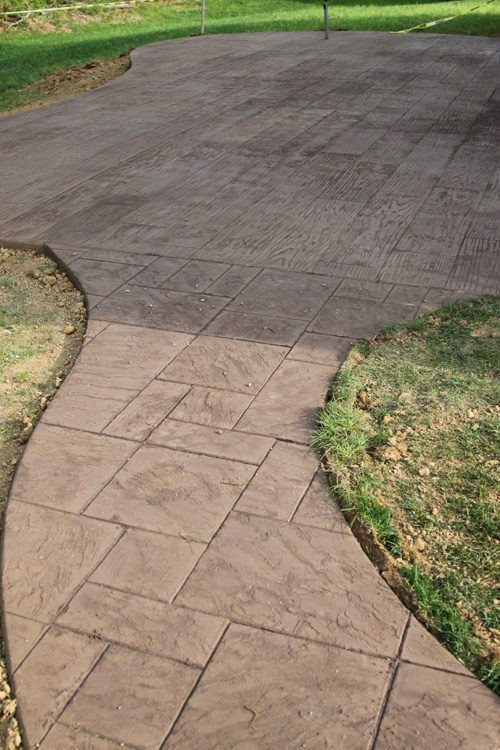
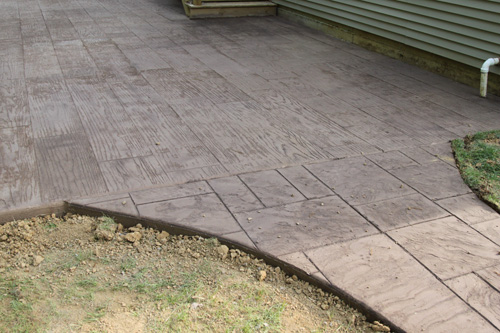
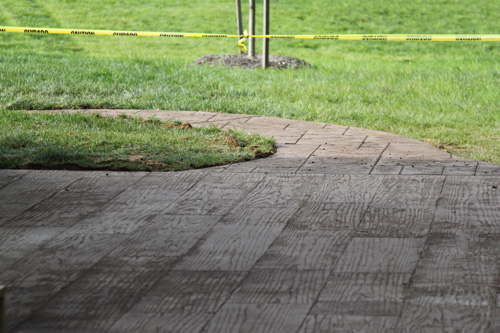
Well after talking with our concrete buddy, we decided the wood plank stamp wouldn’t look great on the walkway. I was worried about this, but he actually brought it up. He suggested we do 2 different stamps. At first I was all like uhh, that’s going to look funny. But he confidently told me that he had a client do it and he thought the same thing, but the result was great. He reassured me by saying that people mix pavers and wood decks, so why not a wood plank stamp with a paver type of stamp? It really didn’t take long to convince me that this could be a cool idea. We picked out the pattern above while standing in the yard in a matter of about 2 minutes. I liked the smaller, mixed size of the “tiles” and the grain type of texture they had to match the wood stamp. We still kept the walkway the same color as the wood stamped patio to unify the spaces.

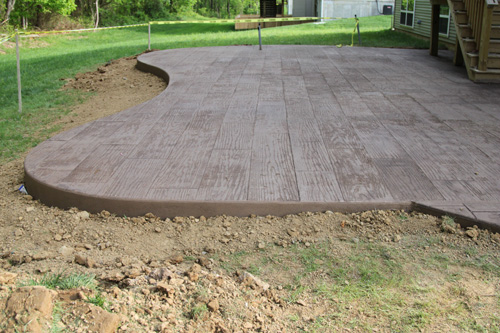
Without further ado, the patio! After stamp but before sealer, so the color will change slightly and will have a nice sheen ๐Ÿ™‚

These guys worked so fast that before 9am, the concrete was fully poured. I was home keeping an eye on Macky for a few hours so I got to see the pouring/smoothing process. It looked quite like icing a cake ๐Ÿ™‚ I missed the entire stamping process though ๐Ÿ™ I was dying to see that!

ps- Here’s the video tour that wasn’t working earlier!

I’m linking this post up to Centsational Girl’s Outdoor Ideas Party!

Spring Fever

130 Comments

Posted by Rebecca, March 3rd, 2011

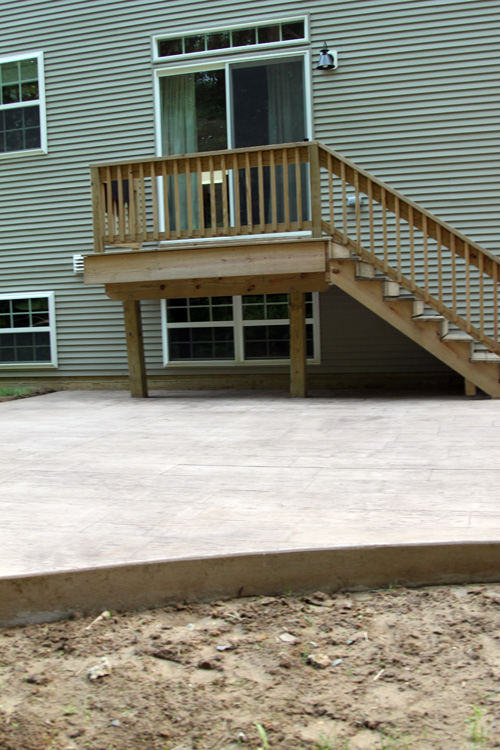
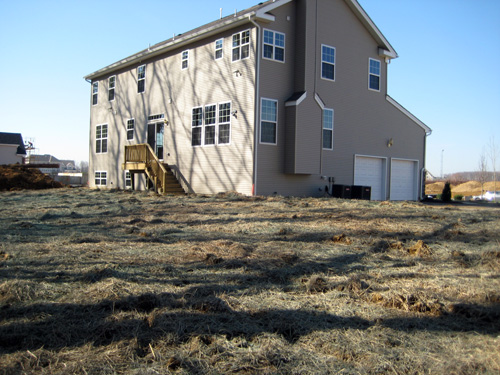
We visited our neighbors this weekend and as we were leaving they said something along the lines of “well pretty soon we can hang out outside and grill!” Mike and I looked at each other, realizing that not only do we have no outdoor “hang out” space, but we don’t even have a grill. The back of our house still looks like this….

We put zero effort into thinking about this space. Well, realistically thinking for the near future. I have high hopes of a pool with a waterfall and slide, but I know that’s not likely to happen. I am not a good landscape/hardscape envisioner… I am still new at this part of homeownership. I can think of the “feel” and “mood” I’d like our outdoor space to have but as far as actual materials, layout, size.. I am clueless.

After our neighbor’s reminder and the long and cold winter we’ve had, we started to think that this may be our big project of 2011. I love being outside when it’s nice out and sitting on the porch by myself got old quick last year. We originally thought we’d do a deck, but a) it’s expensive to do composite b) there’s maintenance involved with real wood with a dark stain and c) not sure if it would be the best place for my firepit dreams. So then we thought (in our dreamland) that we’d do a deck with an eating space with stairs down to a patio with a firepit/loungey area. Then we decided that we didn’t want to eat up too much of our yard and want to keep our future options open. So we started to think about just going with the patio.

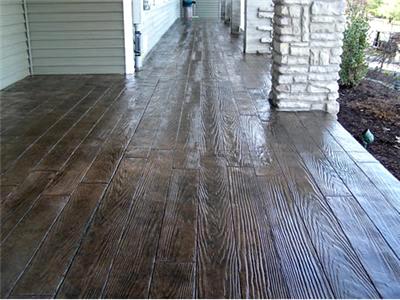
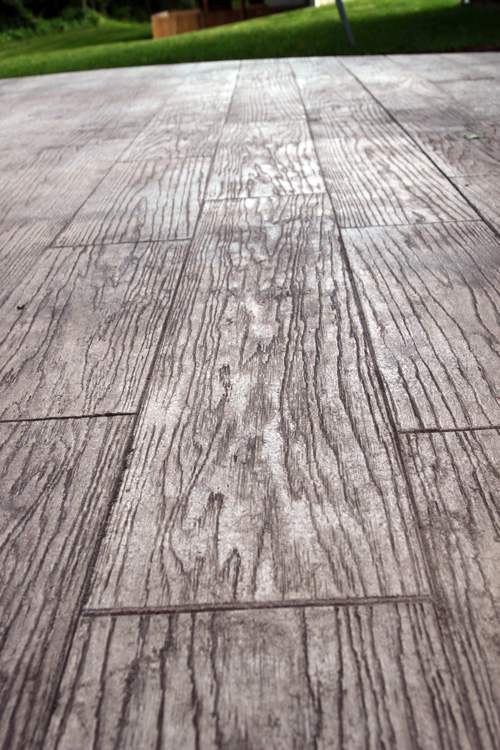
Once again, not only I don’t know much about this, but most patios don’t really do anything for me. We don’t want pavers and figured we’d go with stamped concrete. I just wanted to get a base down that we can work with over the next few years. I’ve seen some different things done with planters and whatnot that peaked my interestย in outdoor space a liiiitle, but for now I was settling for just a start. So we were thinking we’d go with a fieldstone or cobblestone pattern to compliment our house, though neither option really overwhelmed me with excitement. Then Mike discovered this stamp pattern…

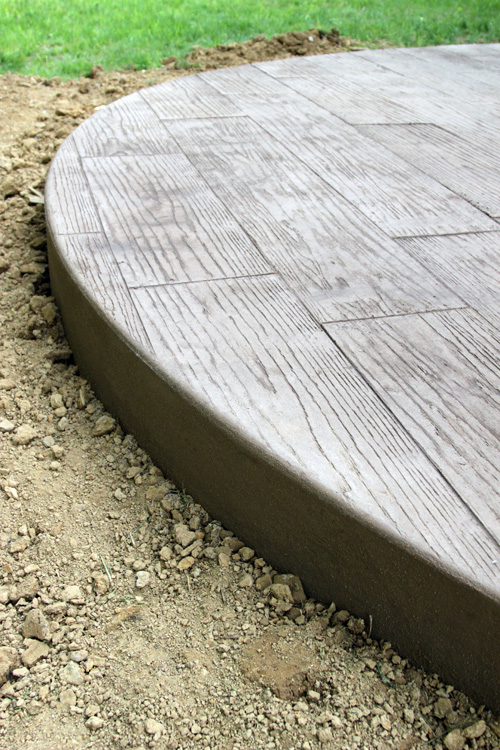
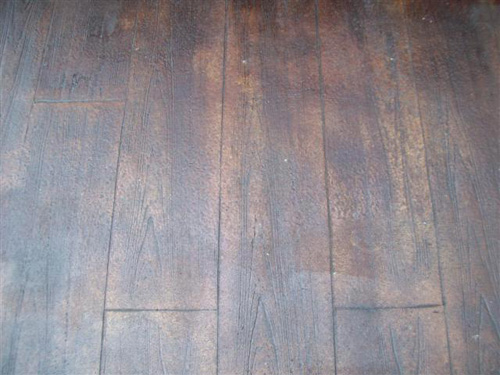
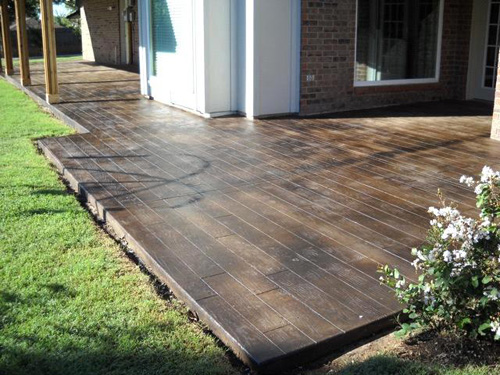
No that is not hardwood, it is stamped concrete! Mike found this idea on a local contractor’s website. We contacted him immediately to get an estimate. I have a love for wood that is dark and rustic, so to be able to have the warmth of a deck combined with the ease of concrete? Heavenly! I’ve never seen anything like this before and it definitely had that little extra we were looking for! Here are some more pics I found while googling…

(via)

(via)

I love the added texture in that last picture! Now, Mike and I can almost guarantee that this pattern and color will be the most expensive stamped concrete option in the history of the world… we just have that sort of luck. But we figure it can’t hurt to ask around. The next question we had to tackle? What size do we want.

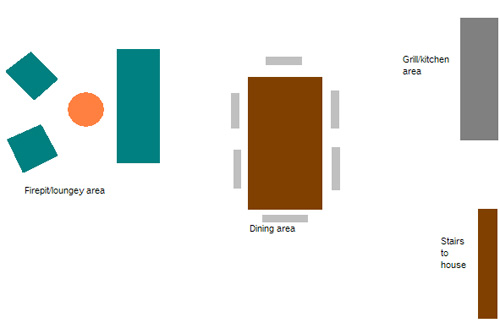
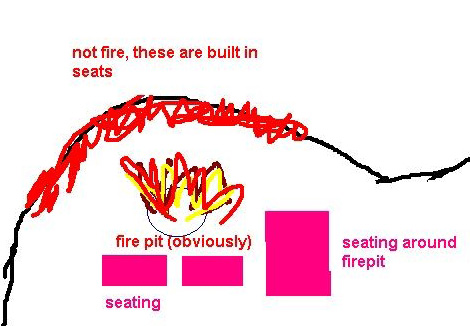
Mike asked me what I wanted out of the space and since he often responds to me with “I’m not following you” or “can you put that in terms I understand”, I had to do one of my awful Paint sketches that are not meant for the general public…

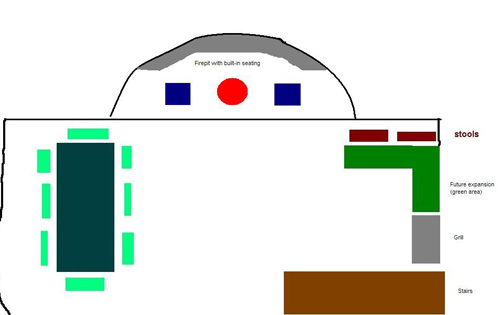
I’m hoping we find a creative contractor that can do better than my pathetically planned out rectangle. We would like all of these elements, just in a well thought out and planned space. So we started throwing some ideas back and forth after thinking for it a bit, so I revised my sketch to push back the grill to save some room for growth…

Mike then elaborated on this and came up with the best sketch ever…

Wait, do you need a close up of the best part?

I married such an artist.

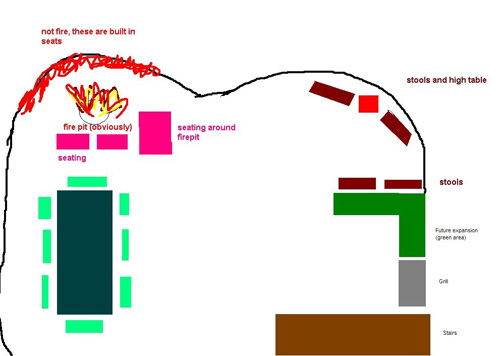
But I think we just came up with a patio the size of our backyard. So I came back with this one, cropping the patio at the edge of the bar and table and adding a lower level for the loungey/firepit…

I think this will still be too big, considering the mass amount of dead space in the center, but hopefully this is just a jumping off point. We’re hoping to actually go outside to the backyard (what a novel concept!) to get an idea of how large we want this thing. We had an appointment with the concrete man for Saturday, but we had to cancel it because we forgot we had other plans. So hopefully, concrete man will come soon with tons of ideas, thoughts on maximizing our space and a cheap price!

Until then, our Paint wars will continue…

ย Update! For those of you just finding this post, we did go forward with the wood plank stamped concrete! You can read all about it in this post and here are some of our very own after pictures ๐Ÿ™‚

Copyright 2010 - 2011. The Lil House That Could. All rights reserved.