Archive for the ‘office’ Category

Coming To You Live From…

1 Comment

Posted by Rebecca, August 9th, 2012

… the new office!

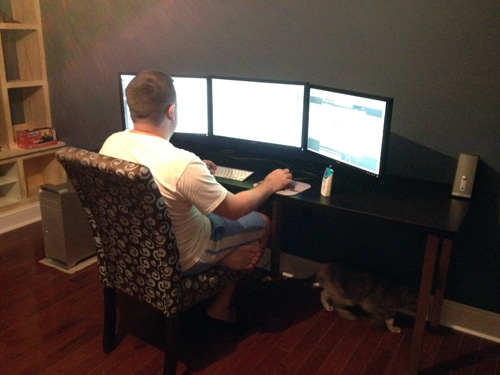
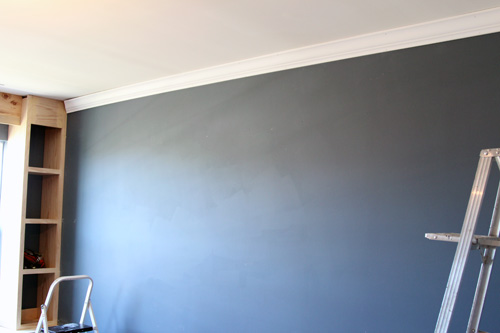
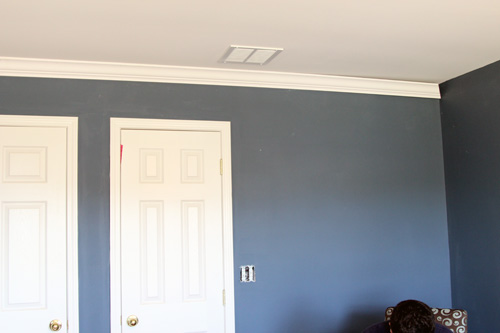
Yep, we officially moved ourselves upstairs today. My chair just made it’s way up so that I could write this post.

I snapped these pictures with my iPhone because a) we moved up here literally just tonight and b) by the time I got Easton to bed and threw in some laundry it was too dark to take pictures.

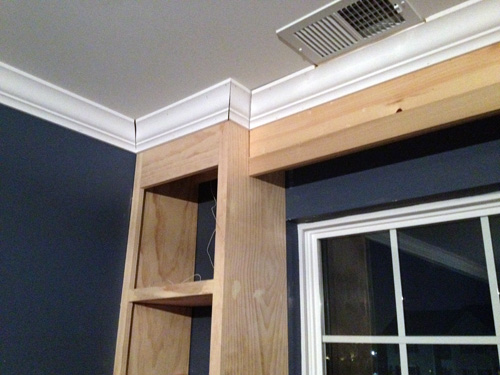
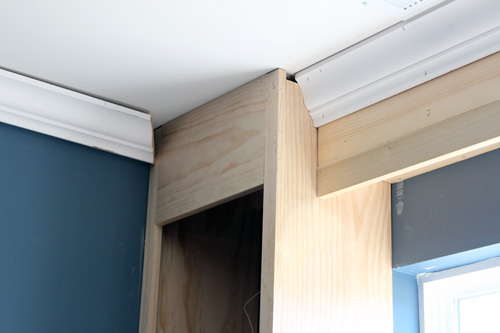
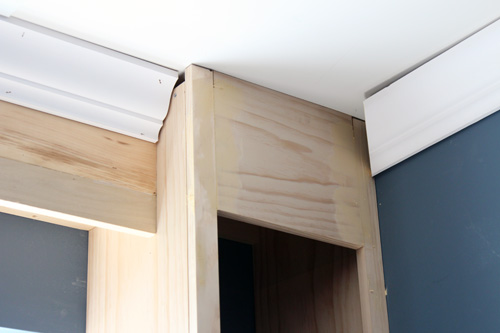
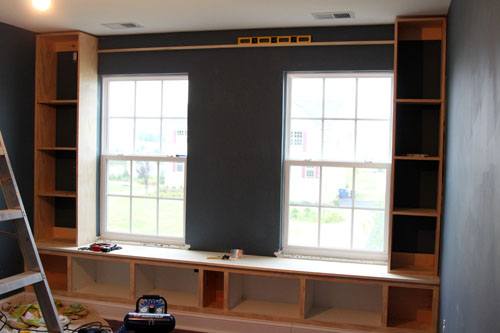
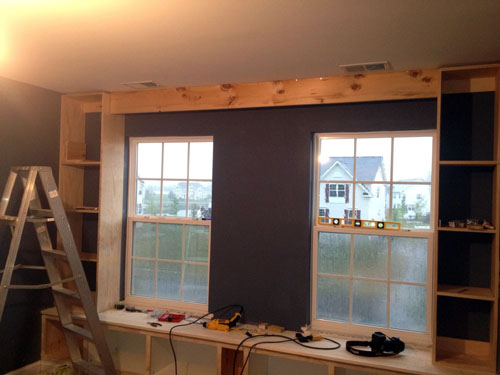
I go back to work in the middle of next week, so we decided that we had to focus on the big picture in this room. The past several weeks, Mike has been working hard on the built-in cabinets/bench and the crown molding but there is still a ton of work left to do. Mike did conquer the crown molding beast around the built-ins and did a pretty good job. This was only the second room we’ve added crown to, which is a pain in itself, so this corner was rough.

It still needs caulk and paint, as does all of the trimwork in the office, but as I said before we’re focusing on the big picture at the moment. The goal was to have the office moved up here by the time I went back to work so that Mike had a safe place to bring Easton during the day. The former office was the victim of our cat’s kidney cancer (though thankfully the only victim!) and we used so many chemicals to attempt to clean the carpet that we don’t want Easton in there. We’re going to put a pack ‘n play in the new office so that Mike can work if Easton is napping. We will be replacing that carpet and turning the former office into a playroom.

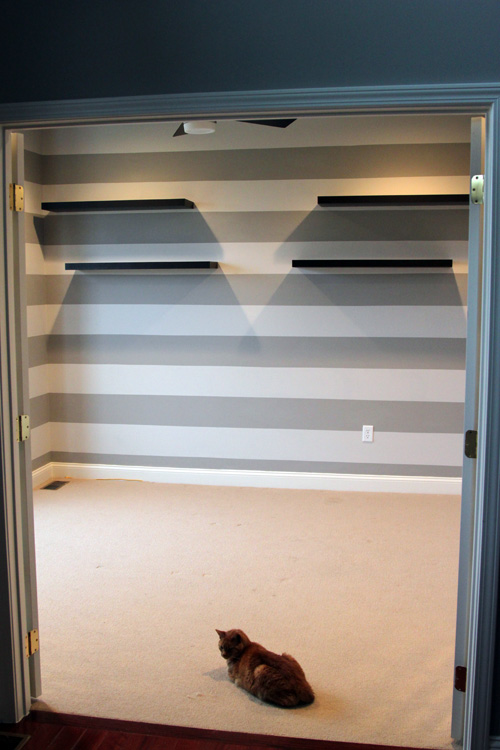
The stripes we so painstakingly painted will of course be staying. When we painted them, we knew this room would someday be a playroom and hey, stripes are fun! The black shelves will be coming down and the fan is coming upstairs with us. We bought a new light fixture for the playroom a while back. Then we plan on building some more built-ins for Easton’s toys. I can’t wait to get started in there, though it’s going to take us a while. Baby steps.

That being said, I’m not sure I’ll be blogging next week. I may take a break to adjust to going back to work and to try to avoid any sort of emotional breakdown 🙂 The less stress the better for now. I would say it’s my first break from blogging without guest posters, but I did take that break you know, when I gave birth. I’m just going to play it day by day and see how it goes. Maybe now that we’re in the new office I’ll want to write about my ideas. It might just relieve some stress and mommy guilt 🙂

Crowning the New Office

2 Comments

Posted by Rebecca, July 26th, 2012

Yesterday, my mom came over to watch Easton so that I could help Mike install the crown molding in our new office. If you recall from our adventures in installing crown in the nursery, I figured out the angles while Mike provided the muscle. We figured this second installation would be cake, though we had to work around the new built-in bookcases.

We picked up 12 foot pieces of molding so that we had less seams to caulk. We started simple with the 3 walls that didn’t have bookcases.

Seemed simple enough, though the wall was longer than 12 feet, so a seam was inevitable.

You can read all about the details of how we made our cuts in this previous post. Though we realized we must really be horrible at installing crown because it was impossible to match up the corners of these long 12 foot runs. The chances of our ceiling being level from end to end are slim to none. The pieces have some flexibility to them, but it’s still hard to get everything matched up to a point where gaps are caulkable. Therefore, we once again ended up breaking some of the longer pieces down to match up the corners perfectly. I think we’d rather build 5 more bookcases than have to install crown again, but at least this shorter wall was easier…

If you notice we didn’t nail the ends right away so that we could move the pieces to match the corners. We learned this trick the hard way last time 🙂
So that was the easy part, next was adding the crown to the top of the built-in. We thought it through a little (okay, not really too much) and decided to start with a straight run of molding across the top first.

When we did the paneled wall in the nursery, we topped it with a straight cut of crown and coped the side pieces into it. We thought we could go with the some method. We called it a quits since I had a baby to feed and we got all of the long pieces done. All that was left to do were these smaller pieces around the bookcases…

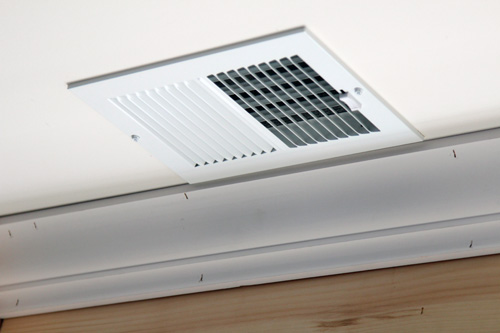
But yeah, that didn’t work. First, we need to put that top piece at more of an angle. We tried to install it so that we could avoid making cuts around 2 vents that are on the ceiling.

After that, we have to figure out how to make an inside corner and an outside corner in an incredibly small piece of molding. We’re not sure that coping was the right choice, since that piece is so small to begin with. Mike tried solving it for a bit today, but the little hamster that runs on the wheel in his head got tired and he came downstairs. I think I saw some smoke coming out of his ears from all of that thinking…

If we can ever figure this out, all we have to do then is caulk and paint the built-ins and trim! Then we will finally be able to start moving in to our new workspace… and Easton will have his playroom 🙂
Wish us luck for a speedy recovery solution!

Some Built-in Updates

4 Comments

Posted by Michael, July 19th, 2012

When I left you, I had just finished the base of our built-in’s for the new office.  The next step was to build up the sides and then finish up with the valance.  The sides weren’t too bad; mostly straight cuts, a couple nails and some glue.  I left off the back because we don’t have the right tools to make the exact cuts required.  We figured we’ll just prime the back and then paint it white to match the finished built-ins.  Not bad.

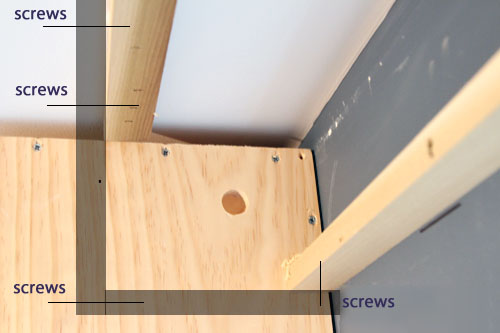
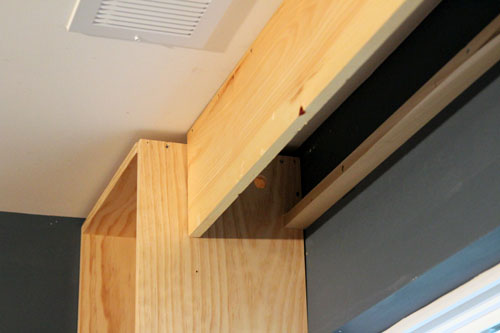
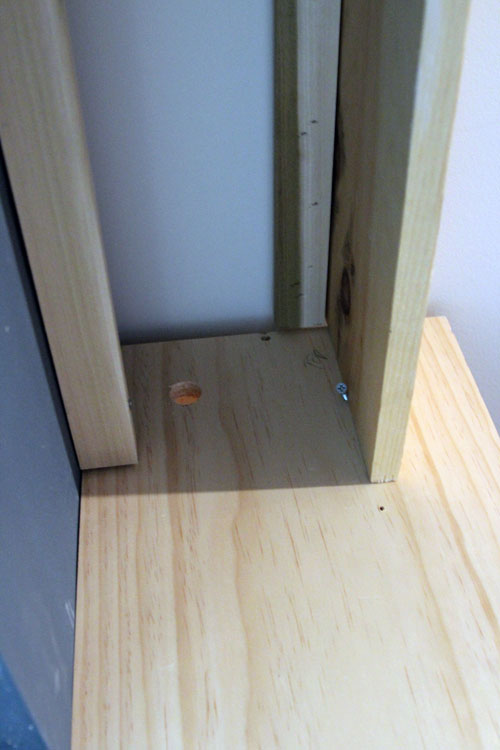
You can see in the pictures below, I put support braces at the tops and bottoms of each bookcase.  This was to ensure we could secure this thing into another stud besides through the sides.  I also used a boatload of liquid nails.  I’m pretty sure this thing is going nowhere.  I feel bad for the next homeowners should we decide to move and should they decide to take this thing down.  Oh man, they’re in for some fun.

Next up was beginning the support pieces for the valance.  This is where I became nervous.  I knew this would have to be able to support plenty of weight between the wood valance, molding and puck-lighting.  In addition to support, I knew this would need to be completely level.  But how do you get it completely level when your ceiling is about a half inch height difference from one end to another?  I’m not sure.  But it all worked out; one way or another.

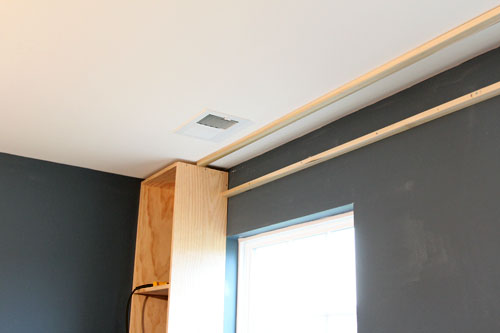
I supported the valance cleat to the wall by drilling screws through just about every stud between the two bookcases.  It also has support with lots of liquid nails.  I think I’m forming an obsession.  I also secured each end to the bookcases via screw.

I then began securing my second cleat to the ceiling.  Do you know how hard it is to find a stud in a ceiling?  I knocked and knocked on the ceiling for probably a half hour trying to find each stud.  The stud finder didn’t help, at all; probably because I’m a bit too awkward holding that thing up against the ceiling.  You’re probably wondering where I am going with these cleats and how it all ties into the valance, huh?  Here is the plan.

Each cleat will secure a portion of the weight from the valance face and bottom.  Then the valance face will secure into the bottom creating a nice clean edge.  Dear god I hope so. You’ll also see I drilled a hole for the puck lighting which will sit on the bottom of the valance bottom.

Here you see the valance face mounted via screws to the front valance cleat. It’s also secured with screws through the sides of the bookcases.  This thing is going nowhere. Don’t worry about those gaps you see between the ceiling and the bookcase; the crown will hide a lot of these imperfections.  Phew.

This is the view from “inside” the valance.  You’ll see I drilled a hole for the puck-lighting again.  See that random screw?  It was my clever way of making sure the valance face stayed level and straight while I was securing it to the cleats.  The valance bottom will fit snug behind the valance front and the rear cleat.

So what’s on the remaining to do?  A couple things actually.

  • Install puck-lighting to valance bottom.
  • Run wires to the left bookcase (where the outlet is).
  • Secure valance bottom to the rear cleat and valance face.
  • Install crown molding.
  • Caulk the heck out of this thing.
  • Prime the heck out of this thing.
  • Paint.

Stay tuned. 🙂

Previously on The Lil Office 2.0

8 Comments

Posted by Michael, June 28th, 2012

Previously on the lil office that could, we told you our plans and initial work for the new office.  Fast forward a baby and six months later, the project resumed!

To recap, we’re moving the existing striped wall office upstairs (sans stripes).  The existing office will become a playroom and toy storage for Easton.

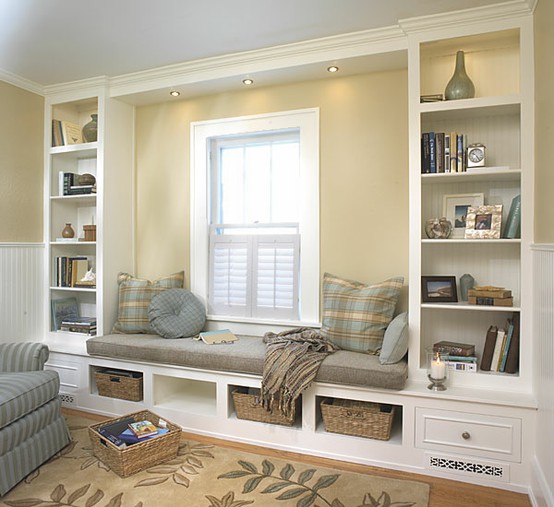
We knew the new office needed storage, so we decided to do built-ins cabinets along the wall with our windows.  Our end goal is for the new office to have built-ins much like below.

(via Plans Now)

Way easier said then done, especially when Rebecca and I lack any type of building experience. 

In late December and into early January, we thought the entire thing out.  And after several trips to Lowes to browse building materials, we decided our best option was to go with prebuilt cabinets via Ikea.

We figured having the base cabinets somewhat prebuilt would make the process a ton easier.  It did make things easier.  But looking back now, we should have just built these things from scratch.  Oh well, there’s always next time!

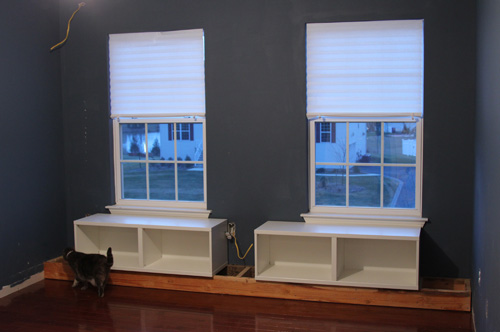
I built a frame out of 2×6 boards.  This allowed us to elevate the cabinets so we can place molding underneath them.  As you can see above, I also ran some electrical towards the top of the wall in order to do some puck lighting down the road.

The above is where I left you, six months ago.

With Easton here now, we knew we had to get this office completed.  Since I work from home these days, I need a space where I can work and Easton could play.  The existing office just couldn’t handle that.  So while Rebecca feeds Easton during the day (just about every 2 hours), I’ve been working on the new office.

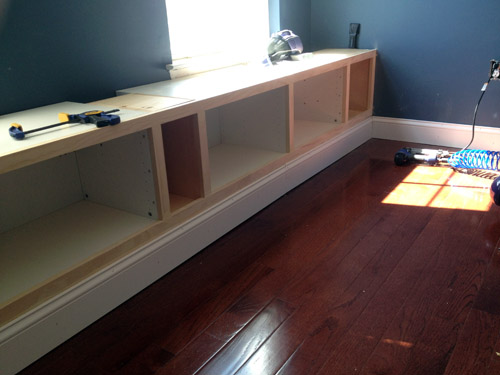
Due to the length of the wall, the Ikea cabinets couldn’t eat all the space.  I built boxes to fill the space and then attached them to the Ikea cabinets with some glue and screws. I built 3 of these boxes; two for each end and one in the middle.

Once the boxes were completed and attached to the Ikea cabinets, I secured the entire unit to the frame on the floor and to several studs within the walls.  Now since we couldn’t match the sizes between wood available at Lowes and the Ikea cabinets, I decided to add some trim.

As you can see above, adding the trim really gave everything a unified look.  And if you look even closer, I even began adding floor molding!

Once the trim was added, Rebecca and I began wondering what we should do with the top.  We eventually want to add a fabric top, but ultimately wanted this thing to look finished.

Since my saw is unable to do these types of cuts, I had Lowe’s cut down two ready-to-paint wood boards to our size.

The top hangs off the cabinet tops by about a half inch which is exactly what we wanted.  It gives the cabinets a nice finished look.

And here is where we currently are.  I mounted the top with some liquid nails and some screws.  There is a seam between the two boards, but I used some wood filler to really hide it. I also added quarter round molding to the floor to match the rest of the house.

So what is next?  There is a slight gap between the top and the trim.  I had to use some shims in order to get the top completely level and in doing so, it left a teeny tiny gap.  When you walk into the room, you can’t see it.  I debated if I should let it be, but I knew it would annoy the crap out of me; even if no one could see it.  I’ll be off to Lowes in a couple days to pick up some trim to fill in this area.  Easy stuff.

I’ll also begin building the side bookcases during the week.  Now that I’m incredibly more comfortable with building these things, I’m sure I’ll be able to bang them out in a day or two.  Once completed, I’ll then work on the valance to go across the top along with the puck lighting.  Almost there!

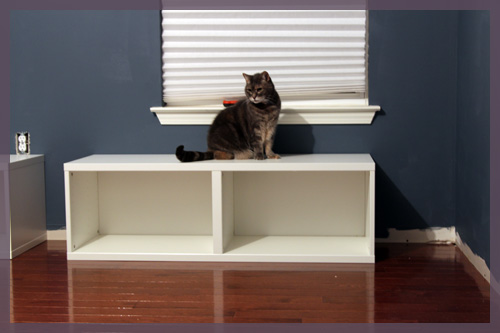
Diggy was the first to discover the new built-ins and immediately jumped on top to check out the view!

Organizing the Wrap

30 Comments

Posted by Rebecca, March 13th, 2012

It’s that time again, time for Young House Love and Bower Power‘s Pinterest challenge! For the last two Pinterest challenges, I made paintings… one was the landscapes I hung in our dining room and the other was a pencil eraser monogram. I really had no clue what to make this time since we’re still in the middle of painting the nursery and not quite ready for any other projects in there. I also did not want to tackle any other large projects on our to-do list, since the nursery is our primary focus these days (considering we only have 8 weeks, eek!) I was honestly thinking I’d sit this one out when Mike reminded me that we picked up some things from Ikea a while back to organize our gift wrap. He’s a keeper.

Cue the Pinspiration!

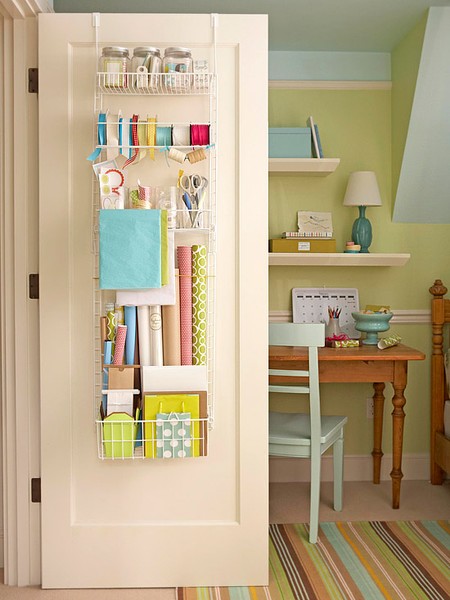
(from BHG via Pinterest)

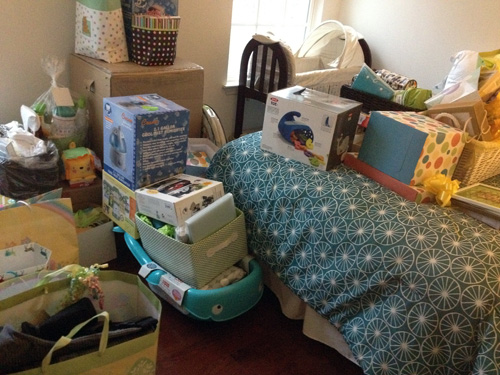
Up until this point, I’ve stored gift wrap in one of those Rubbermaid gift wrap containers. Problem was it didn’t really accomodate my ribbon collection or taller wrapping paper. Our wrapping paper has been hanging out in our guest room and this year I decided to use the Rubbermaid container exclusively for Christmas wrapping stuff. Considering the guest room looks like this as of our baby shower this weekend, this challenge could not have come at a better time….

This is only the smaller gifts… the larger ones are downstairs. Once the baby’s closet is all painted and done, we can move this stuff out of here. All the way in the corner was my wrapping paper collection, I rescued it from the sea of baby.

I decided to use another organizing method I found on Pinterest, this one from A Brooklyn Limestone.

(from A Brooklyn Limestone via Pinterest)

We picked up supplies to tackle this back when we were on a new office kick. We literally dropped everything to work on the nursery once February rolled around, so this got put on the back burner. We pretty much bought exactly the same supplies as the inspiration picture, with a few modifications….

3 Bygel rails

1 Bygel wire basket

1 pack of Dignitet curtain clips

4 Gruntal cutlery caddies

I didn’t take any in progress pictures except for this one, please excuse the mess all over the place. This room was our clutter and sawing area while working on the nursery.

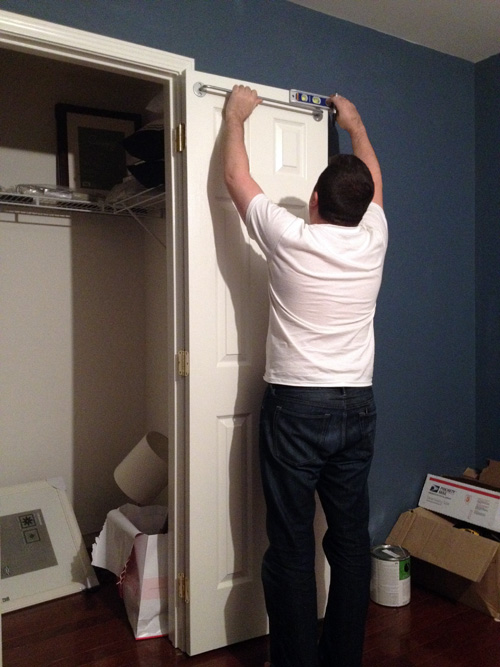
The process was pretty simple and self explanatory. Some important things to note though, the bars do not come with screws. Also, if you go with the Grundtal cups, they screws they give you (or at least they gave us) were too short. So keep some spare screws nearby 🙂

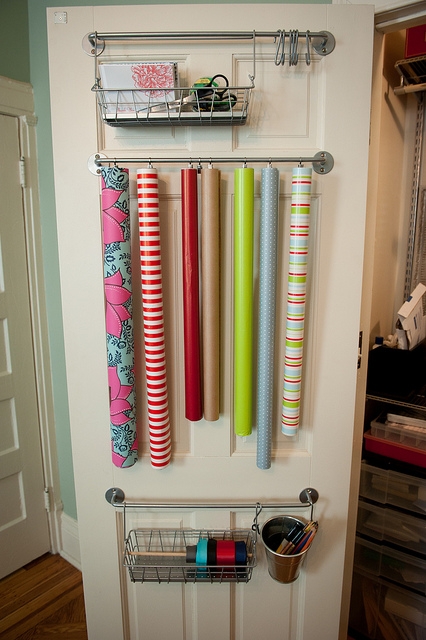
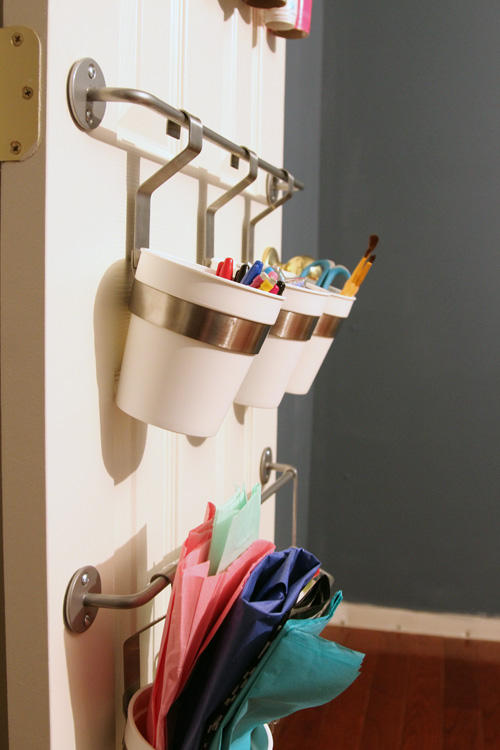
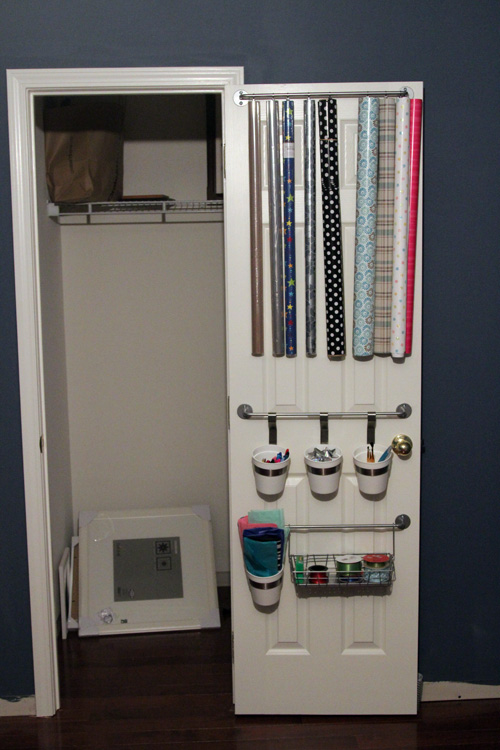
Here’s our finished product (with crappy night photos because I got home from work late)

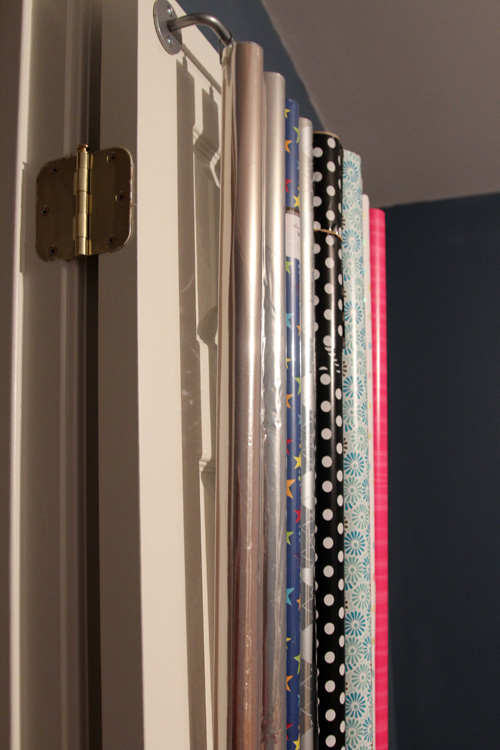
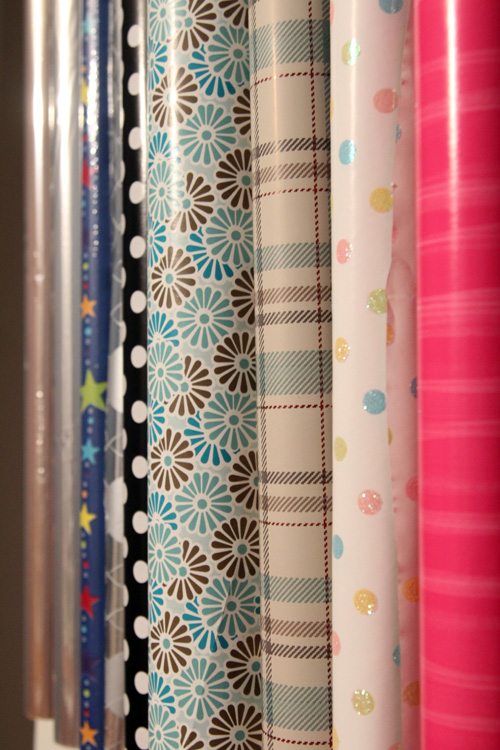
I know, the quality of that picture makes me cringe too. I tried 8 million times to take a better one but the room just has poor lighting at night. Anyway! We decided to put our wrapping paper up top since our door is super narrow and we had to work around the door knob.

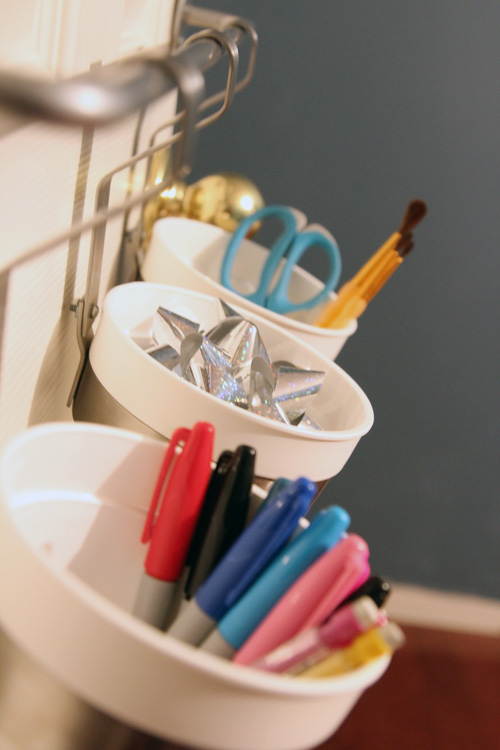
Next, we put 3 cups with some Sharpies, bows and paint brushes for now. Once we fully move the office upstairs I will have tons more crafty things to put in these.

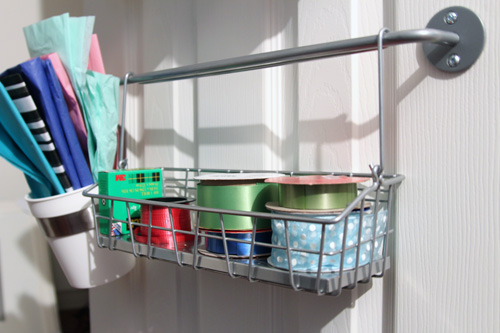
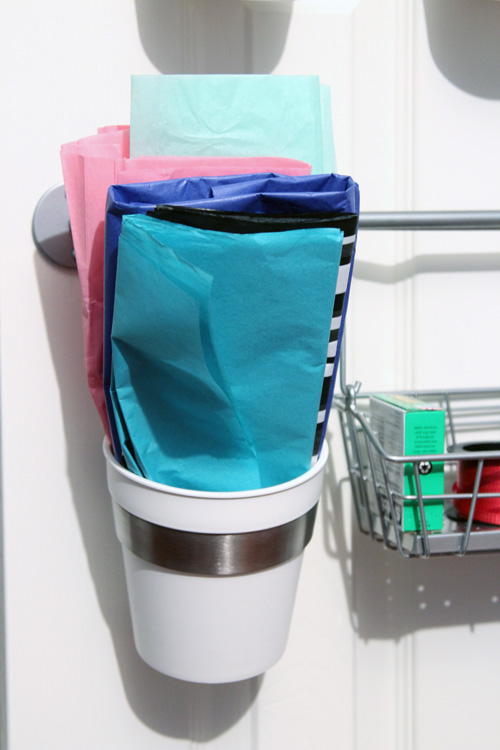
On the bottom we put a flat wire rack with ribbon in it and another cup full of colored tissue paper.

All in all, it was a super easy and cheap way to be able to see all of my pretty stuff. Plus it holds way more wrapping paper than I thought it would.

And the best part? It hides away nicely behind a door 🙂

Be sure to check out Sherry’s (Young House Love) and Katie’s (Bower Power) projects tomorrow. Plus, this time around they’ve teamed up with Cassie from Hi Sugarplum and Erin from The Great Indoors, so check out their projects as well. I shall be in all 4 places tomorrow 🙂

ps- maybe i can update this with better daylight pictures tomorrow!

Copyright 2010 - 2011. The Lil House That Could. All rights reserved.