Some Built-in Updates
Posted by Michael, July 19th, 2012
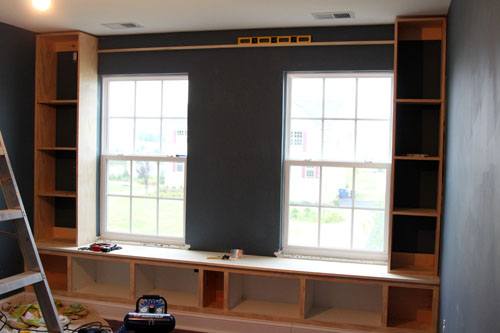
When I left you, I had just finished the base of our built-in’s for the new office. The next step was to build up the sides and then finish up with the valance. The sides weren’t too bad; mostly straight cuts, a couple nails and some glue. I left off the back because we don’t have the right tools to make the exact cuts required. We figured we’ll just prime the back and then paint it white to match the finished built-ins. Not bad.
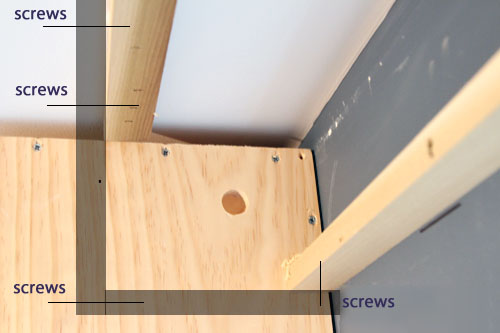
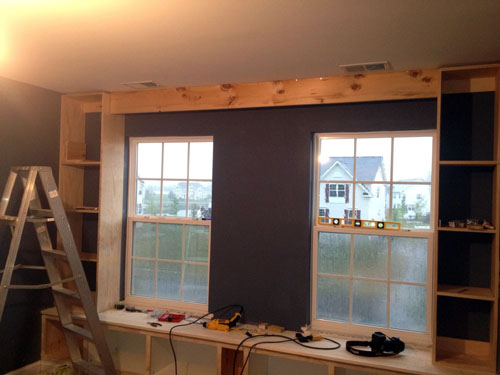
You can see in the pictures below, I put support braces at the tops and bottoms of each bookcase. This was to ensure we could secure this thing into another stud besides through the sides. I also used a boatload of liquid nails. I’m pretty sure this thing is going nowhere. I feel bad for the next homeowners should we decide to move and should they decide to take this thing down. Oh man, they’re in for some fun.
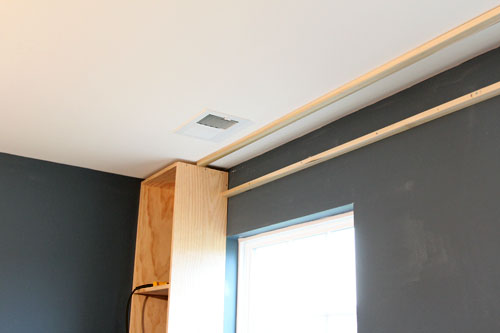
Next up was beginning the support pieces for the valance. This is where I became nervous. I knew this would have to be able to support plenty of weight between the wood valance, molding and puck-lighting. In addition to support, I knew this would need to be completely level. But how do you get it completely level when your ceiling is about a half inch height difference from one end to another? I’m not sure. But it all worked out; one way or another.
I supported the valance cleat to the wall by drilling screws through just about every stud between the two bookcases. It also has support with lots of liquid nails. I think I’m forming an obsession. I also secured each end to the bookcases via screw.
I then began securing my second cleat to the ceiling. Do you know how hard it is to find a stud in a ceiling? I knocked and knocked on the ceiling for probably a half hour trying to find each stud. The stud finder didn’t help, at all; probably because I’m a bit too awkward holding that thing up against the ceiling. You’re probably wondering where I am going with these cleats and how it all ties into the valance, huh? Here is the plan.
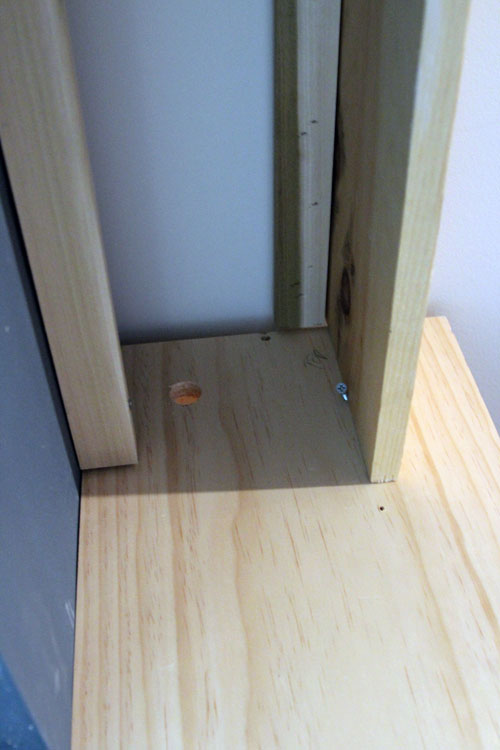
Each cleat will secure a portion of the weight from the valance face and bottom. Then the valance face will secure into the bottom creating a nice clean edge. Dear god I hope so. You’ll also see I drilled a hole for the puck lighting which will sit on the bottom of the valance bottom.
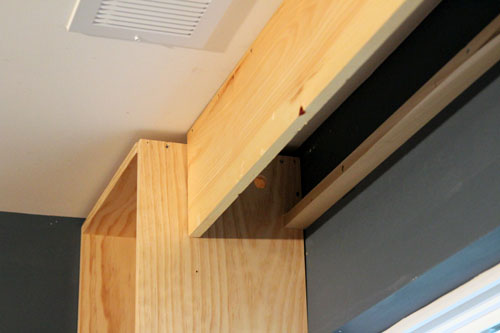
Here you see the valance face mounted via screws to the front valance cleat. It’s also secured with screws through the sides of the bookcases. This thing is going nowhere. Don’t worry about those gaps you see between the ceiling and the bookcase; the crown will hide a lot of these imperfections. Phew.
This is the view from “inside” the valance. You’ll see I drilled a hole for the puck-lighting again. See that random screw? It was my clever way of making sure the valance face stayed level and straight while I was securing it to the cleats. The valance bottom will fit snug behind the valance front and the rear cleat.
So what’s on the remaining to do? A couple things actually.
- Install puck-lighting to valance bottom.
- Run wires to the left bookcase (where the outlet is).
- Secure valance bottom to the rear cleat and valance face.
- Install crown molding.
- Caulk the heck out of this thing.
- Prime the heck out of this thing.
- Paint.
Stay tuned. 🙂


