Posts Tagged ‘art’

Some Playroom Ideas

3 Comments

Posted by Rebecca, January 29th, 2013

Ever since we added the SmartStrand carpet to the playroom, we have been living in there. Like, Mike and I literally sit on the floor in there all the time and we hardly use our family room anymore. I bring my coffee in there on the weekends (or if Easton wakes up ridiculously early during the week) and we just play.

Just before Christmas, we temporarily moved the Expedit that used to live in the office back into the playroom, but we placed it horizontally rather than vertically.

We placed it on the wall that you don’t see when you look in, just to keep the clutter out of sight for now.

Yes, I took these pictures around Christmas time and never got around to writing this post. Whoops.

While it works temporarily, Christmas brought along loads of Fisher Price and about 4 toys that require different sizes of balls that are currently thrown all over the room. Easton throws just like Mariano Rivera, watch for yourself!

YouTube Preview Image

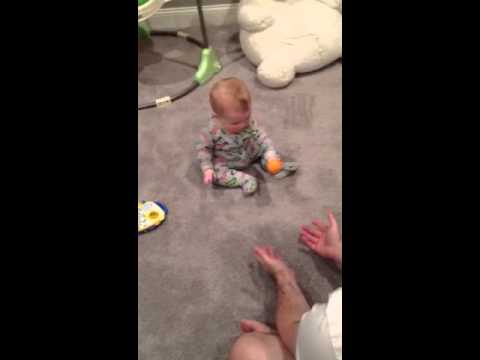
And then applauds himself. Humble, yet proud 🙂

When he’s not hurling fast balls, Easton is at such a great age that he is able to entertain himself for a few minutes at a time. He loves his playroom. His latest trick is crawling away from us and proceeding to pull toys out of the baskets and Expedit…resulting in a giant mess already.

He has some toy cars in one of the bottom cubes that he likes to play with, while actually laying in the cube.

Our original plan, over a year ago, was to add some Ikea bookcases turned built-ins to the room ala Centsational Girl.

(via Centsational Girl)

I still love this idea but the problem is, building in storage is relatively permanent. The room also has a floor vent in the corner that would make this project less than easy. The more we’ve thought about it, the more we think it’s a good idea to do something that is easy to remove. Let’s face it, this room won’t be a playroom forever and it will evolve as Easton and his future siblings grow. Maybe we’ll want to add a table? Or a couch? The room is relatively small (about 11’x13′ I believe) so we think that having more of a modular storage system would accomodate any changes we want to make.

Cue the Cameron storage system from Pottery Barn Kids.

(via Pottery Barn Kids)

While I like all of the storage that these units would provide, what I like more is the fact that they have straight lines and would be easy to DIY since the price is frightening. While I would like some closed storage mixed in, right now Easton is a pro at opening doors and getting his fingers stuck. Being able to add closed drawers/doors as he gets older and can manuever them would be great.

As for what direction I’m thinking for the rest of the room, we already own two pieces that have inspired me for this space. The first one is this New York print I picked up on Fab over a month ago. I ordered Mike some things for Christmas and I was close to free shipping, so I added this adorable $15 print I fell in love with.

I love the mix of neutrals and the bright yellow taxi. The grays and browns bring in the next thing we have for the room, this metal imagine sign.

We bought this piece literally years ago at a shop in New Hope, PA and it is handmade. We planned to hang it in the office when this room was the office, but the copperish line on the bottom always threw me off with the gray stripes (the sign was purchased even before we painted the stripes). But, with the addition of the taxi print, everything seems to be falling into place.

Please ignore the awful picture, but you can see how it all sort of works.

I haven’t yet decided how to hang all of the things I want to add to the room (gallery wall? clothes line? shelves? leaning on bookcases?), but that’s something to worry about later. For now, I just want a fun space full of garland (since I loved our xmas version), a play tent, fun art and one ball throwing baby.

And a hard surface for my coffee mug… 🙂

The Nursery Gallery Wall

26 Comments

Posted by Rebecca, January 10th, 2013

This post has been a long time coming. As in, Easton is now 7.5 months old and I’ve been waiting to do something with this wall in his room since I was pregnant. It has been a thorn in my side– that project that always seems to have some issue that makes you delay it another week… then another… then another. But then finally, it’s done.

Wait, where did I last leave you? Oh yes, with a Corn Flakes box and some tissue paper.

I bought a black shadowbox and planned to paint it white. The Corn Flakes box and spray paint run was a major fail. The spray leaked through the glass and the paint didn’t adhere to the frame. Next I decided to just hand paint the whole thing. I bought some paint and primer in one, gave it a decent sanding then sat on the garage floor one night painting away. Have you ever painted a shadowbox? Yeah, don’t. There are way too many little ledges inside and out. I painted everything I could with the door of the thing open, then left it to dry before doing the next parts. When I saw that one coat of paint wouldn’t be enough to cover the black, I decided to try a new(er) approach.

I returned to spray paint, but this time I went with my usual Rustoleum Universal spray paint and I decided to Frog Tape the entire glass portion of the shadowbox, front and back. Why I didn’t think of this sooner, the world will never know.

First I had to do a lot of cleaning and scraping of the previous overspray.

FYI- the plastic knife worked the best since it didn’t scratch the glass 🙂

I used the razor to trim the tape perfectly so I didn’t have to scrape anymore paint off the glass.

Then it was back to the yard for the shadowbox and two smaller frames that I had sprayed with the previous spray paint. I could have lived with them, but they were chipping so easily that I figured I’d give them a good coat so I could stop handling them like they were a dozen eggs.

Once everything dried and sat in the garage for a few days, we were FINALLY ready to hang everything!

The gallery wall recipient so proudly watched from his crib.

He loved it before it was even done.

To hang everything, we had the awful tissue paper up, but I knew the real frames were likely to be off from that. So we didn’t nail into the templates or anything, but we just started with the most centered frame. From the tissue paper, I knew I wanted everything about 2 inches higher so we just eyeballed it. Once the first frame was up, we did the one above it– spacing it rather close to the first frame.

This part is personal preference, but I like gallery walls that have a tight arrangement. We then moved to either side, keeping everything spaced tight, until it looked like this.

Hanging everything took no time at all. After all of these months, we finally have a completed nursery.

Scatter brained sidenote:  I forgot to tell you guys that Easton had a little Christmas tree…

I took the tree away for the rest of the finished pictures so that it wouldn’t distract from the gallery wall.

I already mentioned in my planning post how easy it was to actually decide what to put in the frames and where they would go.

On the far left is a photo from our maternity shoot. I wanted to remember what Easton looked like on the inside.

To the right of that, on top, is a print I made that says “You are the world and the world is yours”. It’s from a Jason Mraz song and since we went to two concerts when I was pregnant, plus I listened to his album while in labor and when Easton was a newborn, it will forever remind me of Easton. Thirty years from now I will hear some of those songs and remember walking my newborn around our neighborhood, with my iPhone in the stroller cup holder playing music.

Underneath that is just a spare piece of chevron fabric from the curtains and crib skirt I made.

Next to those, on the top, is a rocket I made out of scrapbook paper. I originally painted a rocket in muted blues and grays, but it was lacking the fun, vibrant color that I wanted to include in the nursery. I felt like there were enough sophisticated parts to this room, let the rocket be fun Rebecca. So I remade it.

Below that is one of Easton’s hospital pictures. It’s inclusion is self-explanatory.

On the end is a photo of Macky that we always refer to as Macky’s mugshot. It’s a few years old but we love it. When I was planning this wall, I wanted it to sort of be a “things we love” lesson to Easton. The cats are a huge part of our family and I wanted them to be included in his room. We used Macky has the ambassador because of this particular picture, but it turns out that Easton adores all of the cats, but especially loves (or is obsessed with), Macky. A dream come true for all of us.

And finally, up top is of course that effing shadowbox that has caused me so much work. But in the end, it was totally worth it. Just look at this little newborn sized onesie.

I originally planned to iron the onesie, but once it was in there I decided I liked the not perfectly pressed and flat look. The 3D appearance looks better to me.

I couldn’t be happier with how this wall (finally) turned out. Whenever I open Easton’s door, it makes me so happy to see his tiny little onesie and newborn picture up there. I cannot believe he’s almost 8 months old.

And with this wall, the nursery is officially complete! Final room reveal coming right up! I couldn’t snap anymore pictures, my assistant was demanding me.

Wait, he’s my boss.

To Da Beach

5 Comments

Posted by Michael, September 12th, 2012

I seriously always find myself on 20×200 which releases great, but affordable, art each and every week. Being on the site always makes me want to post on here and show off some cool stuff I find like I did here, here and here some time ago.

So it’s no surprise that tonight I’ll be showing off some 20×200 finds.  Act like you love it.

There were two photographs that instantly jumped out at me.  They are essentially the same topic; just different angles.  But the topic in photography is always one that sucks me in.

The topic?  Old pictures of crowded beaches and especially Coney Island.

Rebecca and I have lived close to the Jersey shore our entire lives; we’ve been to our share of beaches here.  And while some get crowded today (think Seaside Heights), they never seem to be as jammed packed as what beaches were like 50-60 years ago.  It always blows my mind looking at beach pictures from the 1960s with what seems like millions lounging on the sand and another million standing in the water.

“Parachute Jump and Beach Scene, Coney Island, ca. 1965” via 20×200.

“Coney Island Beach, June 10, 1947” via 20×200.

Seriously, look.  Look at all of those people on the sand, in the water and on the boardwalk.  I’m totally geeking out over here.  Perhaps one day we’ll have a library where I’ll dedicate one area for vintage crowded beach photographs like the one above.  And Easton will stand there, holding his iPad 15 and asking, “what is a library?”

In other art news outside of :gasp: 20×200, a few weeks back I stumbled upon www.wearedorothy.com.

And my jaw dropped to the floor when I discovered a piece of art which was a map.  A map made up of 390 song titles.  Before I even decided to read any of the road and street names, I already had the thing purchased.  Talk about a total impulse buy.  An awesome impulse buy, I might add.

“Song Map” Original Open Edition via wearedorothy.com

The print is still rolled up in it’s tube.  It needs a great frame and then we’ll rock it somewhere in the new office.  I’d love to perhaps center this above my desk and have some of my favorite album art flanking each side of it.  Stay tuned. 🙂

Easy Art Switcheroo

3 Comments

Posted by Rebecca, July 10th, 2012

Remember way back at Christmas time, when I framed some metallic wrapping paper to make our powder room all festive?

Well it stayed like that for much longer than I’d like to admit. One of my to-do list items before Easton was born was to switch out the paper in these frames. I planned to browse Target or Michael’s or something to get some brand new wrapping paper but I ran out of time and ended up using what I had around. I had a few sheets of different scrapbook paper hanging around and I dug out some gray and white damask sheets.

This time around I went with two of the same sheets of paper since I didn’t have two related patterns. But to change it up, I put one right side up and one upside down 🙂

This room is insanely, insanely hard to photograph since it’s well, a small powder room and painted nearly black. A full room shot is nearly impossible, but this gives is where we stand now…

Now that I look at that above picture, it’s quite funny that we can never get the frame and the shelves in the same picture. It looks like a drunken bathroom picture… or like our camera accidentally took that…while drunk.

We originally planned to add aqua accents to this room, but right now it’s just shades of gray and white. And I like it! I like the idea of keeping the shelves white and painting the mirror we have in there white. Then we can change out the accessories as we want and make a hand towel, pictures or little things on the shelf aqua or even red again around Christmas. Up next, I have a date with a can of white spray paint and the bathroom mirror. It’s long overdue.

Gallery Wall Makings

4 Comments

Posted by Michael, November 28th, 2011

Rebecca and I have been discussing the whole gallery wall thing for quite awhile.  So much so that we’ve probably purchased nearly thirty to forty frames in anticipation of finally getting the wall going.  The only problem besides finding time to do so?  Actually determining what to put in these frames.

We have a couple of pictures in mind such as a handful of our pictures from our honeymoon in Maui, our nephew leaping into some fall leaves and, of course, pictures of the cats.  But, those might only fill up — at most — 10 of those frames; certainly not enough to fill out where we’re planning on doing the gallery wall.

While looking for our marriage certificate (yeah, you read that) the other day, I came across some little cards we picked up from a small shop in New Hope, Pennsylvania (if you can ever get the chance to visit New Hope, please do so).  They are 5 x 5 inch cards with inspirational quotes on them.  Now, we’re not ones to do sappy quotes on our walls, but the ones we found actually have some meaning behind them for us.

So where does this all connect?  Well, we bought the cards to frame … and to hang on our eventual gallery wall. We’re not sure if we’ll frame all the cards we bought, but we couldn’t narrow it down to just one at the store.

Probably one of my favorite all time quotes, outside of “Keep It Simple Stupid”, comes from good ol’ Teddy Roosevelt.

Our second pick was a quote from Gary Lew.  Simple and to the point, but enough to get you thinking.

And our last pick and probably the one getting my vote for the gallery wall is a Zen saying.  It also happens to be a Jason Mraz line in the song Make It Mine.  But most of all, it’s stays true to a decision we recently made in quitting my job to do SongMeanings full time.

The company that made these, Quotable Cards, has many many more — some great, some corny and sappy.  I just found “grow old with me! the best is yet to be!” by Robert Browning, which is also a famed John Lennon line.  Or even Lincoln’s “whatever you are, be a good one.

We’re planning on lining our entry way, up the stairs and the upstairs’ hallway with frames.  Rebecca had it as an item on our to-do list for our staycation way back in August.  Yeah, we never got to it.  Rebecca has been swamped with graduate school (oh and growing a baby) and if she leaves the entire thing up to me, it’s going to be filled with album art, hip-hop lyric quotes and pictures of kittens — some of which won’t even be ours.  I think it’s best if I wait for her, eh?

Copyright 2010 - 2011. The Lil House That Could. All rights reserved.